
How to Easily Make Your Skin Look Better with Shading
Give your custom model real light and shadow in a few clicks with Ruby. No code, no Blender, just one material.
Most custom models look flat in game. The texture is fine, but there is no light or shadow on it, so it looks pasted onto the champion.
A shading material fixes that. With Ruby it takes a few clicks, and you see the result live before you open the game.
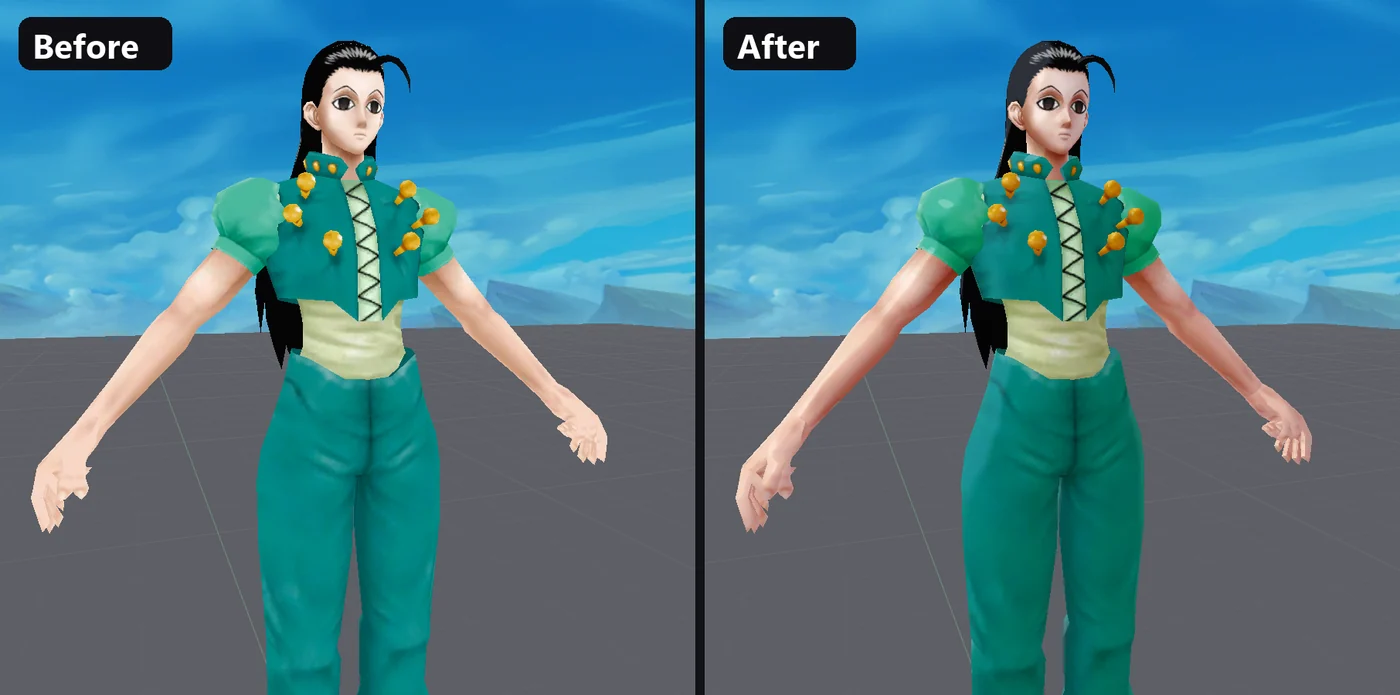
Before and after
Illumi Zoldyck on Locke
Rem on Zaahen
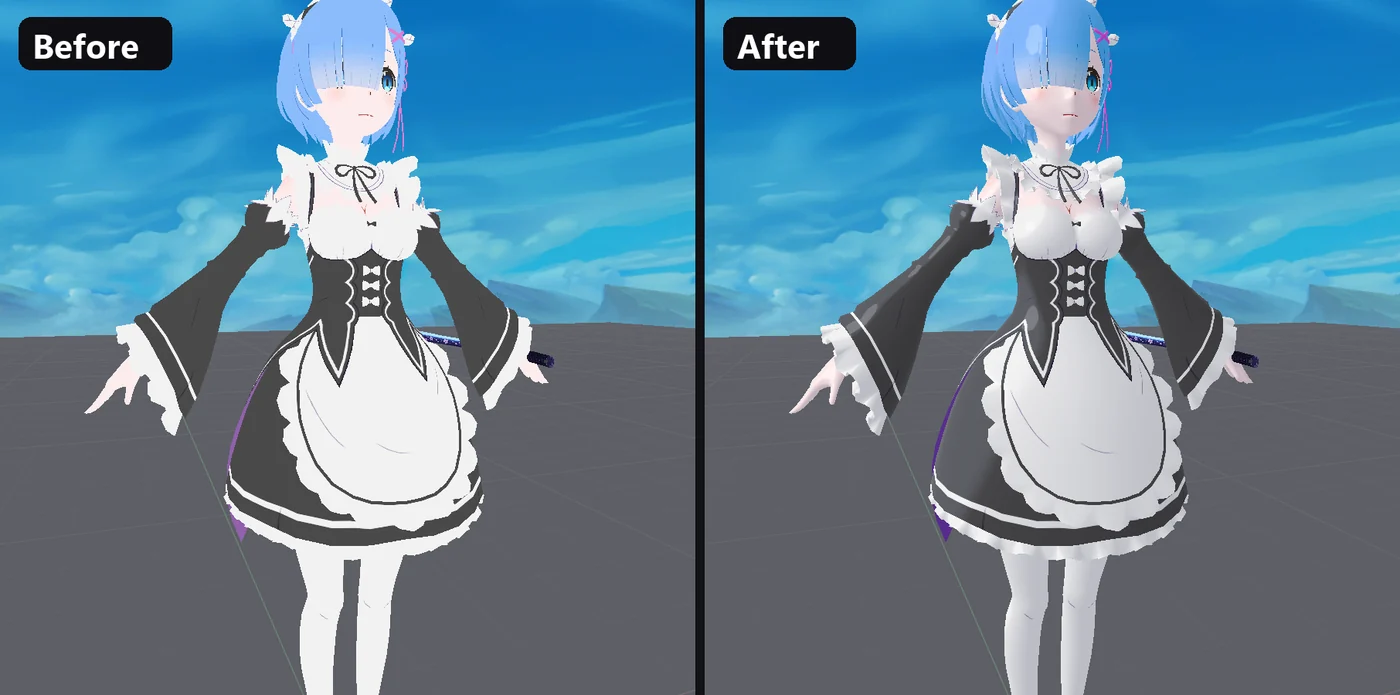
Same model, same texture. Only the material changed. Look at the arms, the sleeves and the skirt: they finally have a light side and a shadow side.
In this guide we use AnimeShade, Dazashu's shading preset made for Ruby. It works on any skin, not only anime characters.
1. Install the preset
- Download AnimeShade.
- In Ruby, click the Browse League / TFT skins icon (the last icon in the top bar) and open the Shaders tab.
- Click Install a pack and pick the file you downloaded.
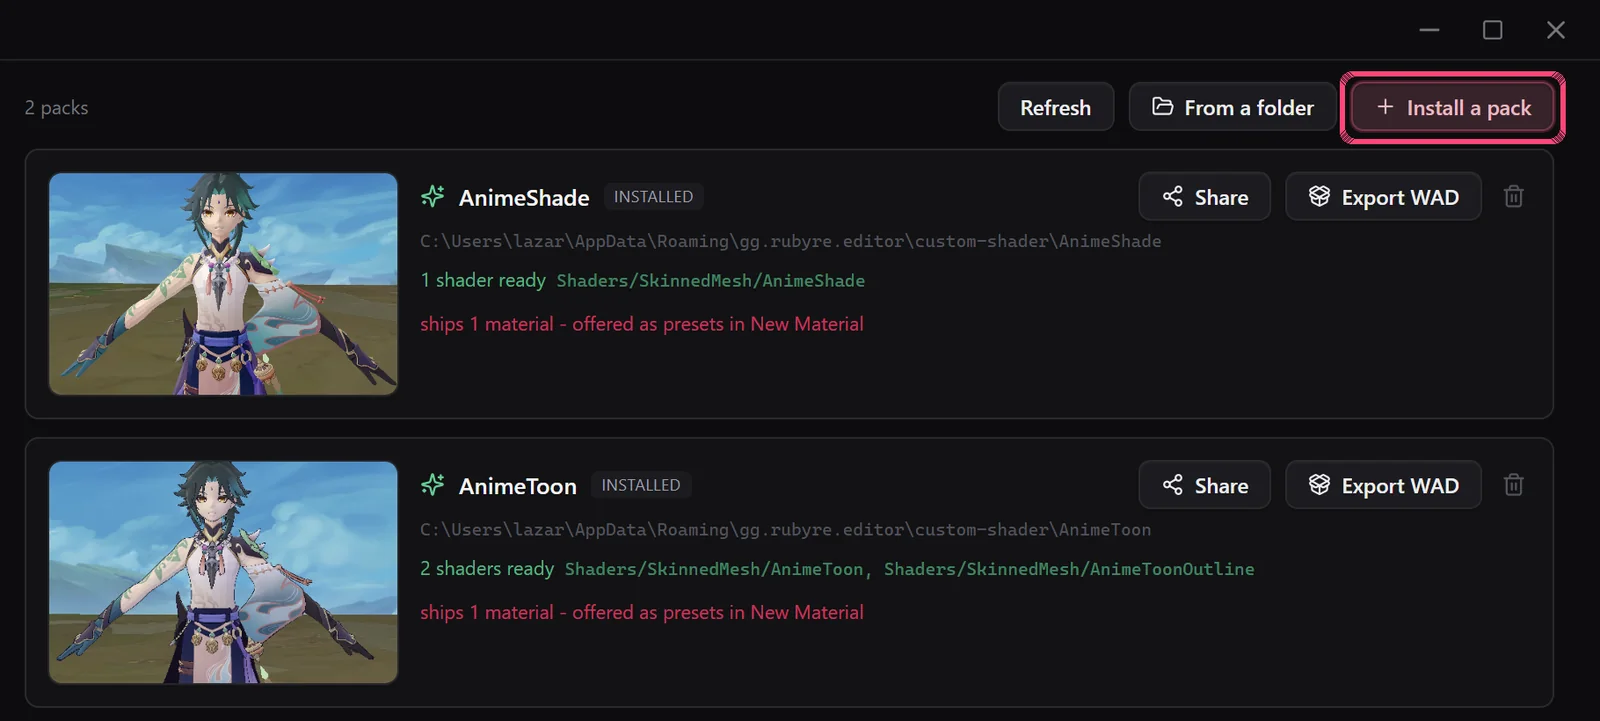
You only do this once. The preset stays in Ruby for every future skin.
2. Open your skin
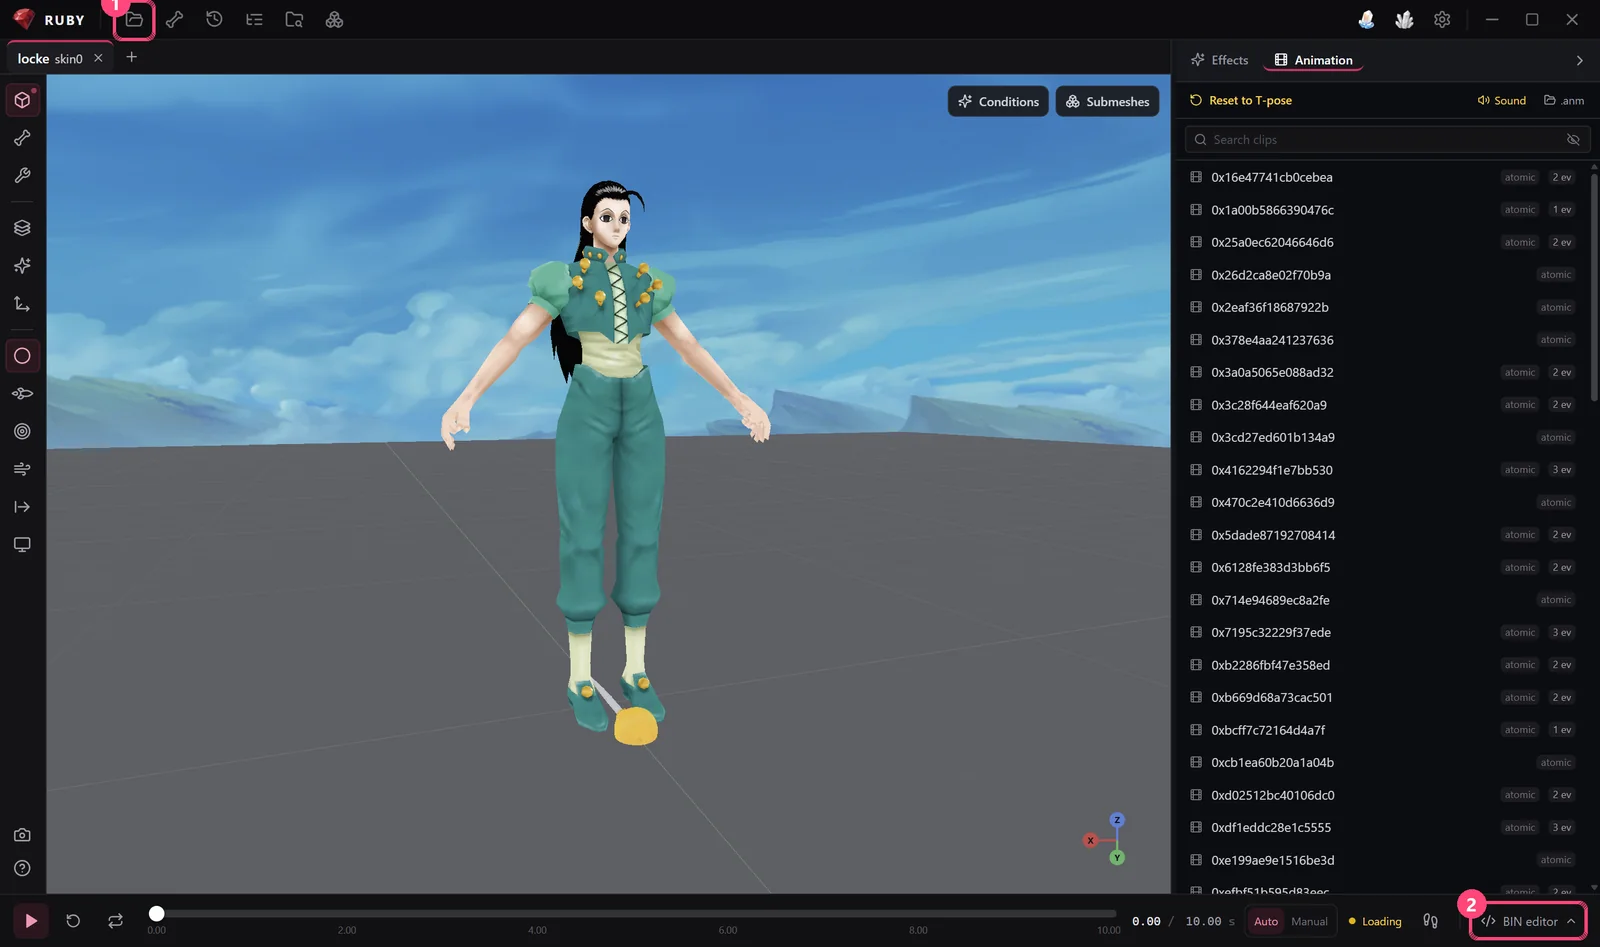
- Click Open BIN (the folder icon) and pick your skin's
skin0.binfrom your extracted mod folder. - Click BIN editor in the bottom right corner and go to the Material tab.
3. Create the material
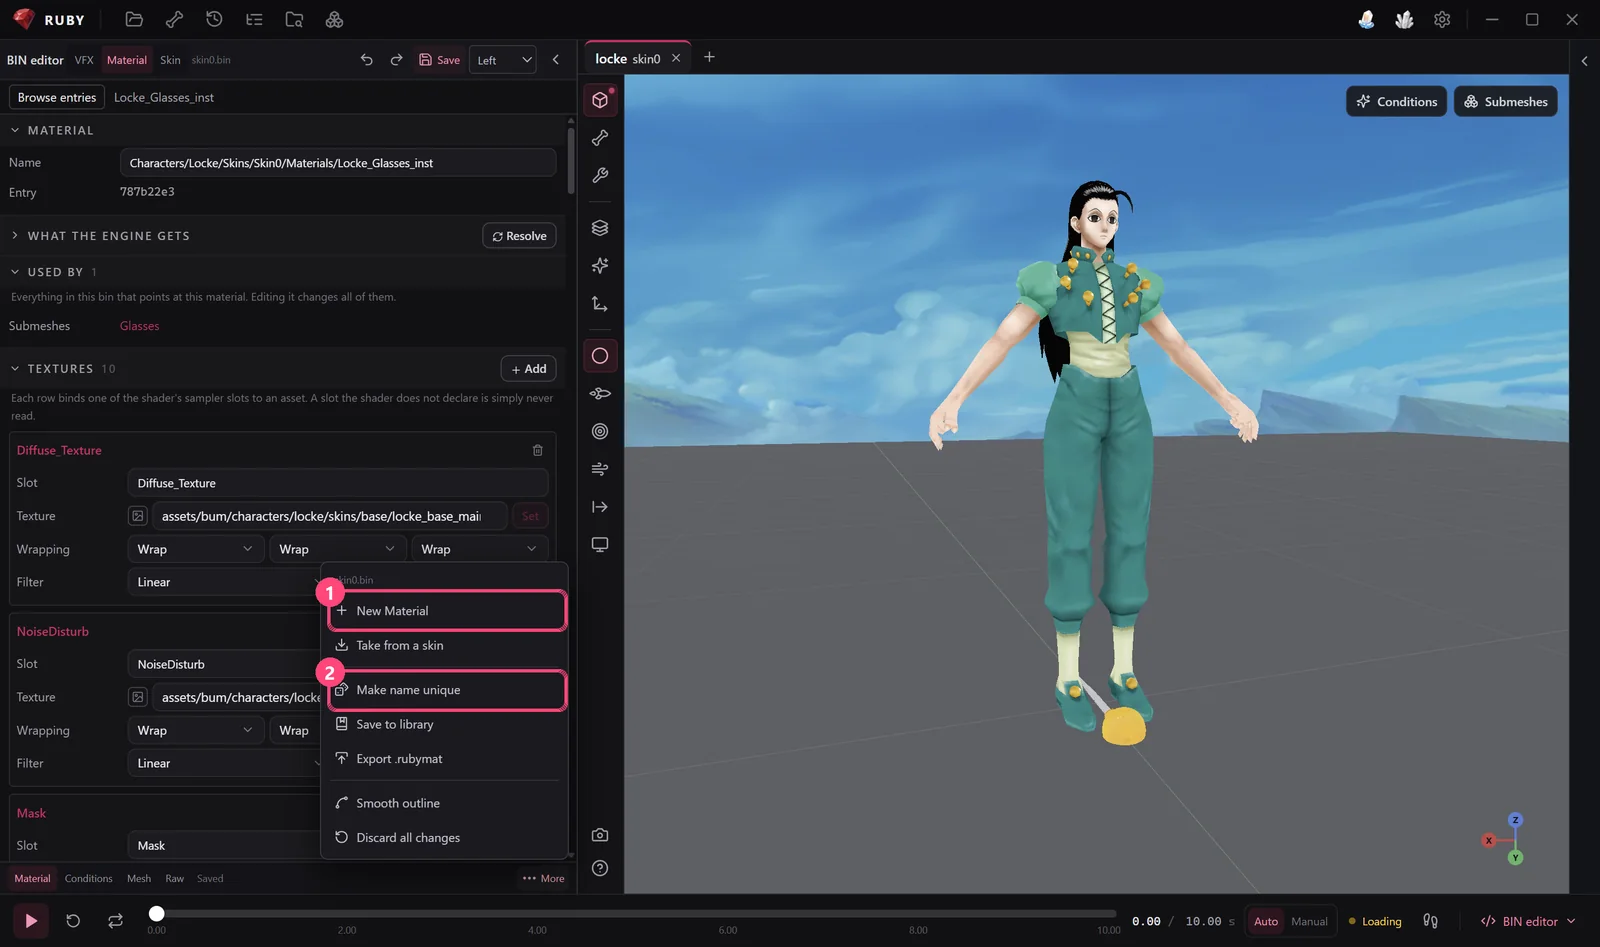
Click More at the bottom of the BIN editor, then:
- New Material.
- Later, once it's created, Make name unique. This stops it clashing with other mods that use the same preset.
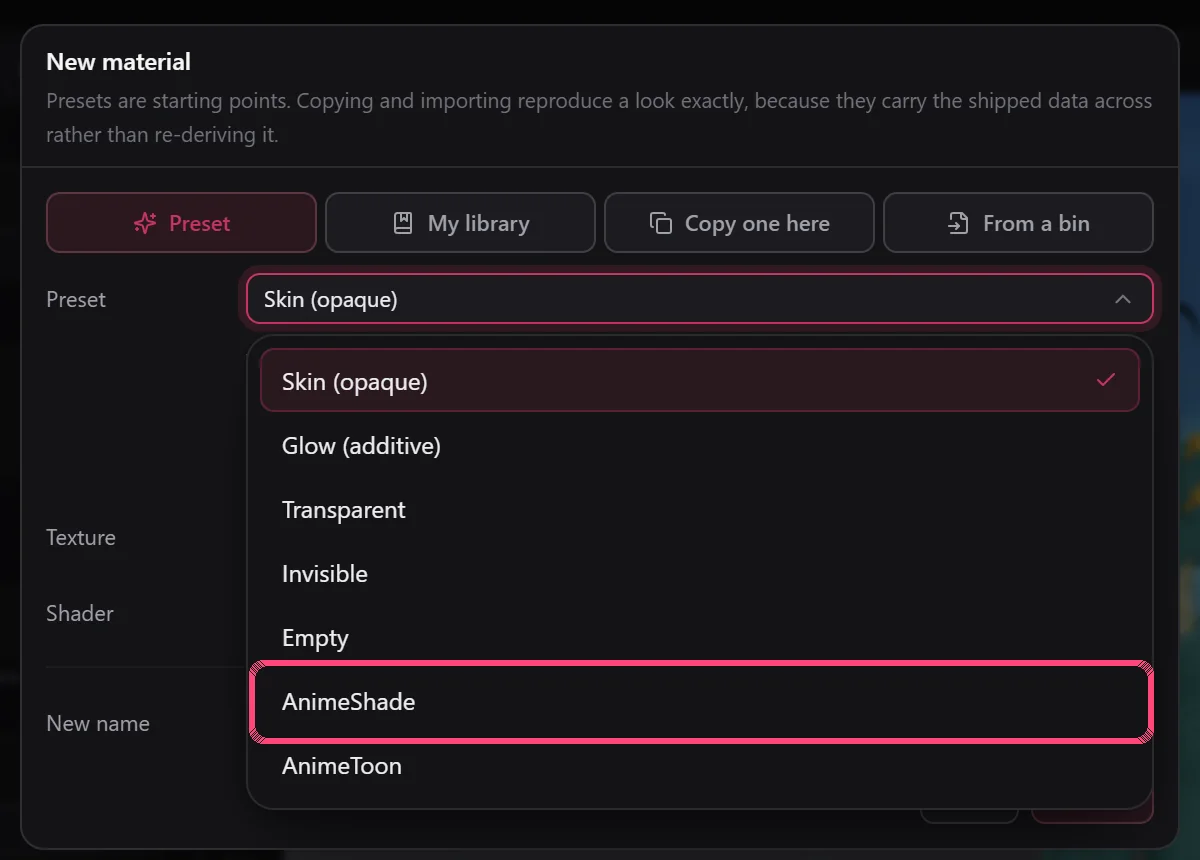
In the New material window, pick AnimeShade as the preset and click Create.
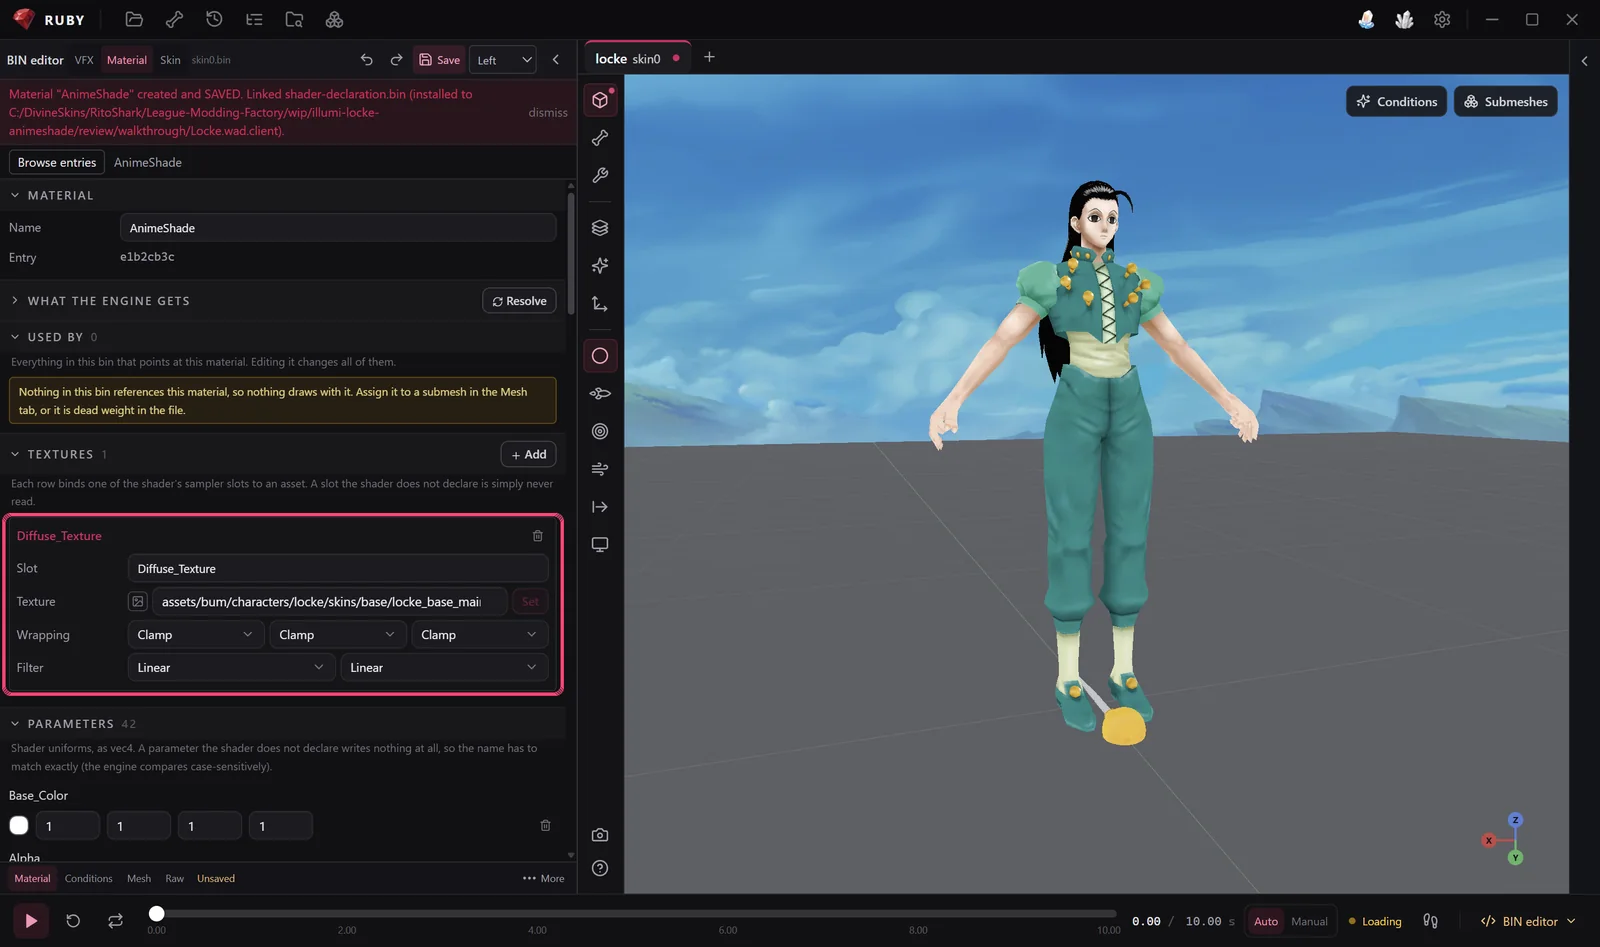
Ruby links the shader to your skin for you. Now click More → Make name unique.
4. Set your texture
Under Textures, paste your model's texture path into Diffuse_Texture
and click Set. It's the same .tex your skin already uses.
5. Put it on your model
Open the Mesh tab at the bottom of the BIN editor. Under Base material, click Apply. That puts the material on your whole model.
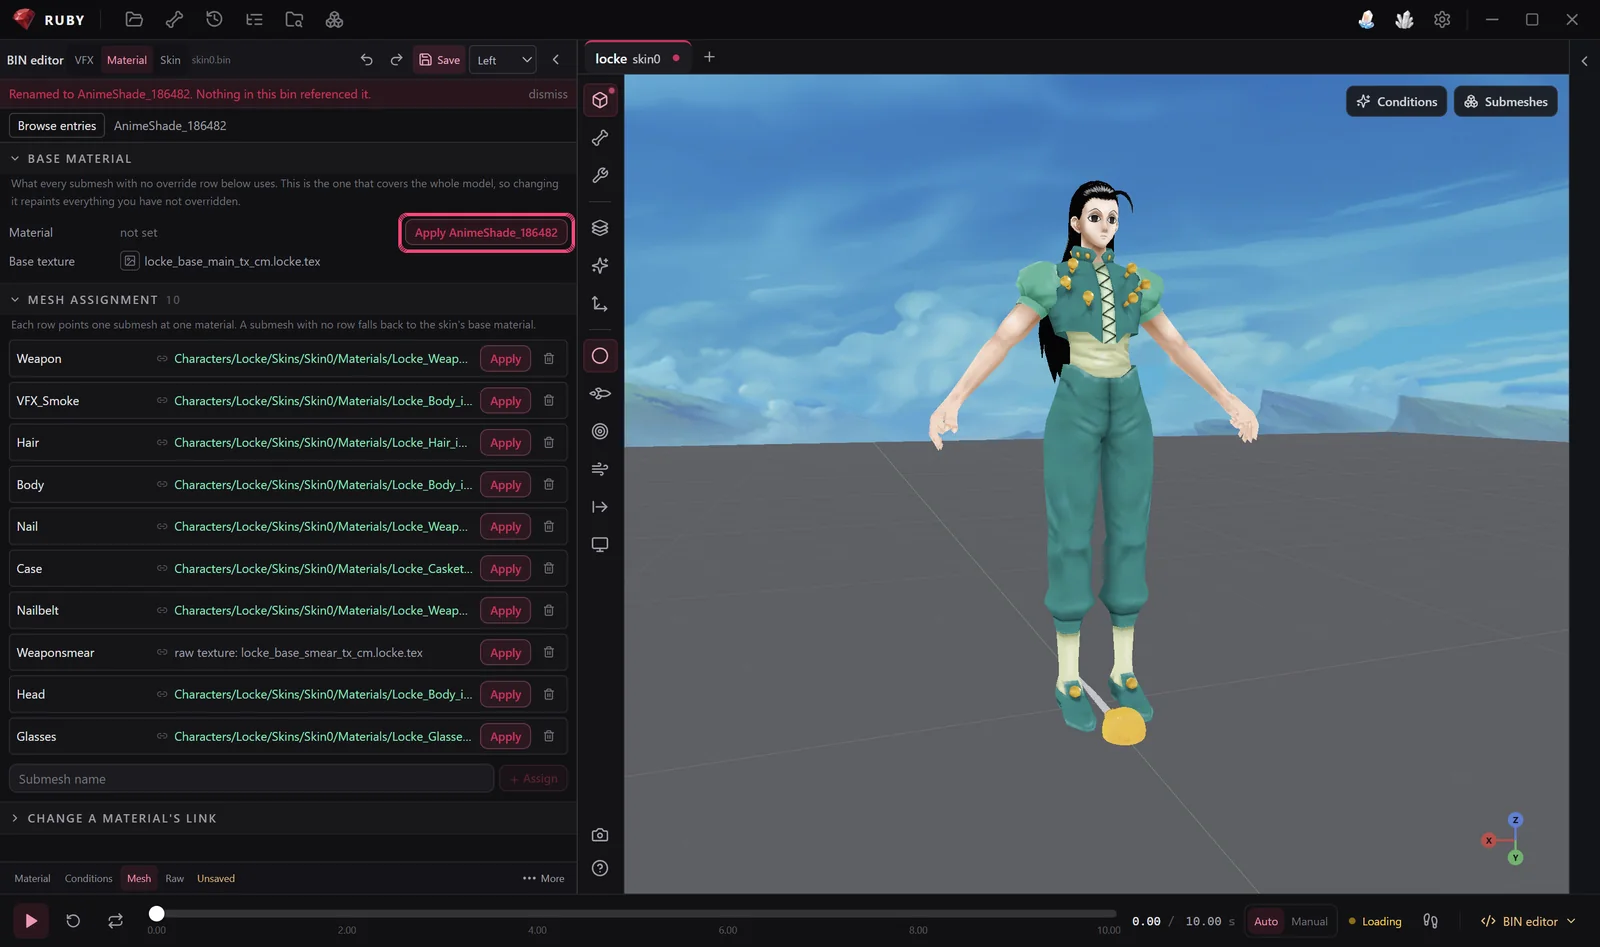
The preview updates right away. Click Save.
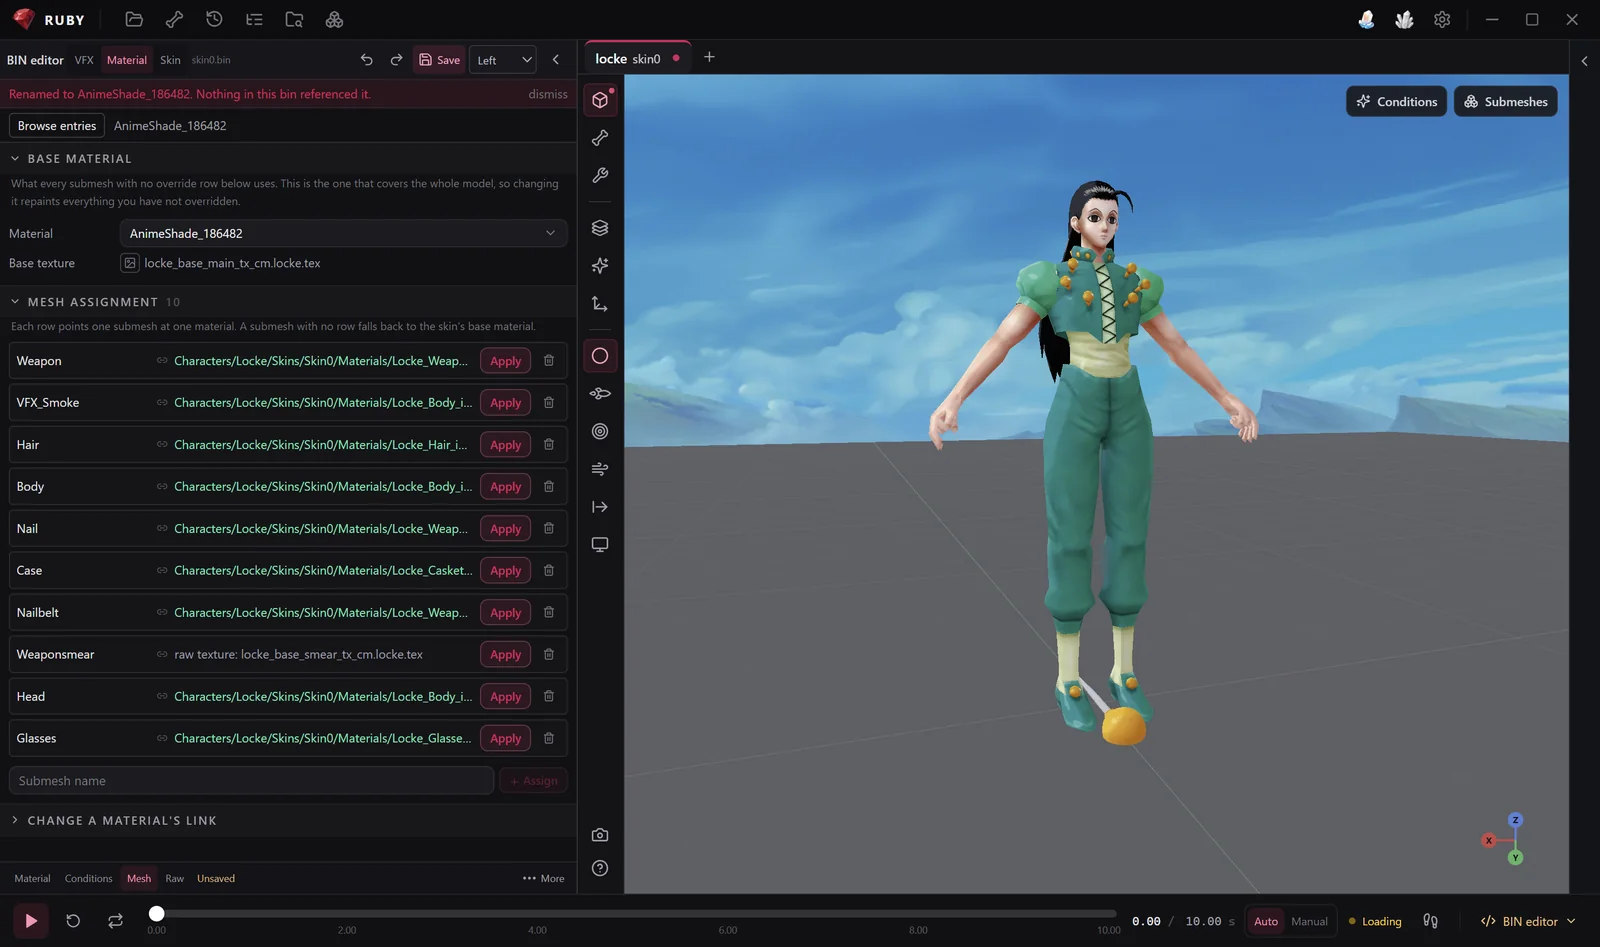
Each row under Mesh assignment is one part of the model. Click Apply on a row to shade only that part. Skip parts that already use a special Riot material, like a transformation or a death dissolve: replacing it removes that effect.
6. Export the shader WAD
Go back to the Shaders tab and click Export WAD on AnimeShade. This
saves a ShaderCache.dx11.wad.client.

Put it in your mod next to your champion WAD, in the same layer:
content/base/
    Locke.wad.client/
ShaderCache.dx11.wad.client/Your skin now uses the shader. If you leave out ShaderCache.dx11.wad.client,
the game crashes on load. Ruby's preview won't warn you.
That's it. Pack your mod and enjoy the new look in game.
Make it yours
Every setting is under Parameters in the Material tab and updates live:
| Setting | What it does |
|---|---|
Saturation | Color strength. |
Shading_Threshold / Shading_Softness | Where the shadow starts and how soft its edge is. |
Shadow_Color | Tint of the shadow side. |
Rim_Intensity | Soft light around the model's edges. |
Specular_Intensity | Shine on highlights. |
Base_Color | Multiplies the whole texture. Lower it to darken the skin. |