
Ruby
A live preview app for League of Legends VFX and materials, with a built-in BIN editor and asset browser.
Ruby is a preview app for League of Legends particles and materials, with a BIN editor built in. VFX by Frog, shaders and materials by Dazashu, RE by DAKA.
What it does
- Preview VFX on any champion, on demand, alongside their animations.
- Preview materials the same way, with live updates when you edit them.
- Built-in BIN editor for VFX systems and materials, with live preview: edit a value and see the change in the viewport right away.
- Asset browser pulls skins straight from your game install, no manual extraction. TFT companions too.
Set up your game path
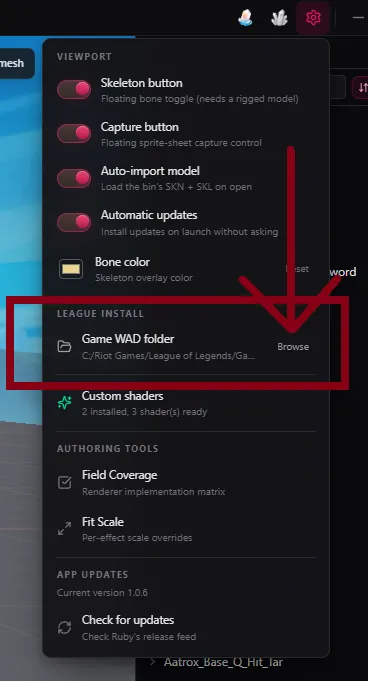
Ruby needs your League install to load champions, skins, and materials.
- Open Settings.
- Under League install, click Browse next to Game WAD folder.
- Point it to your League of Legends install folder.
The top bar
The menu in the top-left of the screen changes depending on whether a skin is loaded.
No skin loaded
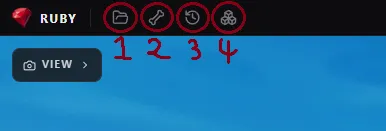
- Load a BIN file manually. (The main button you'll use to import your mod or model and see it in the preview right away.)
- Load a
.sknfile. - Open a recently loaded BIN. Only works if the BIN is still on disk.
- Open the asset browser.
Skin loaded
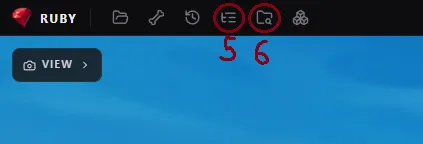
- Open Ruby's BIN Editor.
- Show the currently loaded BIN in your file explorer.
Asset browser
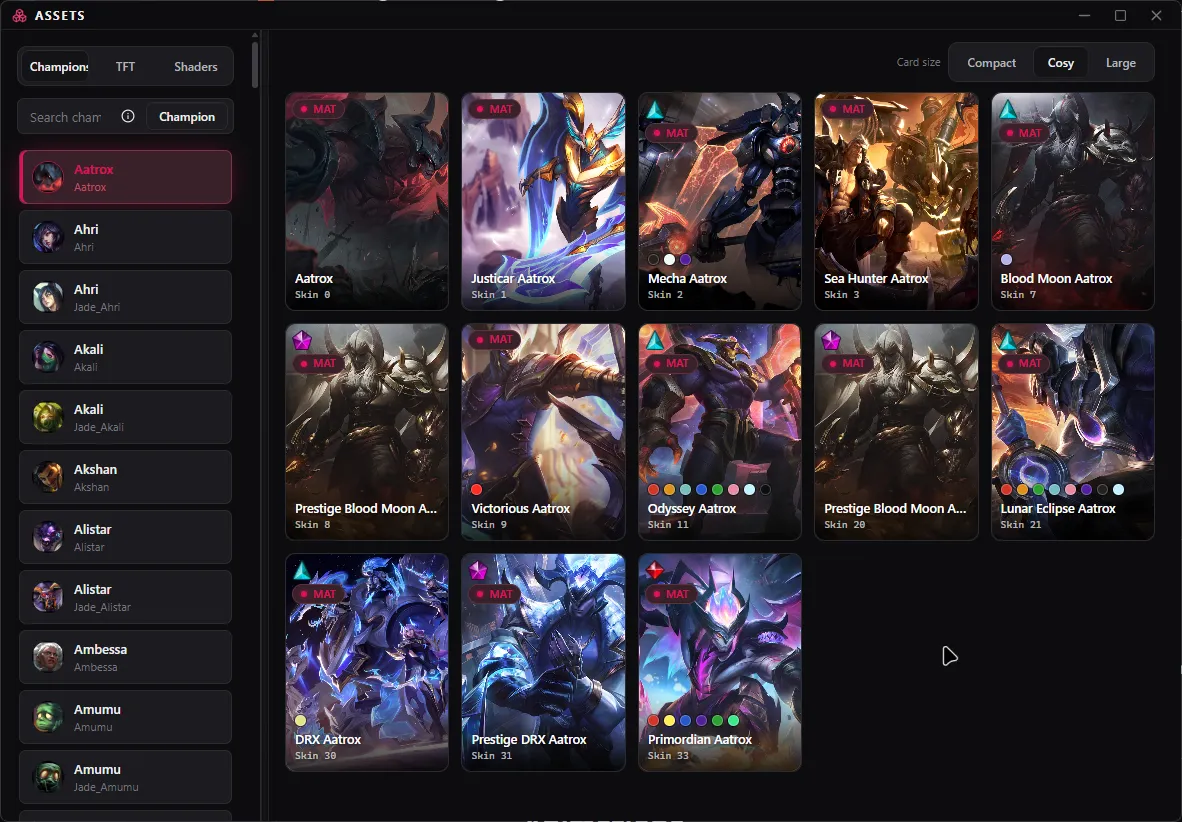
Open the asset browser to browse every skin in your install and load one straight into the viewer, no extraction step. It covers League champion skins and TFT companions.
VFX Systems
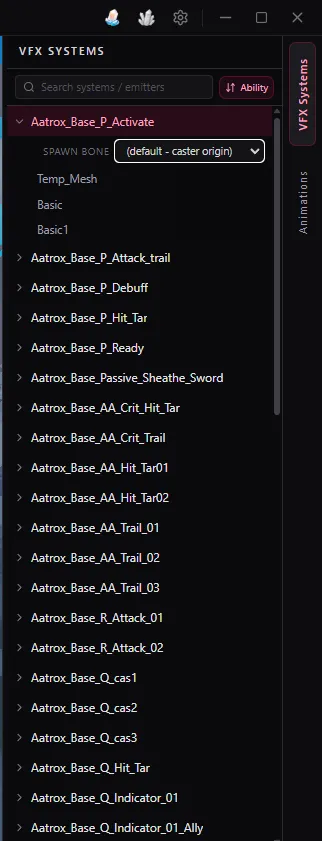
The VFX Systems page lets you pick VFX manually and preview them. Click the arrow to the left of a VFX's name to open its system and see its emitters, and pick which bone the VFX spawns on.
Select several VFX at once with Ctrl + Click or Shift + Click.
Animations
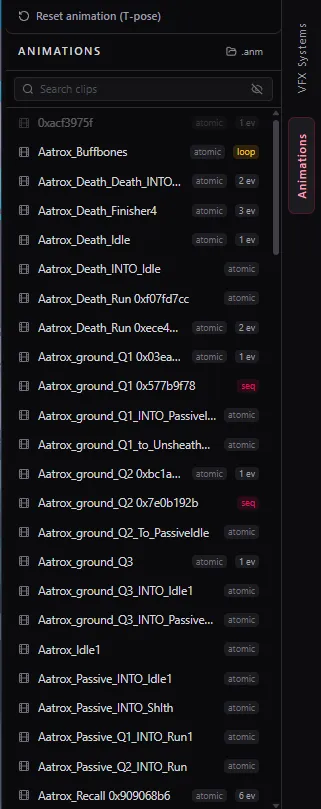
The animations menu sits on the right side of the screen, below the VFX Systems tab. It loads the animations that ship in the mod, so you can play them alongside the VFX and materials and see everything the way it looks in a real game.
Each animation can carry a few tags:
- seq: the animation is a sequencer.
- loop: the animation loops in-game.
- 1 ev, 2 ev, and so on: the number is how many events the animation bin fires during that animation. An event is something like a VFX spawning or a submesh showing/hiding - the count just says how many of those happen, not what they are.
An animation only loads if both its .anm file and the animation BIN are
present in the mod. Missing either one means the animation can't load.
The Options panel
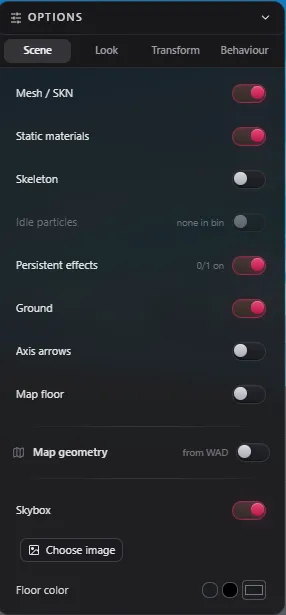
The Options panel has four tabs: Scene, Look, Transform, and Behaviour.
Scene
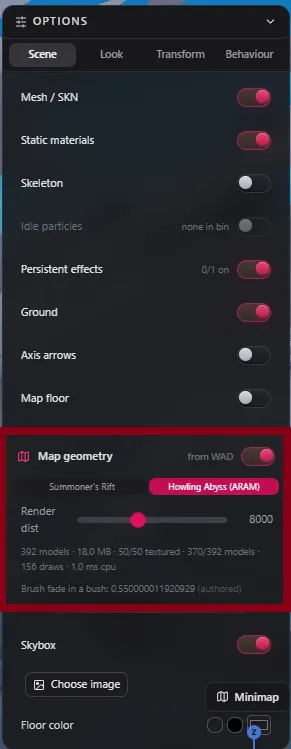
Turn parts of the preview on and off: mesh/SKN, static materials, skeleton, idle particles, persistent effects, ground, axis arrows, map floor, and map geometry (loaded from the WAD). You can also toggle a skybox and pick its image, and set the floor color.
Look
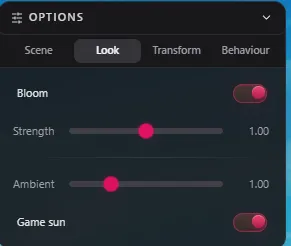
Adjust bloom (on/off and strength), ambient light, and toggle the in-game sun.
Transform
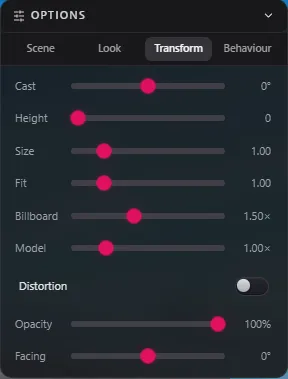
Adjust cast angle, height, size, fit, billboard, and model scale. A separate distortion block controls opacity and facing.
Behaviour
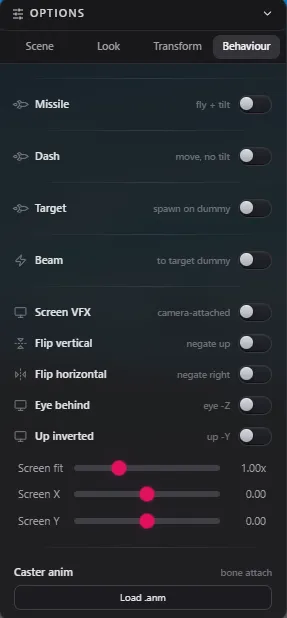
Toggle how VFX react to gameplay events: missile, dash, target (spawn on a dummy), and beam (aim at the dummy). Also screen VFX, flip vertical/horizontal, eye behind, up inverted, and sliders for screen fit/X/Y. Load a caster animation here to test bone-attached effects.
Loading the map
You can load Summoner's Rift or ARAM from the Scene tab in the Options panel. Use it to test materials and shaders that depend on the champion's position on the map, like the sun.
Persistent effects and idle particles
If a skin has persistent effects or idle particles, Ruby shows toggles for them in the Scene tab so you can turn the preview on or off per effect.
Conditions
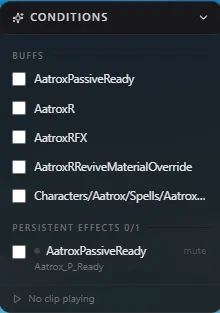
The Conditions tab lets you flip on the conditions that gate a VFX or material in-game (buffs, ability states, and similar), so you can see what the skin looks like when that condition is active without needing to trigger it for real.
Ruby Bin Editor
VFX
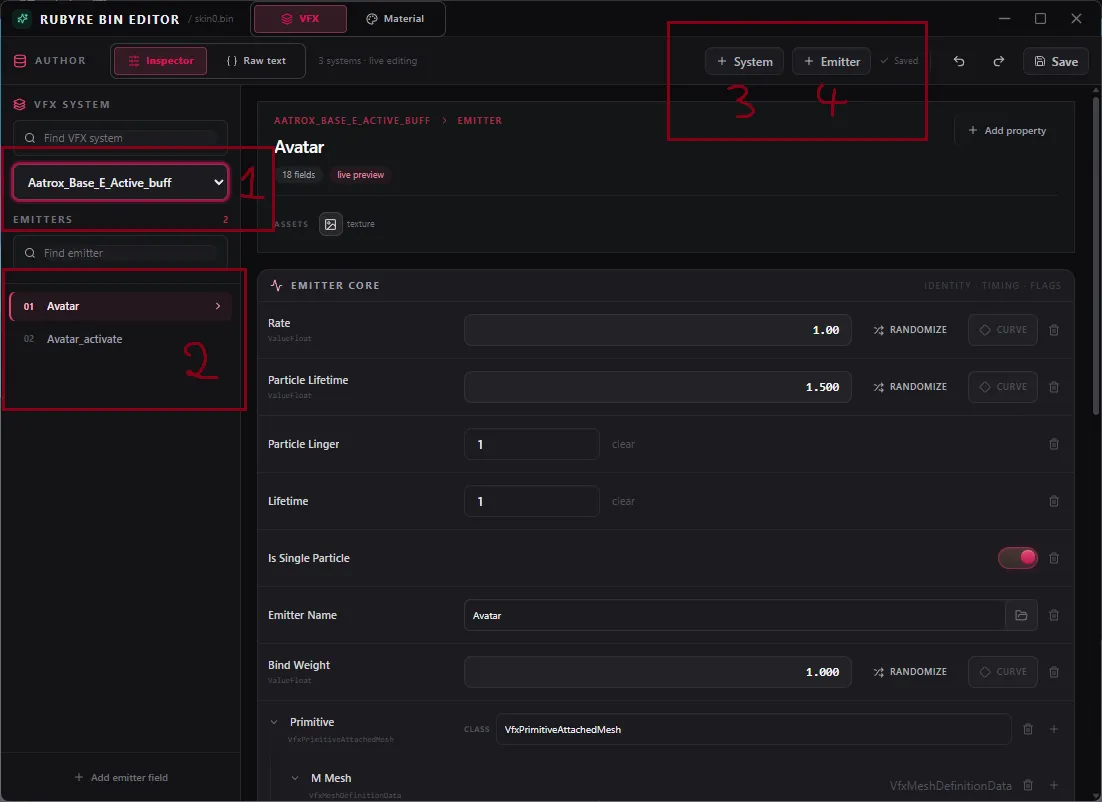
This tab edits everything VFX-related.
- VFX Systems: only the systems in the bin you have open show up here, not the ones in its linked bins. Merge your VFX into a single bin first - Quartz's context menu makes this easy.
- Pick the emitter you want to edit.
- Create a new System.
- Create a new Emitter.
Every change you make here shows up live in Ruby's preview, so you can edit and watch the result right away.
The rest of the editor is best explored on your own. It's mostly self-explanatory.
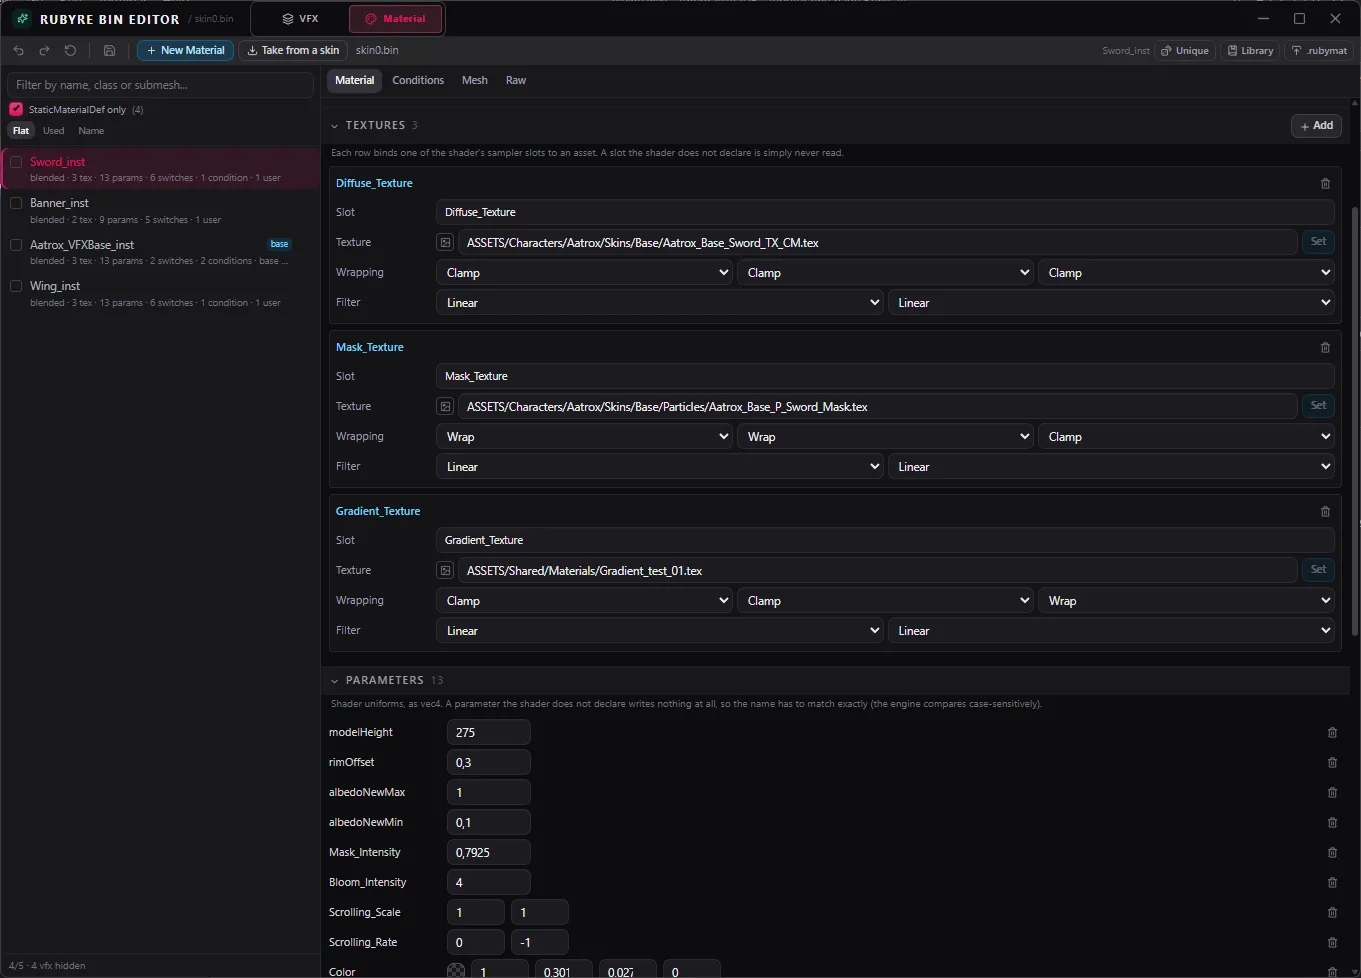
Material
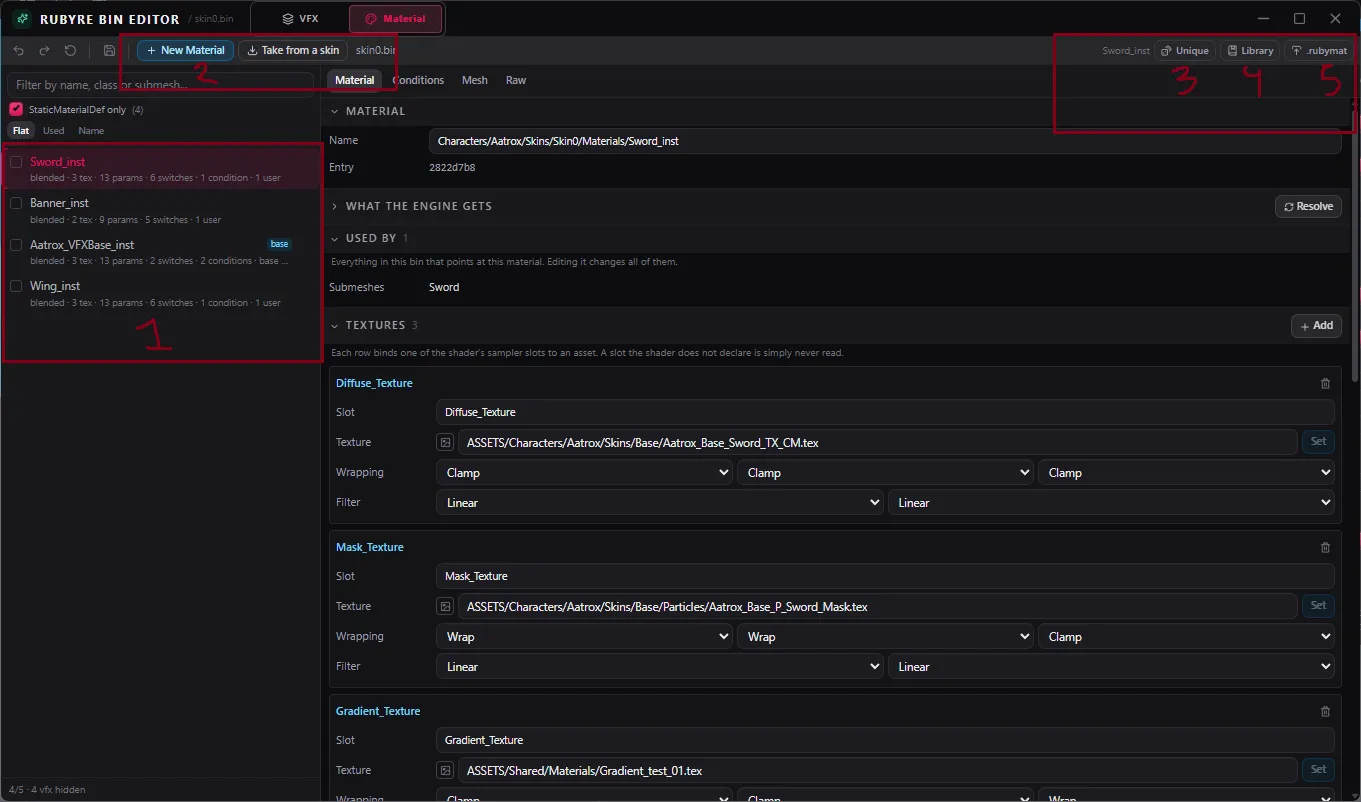
This tab edits materials the same way, with the same live preview as VFX.
- All the materials in the bin.
- Add a material from another skin. This opens two ways to bring one in.
New material
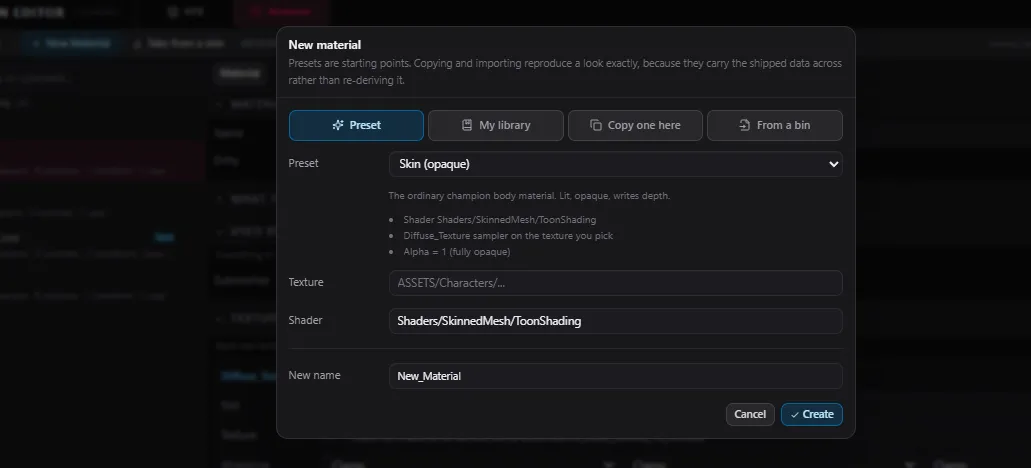
Use a preset here, including your own custom shaders : any
.rubyshader you've imported shows up in this list. My library holds
materials you've saved before. Copy one here duplicates a material already
in the bin. From a bin pulls one from an existing bin or skin.
Take from a skin
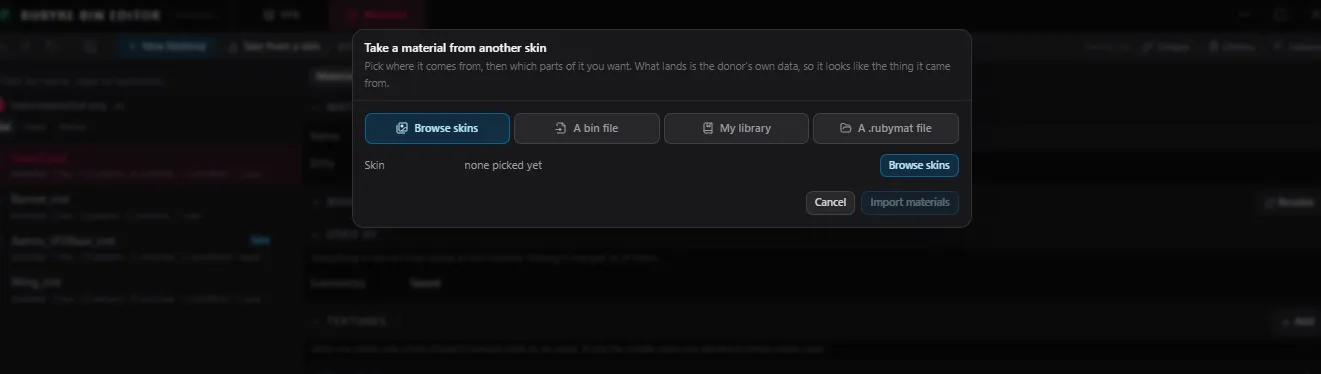
Browse skins opens the asset browser so you can grab a material straight
from a Riot skin. From a bin pulls one from an existing bin, same as
above. My library opens your saved materials. A .rubymat file is a
single exported material: save one yourself to reuse it later, or someone else
can export theirs and hand it to you.
- Make the material's name unique. A duplicate name causes a conflict.
- Save the selected material to your library.
- Export the selected material as a
.rubymatfile.
The editor has a few more tabs.

You start on the Material tab, which shows the material clearly.
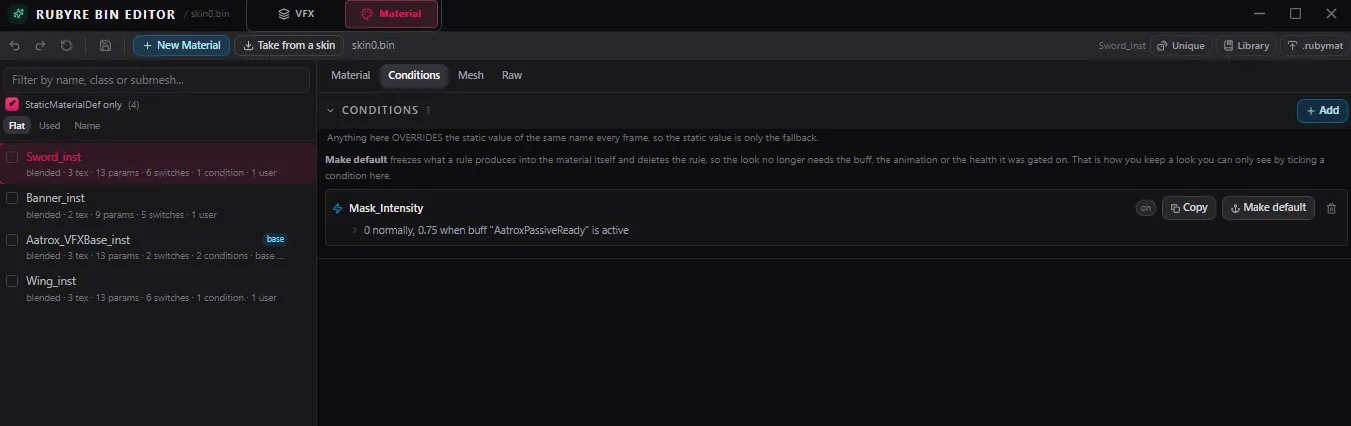
Conditions lets you build your own conditions for the material, or bake a condition into the base material with one button - handy for some of Riot's own materials.
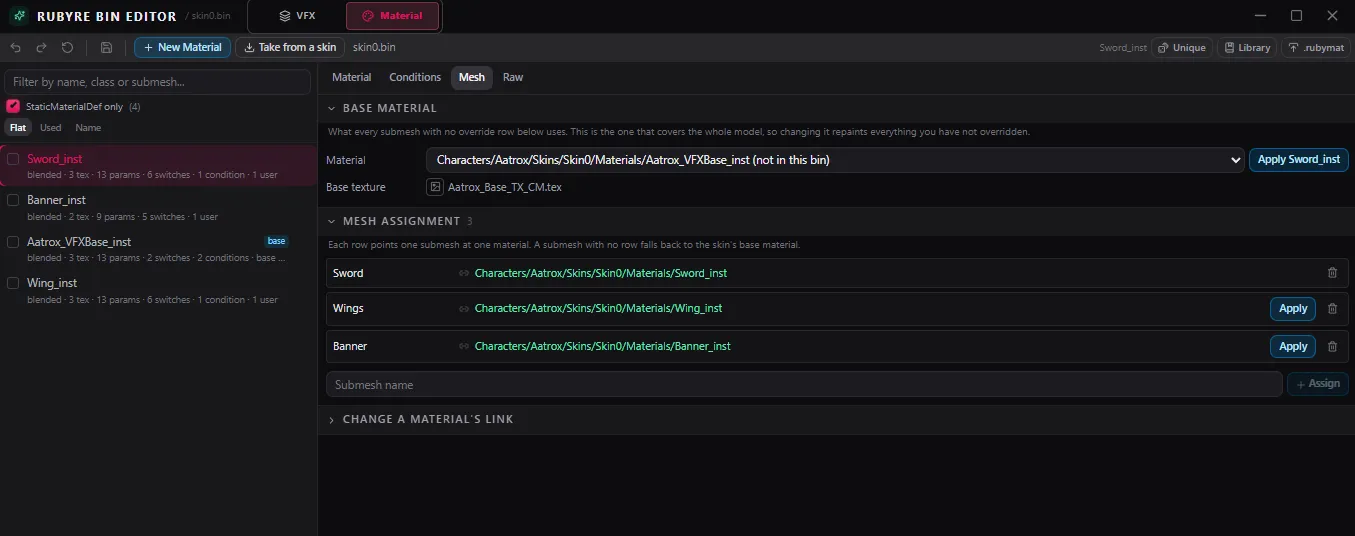
Mesh applies the currently selected material to whichever mesh you want.
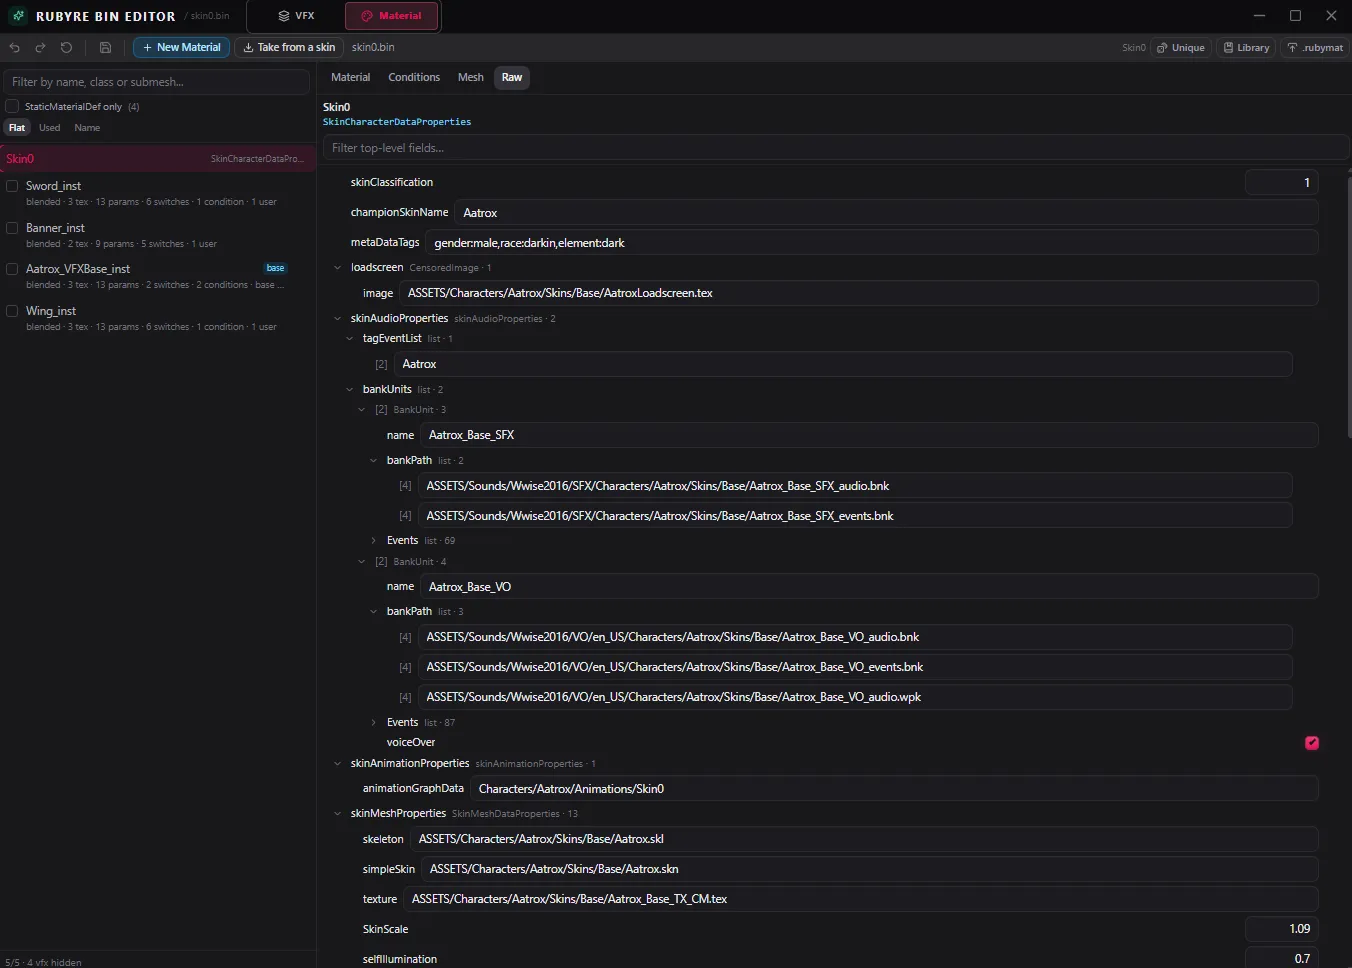
Raw shows the material exactly as it is and lets you edit everything
directly. Useful once you uncheck StaticMaterialDef only: you can select
SkinCharacterProperties directly and grab texture names from it if you need
them.
Custom shaders
The Shaders tab, inside the asset browser, is where you import your own shaders into Ruby, and manage and export the ones you've already added.
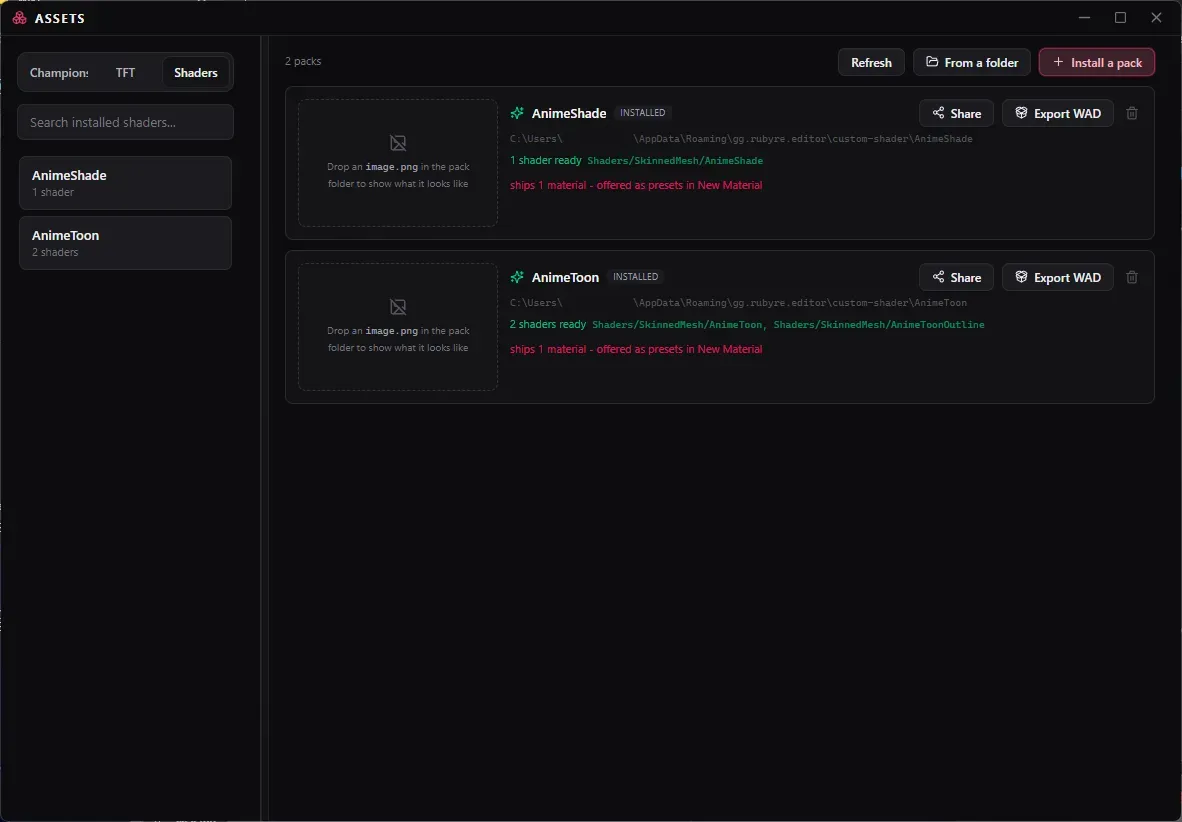
Shaders by Dazashu
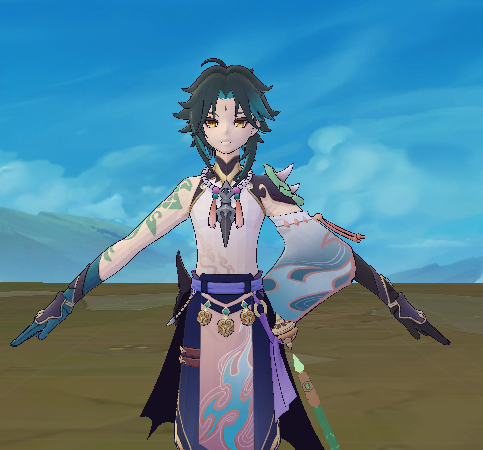
AnimeToon : the first shader made as a test. Gives an anime shading effect and an outline.
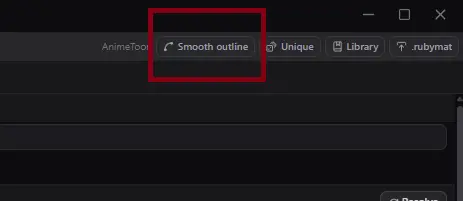
I added a new button that automatically fixes the mesh normal from the .skn for AnimeToon's outline. If
you run into a problem, click it and check the preview to see if it looks
better. The original .skn stays as a backup in the same folder, renamed
with a .bak extension.
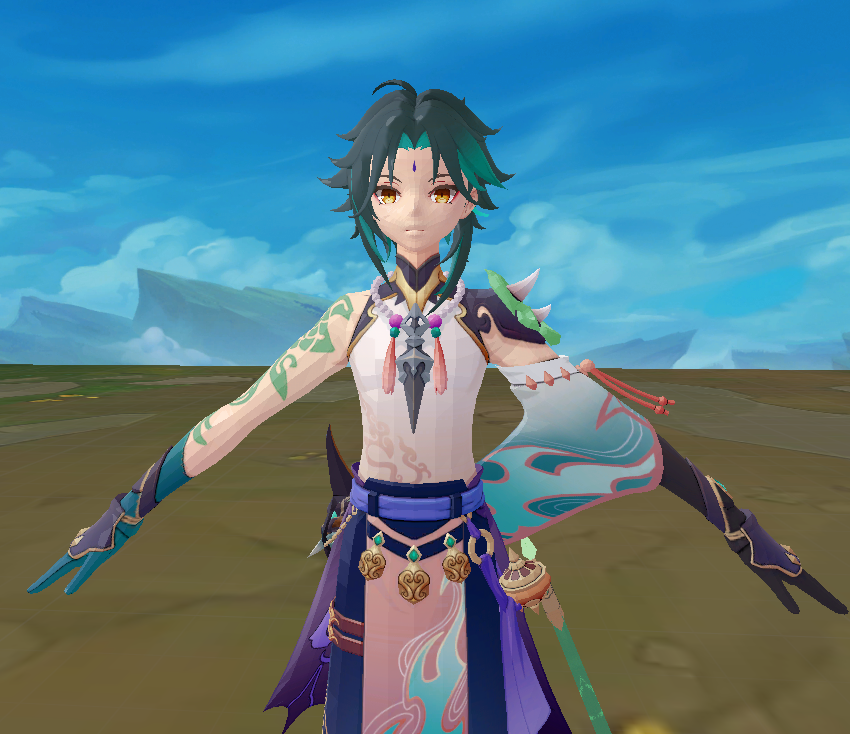
AnimeShade : a nicer anime shading effect than AnimeToon.
Both are experiments and may not work perfectly. Import them from the Shaders tab in the asset browser to use them in the BIN editor.
Share exports the shader as a .rubyshader file. It's just a renamed
.7z archive.
A custom shader only works in-game once you Export WAD. This saves a
ShaderCache.dx11.wad.client file - include it in your mod, or the custom
shader won't load.
To apply a shader, pick it from the preset menu in New material, inside the Material tab of the Ruby Bin Editor.
Other app settings
- Skeleton button: floating bone toggle (needs a rigged model).
- Capture button: floating sprite-sheet capture control.
- Auto-import model: load a BIN's SKN and SKL automatically when you open it.
- Automatic updates: install updates on launch without asking.
- Field Coverage: a matrix of what the renderer currently implements.
- Fit Scale: per-effect scale overrides.
Ruby checks its own release feed for updates, shown under App updates with your current version.