
Hero swap part 3: attachments, camera, and game data
Copy every attachment, camera preview, and game data block from the original hero so the camera, health bar, and sounds still work.
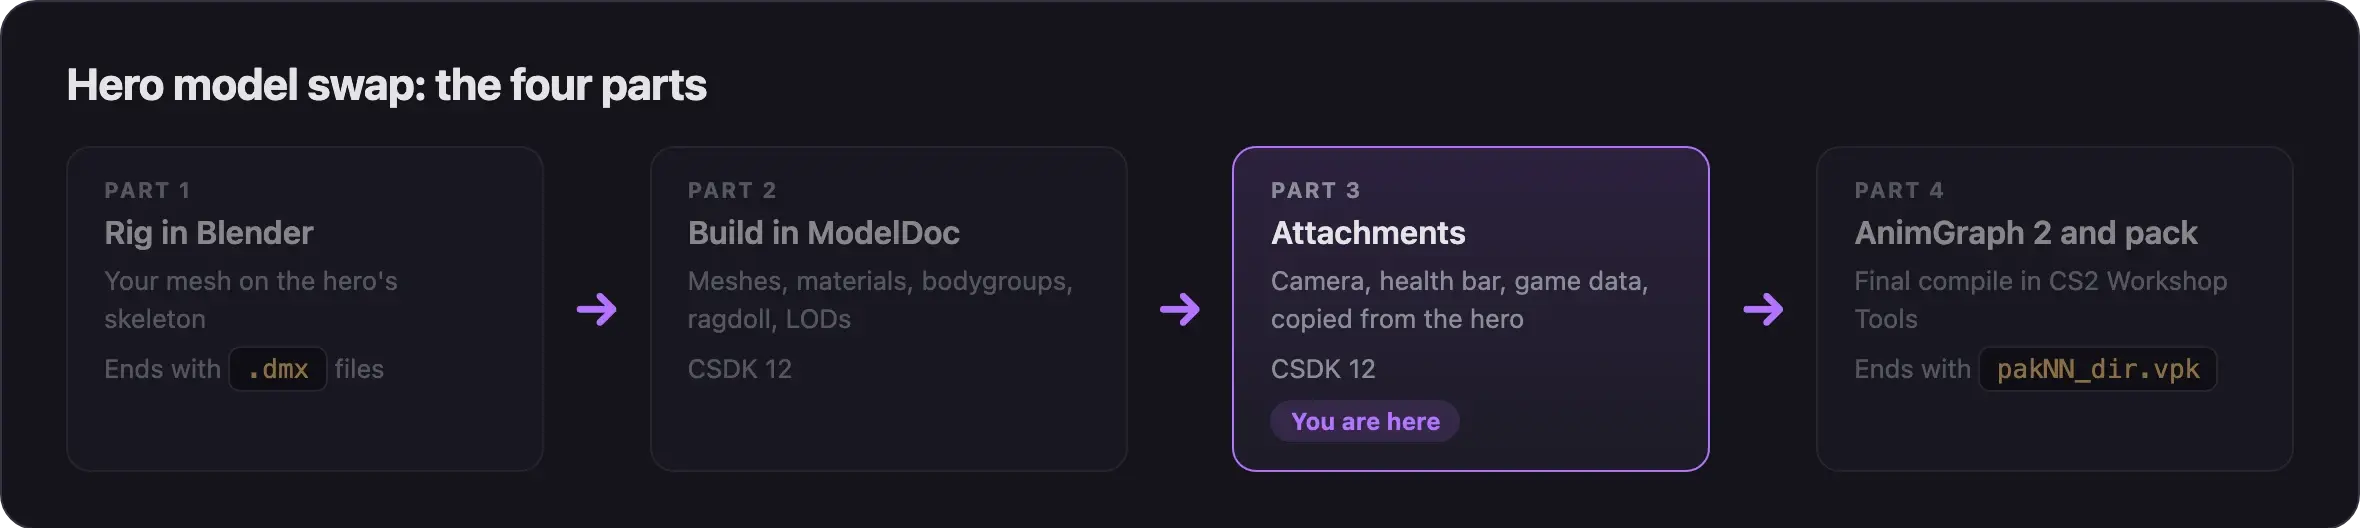
Part 3 of 4. You start with viper_work.vmdl, which compiles in CSDK 12 after part 2. You finish with the original hero's attachments, camera previews, and game data in your model. Then the camera, health bar, and sounds work. The whole path is in Hero model swap: overview.
What you need

Open your work model from part 2 in ModelDoc. Use Source 2 Viewer 20.0 or newer, or a dev build from 2026-08-04 or later.
Watch the walkthrough
Basilisken fixes the camera and FOV from 1:14:44. Pugzilla covers attachments from 34:31 and the health bar from 53:21.
Both videos predate the Source 2 Viewer fix of August 2026, so they copy every value by hand. With a current build, you mostly check values.
Why attachments matter
Attachments are named points on the skeleton. The game hangs things on them: the camera, gun aim, muzzle flash, ability effects, the health bar, the portrait camera, ziplines, and foot placement. Game data blocks hold the rest, such as camera offsets, health bar height, and sound settings.
Wrong values put the camera in the middle of the screen. They can also drop the health bar to the feet or mute hero sounds.
The rule for this part
Every value in this part comes from the original hero. You copy values. You never invent or tune them.
| What | What you do |
|---|---|
| Attachment positions and angles | Copy them from the original |
| Camera preview FOV values | Use the original hero's values |
CitadelCameraSettings_t (camera offsets and heights) | Keep the original values. Never change them |
Hitboxes (HitboxSetList) | Keep the original sets. Never edit, scale, or delete them |
| Every other game data block | Copy it from the original |
A different camera offset, height, or FOV gives you a wider or higher view than other players. Changed hitboxes change what you see when you aim. Both are unfair mods, and this wiki never covers them. CSDK 12 compiles the original hitbox sets fine, so there is no reason to touch them.
Check your Source 2 Viewer version
Source 2 Viewer builds from before 2026-08-04 decompiled attachments with small errors. A pivot angle of -90 came out as -89.972. That small error puts the camera in the middle of the screen.
- You decompiled with 20.0 or newer, or a dev build from 2026-08-04 or later: your values should already match. Check them below.
- You decompiled with an older build: copy every camera attachment value by hand, as shown below.
Quick check: select standing_pivot in your model. Its angles should be whole numbers like -90, not -89.97.
Copy the original values
Make a reference copy of the original
The compiled original keeps the exact values. Put a copy where CSDK 12 can open it.
- In Source 2 Viewer, right-click the hero's
.vmdl_cand choose Export as is. - Save it into CSDK 12's own game folder, at the same path:
Reduced_CSDK_12/game/citadel/models/heroes_staging/viper/. - In the CSDK 12 Asset Browser, open that
viper.vmdl_c. - Place it next to your work model, so you can read both.
Never let your own compiled model overwrite this copy. A replaced reference is a common cause of the centered camera. Your viper_work file name keeps them apart.
Pugzilla's short video Compiled Models In CSDK exports every hero this way. It takes 4 to 5 GB and slows CSDK 12 down, so one hero is enough here.
Copy attachment positions and angles
- Open
AttachmentListin both models. - Select
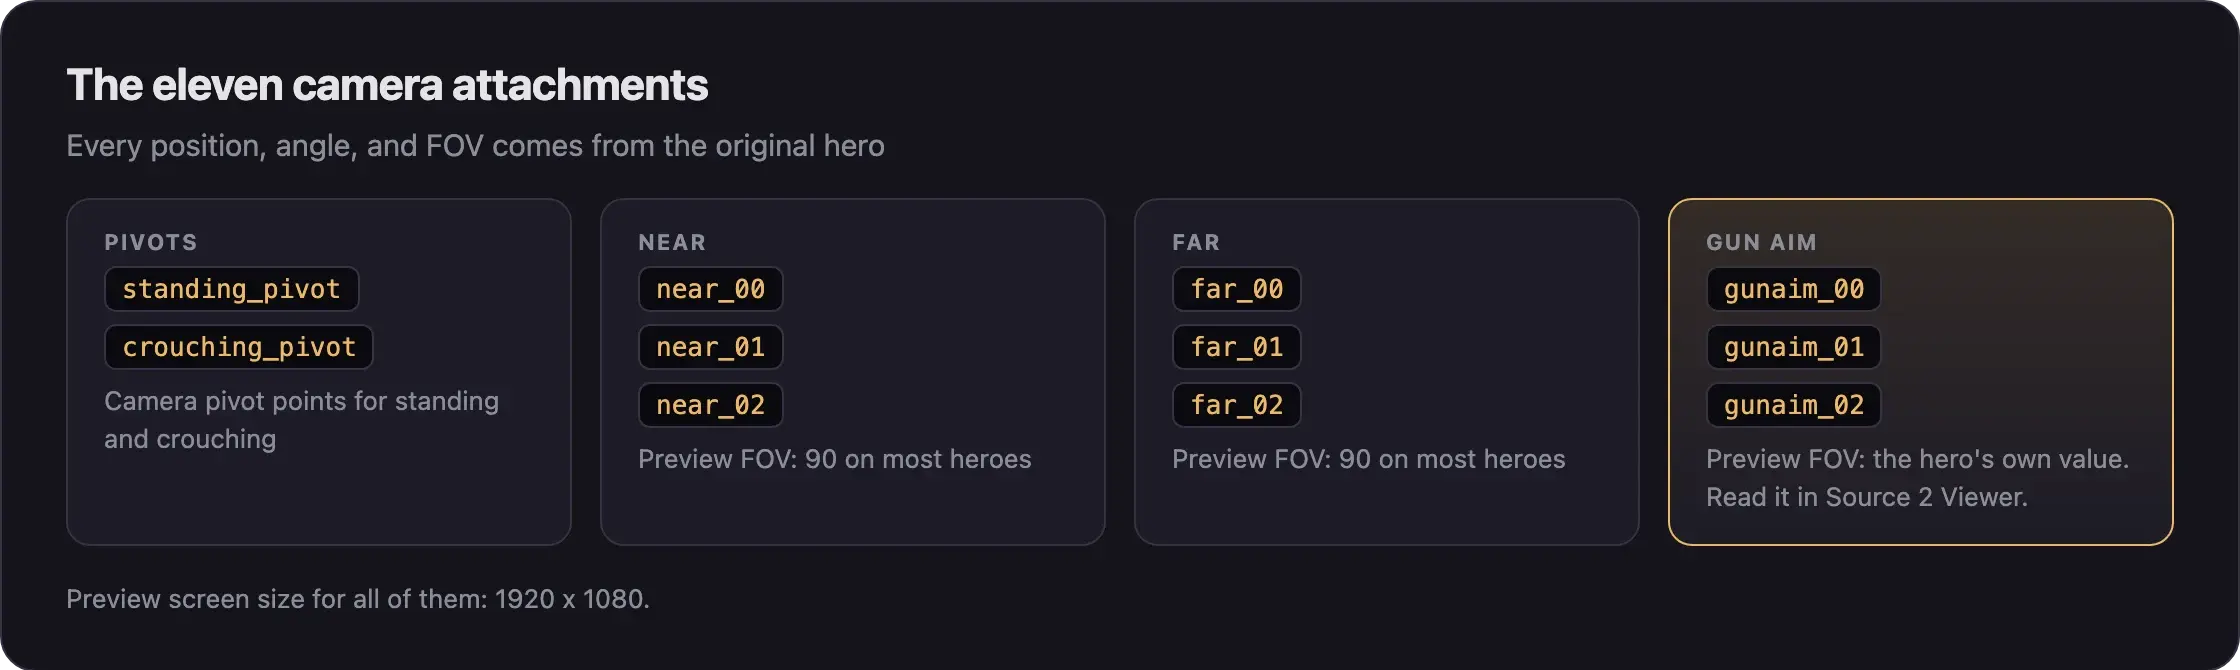
standing_pivotin each model and compare Relative Origin and Relative Angles. - Copy the reference values wherever yours differ.
- Repeat for
crouching_pivot,near_00tonear_02,far_00tofar_02, andgunaim_00togunaim_02. - Check that the other attachments are all there too, such as
aim,ability_cast,muzzle_fx,head_fx,healthbar,portrait_camera, andzipline. - Click Compile.
Never delete or move an attachment. If one is missing, copy it from the reference.
Add camera previews
Each camera attachment needs a preview with the right field of view (FOV).
- In Source 2 Viewer, open the original
.vmdl_cand go to the Data tab. - Find
AttachmentCameraData. Note the FOV it lists for each camera attachment. - In ModelDoc, select
standing_pivotthroughgunaim_02. - Right-click them and choose Add Attachment Preview.
- Set the FOV to
90and the screen size to1920by1080. - Select the three
gunaim_attachments. Set their FOV to the hero's own value from the Data tab. - Click Compile.
The gun aim FOV differs per hero. The guides show 42 for Vyper, 50 for Billy, and 55 for Drifter. Use the number in your hero's Data tab.
Add the camera prefab
Fuji's guide adds ready-made camera data from CSDK 12. This step comes from one guide and may differ on the current build.
- Open
content/citadel/models/prefabs/camera_attachmentdata/in your CSDK 12 folder. - Find
camera_attachmentdata_<hero>.vmdl_prefabfor your hero. - Add a prefab node to your model that points to this file.
- Right-click the prefab node and choose Flatten Prefab.
- Click Compile.
The folder is missing? Update CSDK 12. Older guides set this camera data in CS2 Workshop Tools instead.
Copy the game data
GameDataList holds Deadlock's own settings for the hero. Source 2 Viewer has written these blocks into decompiled models since version 17.0, so yours should be there already.
| Block | What it controls |
|---|---|
CCitadelHeroModelGameData_t | Hero select and shop animation graphs, ambient particles |
CitadelCameraSettings_t | Camera offsets and heights. Never change it |
CitadelUnitStatusSettings_t | Health bar height |
CitadelTaggedSoundSettings_t | Hero sounds. Without it, some sounds go missing |
CitadelMuzzleSettings_t | Muzzle flash |
CitadelEventIDToBodyGroupMapping_t | Game events that switch bodygroups |
CitadelModelParticleSettings_t | Particles on the model |
CitadelModelDamageNumberSettings_t | Damage numbers |
| Feet nodes | Footstep sounds |
- Open
GameDataListin your model. - Compare each block with the original's Data tab in Source 2 Viewer.
- Copy every value that differs.
- Add any block that is missing. Use the text editor method below.
- Click Compile.
Some heroes have extra blocks, for example for a pet or a second rig. Copy those too.
Copy a block with a text editor
Use this for any block that is missing or wrong. The health bar block is the usual one.
- In Source 2 Viewer, decompile the original hero's
.vmdl_cas.vmdlinto a new, empty folder. - Open that file and your
viper_work.vmdlin your text editor. - Search both files for the block name, such as
CitadelUnitStatusSettings_t. - Replace your block with the original block. If yours is missing, paste the original next to the other game data blocks.
- Save your file.
- Go back to ModelDoc. It warns that the file changed outside the editor. Reload it.
- Click Compile.
Check your work
- Click Compile and fix any errors.
- Count the attachments in your model and in the reference. The numbers should match.
- Keep the reference copy. You need it again after game updates.
You cannot check the camera in game yet. Part 4 adds the animations, then you test the camera, aiming, health bar, and sounds.
Common problems
- The camera sits in the middle of the screen. A camera attachment value differs from the original. See Model and skin problems.
- The health bar sits at the feet. Copy
CitadelUnitStatusSettings_twith the text editor method above. - Some hero sounds are missing. Copy
CitadelTaggedSoundSettings_tand the feet nodes the same way.
Next steps
Link the hero's skeleton and animations in CS2 Workshop Tools, then pack and test your skin.
Credits
This guide is based on the work of these creators. Check out their original guides.
- Video: Bat Drifter from Start to Finish: Part 1 - Make it exist first, make it pretty later by Basilisken.
- Video: (Read Desc) Deadlock - General Model Swap Steps by Pugzilla.
- Video: Deadlock - Compiled Models In CSDK by Pugzilla.
- Guide: From Start to Finish (Fuji's Asset Replacement Guide) by Fuji.
- Guide: How to Model Replace for Dummies + Blender Steps by Axelliax.
- Tool: Source 2 Viewer by the ValveResourceFormat team.