
Recolor with material values
Change colors, metalness, and roughness in the Material Editor without painting a texture. Example: a gold briefcase for Pocket.
Recolor part of a hero by changing material values in CSDK 12, without painting any images. In this guide you turn Pocket's briefcase into shiny gold. First set up your tools with Set up your creator tools.
What you need

Source 2 Viewer finds the hero's material and decompiles it. CSDK 12 opens it in the Material Editor and compiles it. Pocket's briefcase uses the codename synth.
What a material is
A material tells the game how a surface looks. It names a shader (pbr.vfx for heroes), lists the texture images, and holds values like color, roughness, and metalness. The game reads the compiled .vmat_c. You decompile it, change values in the Material Editor, and compile it again. Hero material settings reference explains every setting.
Keep it fair
You see a recolor on every copy of that hero, enemies included, so a bright skin can make an enemy easier to spot.
Do not turn on self-illumination or make a hero glow. Do not make a hero much brighter, near-transparent, or very dark. These change how easy a hero is to see. Read What's allowed and how to stay safe.
Make the mod
Pick a route. The full workflow changes the material values themselves. The quick options work in Deadlock Mod Manager or your browser.
Find the material
- Open Source 2 Viewer.
- Open
Deadlock/game/citadel/pak01_dir.vpk. - Go to
models/heroes_staging/synth/materials/. - Find
pocket_suitcase.vmat_c.
Materials do not always sit next to the model: Pocket's model is in models/heroes_wip/pocket/, but the briefcase material is in synth. For other heroes, look up the codename in Hero names and file paths. Then open the hero's model and check its References tab for the real material paths.
Decompile it into your addon
- Open the CSDK 12 launcher and create a new addon. Name it in lowercase with no spaces, for example
goldcase. - Right-click the addon and choose Explore Content Folder.
- Inside it, rebuild the material's path:
models/heroes_staging/synth/materials/. - In Source 2 Viewer, right-click
pocket_suitcase.vmat_cand choose Decompile & export. - Save it into the folder you made in step 3.
Your addon's content folder now looks like this:
Open it in the Material Editor
- In the CSDK 12 launcher, select
goldcaseand click Launch Tools. The Asset Browser opens. - Set the Asset Browser to show only your addon's files.
- Type
type=material_assetin the search box to show only materials. - Double-click
pocket_suitcaseto open it in the Material Editor. - Check that the shader at the top is
pbr.vfx. A decompiled hero material should already use it. - Set the preview model to Pocket,
models/heroes_wip/pocket/pocket.vmdl, to see the briefcase on the hero.
Change the values
Each setting can read from a texture image or use a fixed value. For polished gold, change three settings:
- Change Roughness from texture to Color. Pick pure black. This makes the surface smooth and shiny.
- Change Metalness from texture to Slider. Set it to 1.0. This makes the surface look like metal.
- Change Color to the gold you want. The example uses 255 192 47.
- Check the preview and adjust the values until you like the result.
- Press Ctrl+S to save. Close the Material Editor.
Materials also have a color tint value (g_vColorTint1 in the file). It
multiplies the texture's color, so details stay visible. Many hero materials
have a tint mask, so the tint only shows on some parts.
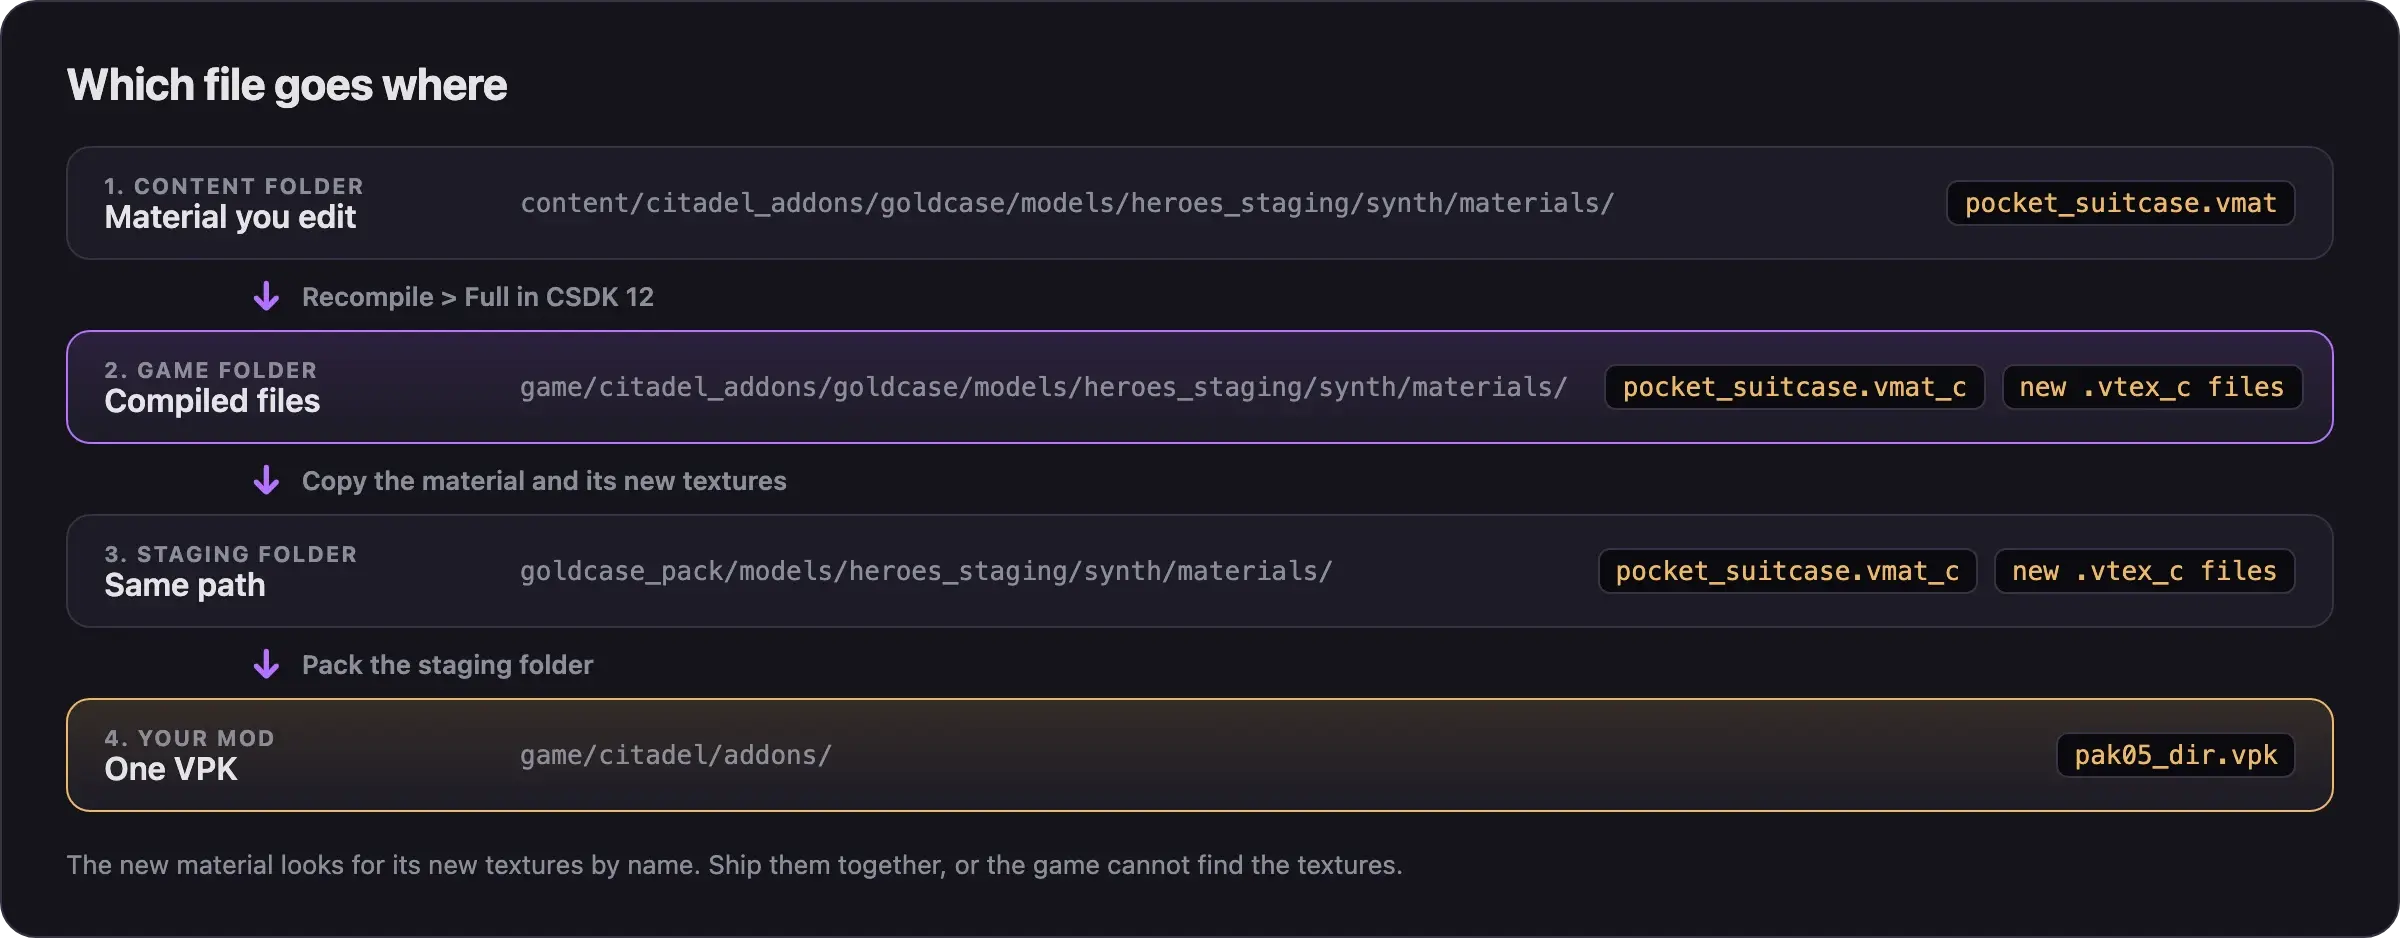
Compile and collect the files
- In the Asset Browser, right-click the material and choose Recompile, then Full.
- Right-click
goldcasein the CSDK 12 launcher and choose Explore Game Folder. - Open
models/heroes_staging/synth/materials/. You see the newpocket_suitcase.vmat_cand new.vtex_ctexture files. - Make a staging folder, such as
goldcase_pack, with the same path inside:models/heroes_staging/synth/materials/. - Copy the new
.vmat_cand every new.vtex_cinto it.
The new material points to its textures by their compiled names, which include a code, like abrams_coat_color_png_63291cfb.vtex_c. Ship the material without them, and the game cannot find its textures.
Pack and test
- Pack your staging folder into a VPK with Pack your mod into a VPK.
- Load the mod and look at Pocket's briefcase in game with Test your mod in game.
Always check in game: Source 2 Viewer's preview does not match Deadlock's lighting exactly.
These need no CSDK 12 but give you less control. More in Make mods without installing tools.
Mod Foundry in Deadlock Mod Manager. Open Settings, then Experimental, then Mod Foundry. It recolors a hero's body and weapon and exports a VPK. See the Mod Foundry docs.
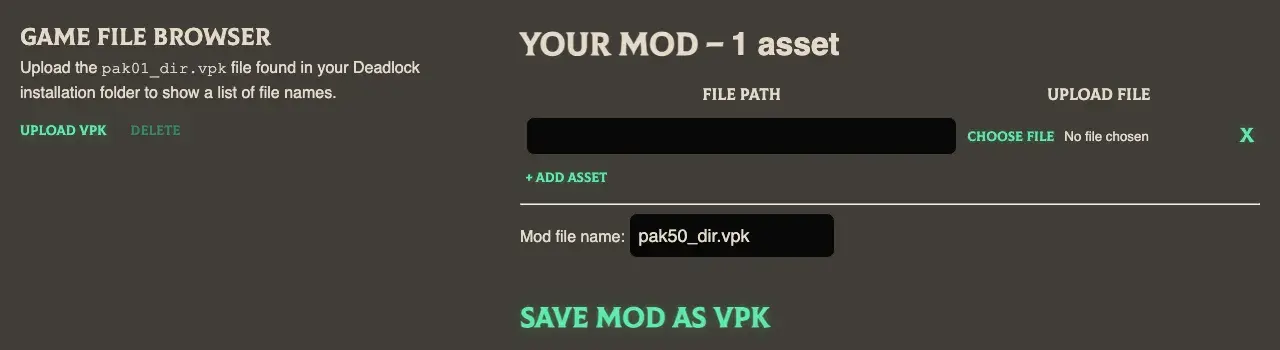
DeadMod in your browser. Recolor a texture image you exported with Source 2 Viewer. In DeadMod, paste the texture's game path, upload your image, and click Save mod as VPK. This edits images, not material values.
Common problems
More fixes are in Model and skin problems.
Next steps
Paint the hero's images instead of changing values.
Build new materials with the settings Deadlock heroes need.
Credits
This guide is based on the work of these creators. Check out their original guides.
- Guide: How I Make Shiny Metal Materials by ShockHub.
- Guide: Neutral's General Guide for Modding Deadlock (Models, Textures, Sounds) by Neutraldrift.
- Data: GameTracking-Deadlock by SteamTracking, for the shader settings and file paths.
- Docs: Customization (Mod Foundry) from Deadlock Mod Manager.
- Tool: DeadMod by RedMser.
- Tool: Source 2 Viewer by the ValveResourceFormat team.