
Materials for custom models
Create materials for a custom hero model with the settings Deadlock needs: stylized lighting, status effects, outlines, and transparency.
Make new materials for your own model so it looks like it belongs in Deadlock. You build them in CSDK 12's Material Editor and assign them in ModelDoc. Your model should already open in ModelDoc. Your first model swap shows how for a simple model, and the hero swap guides cover heroes.
What you need
CSDK 12 has the Material Editor and ModelDoc. Use your model's addon. Use power-of-two texture sizes, such as 1024 x 1024 or 2048 x 2048.
How the names connect
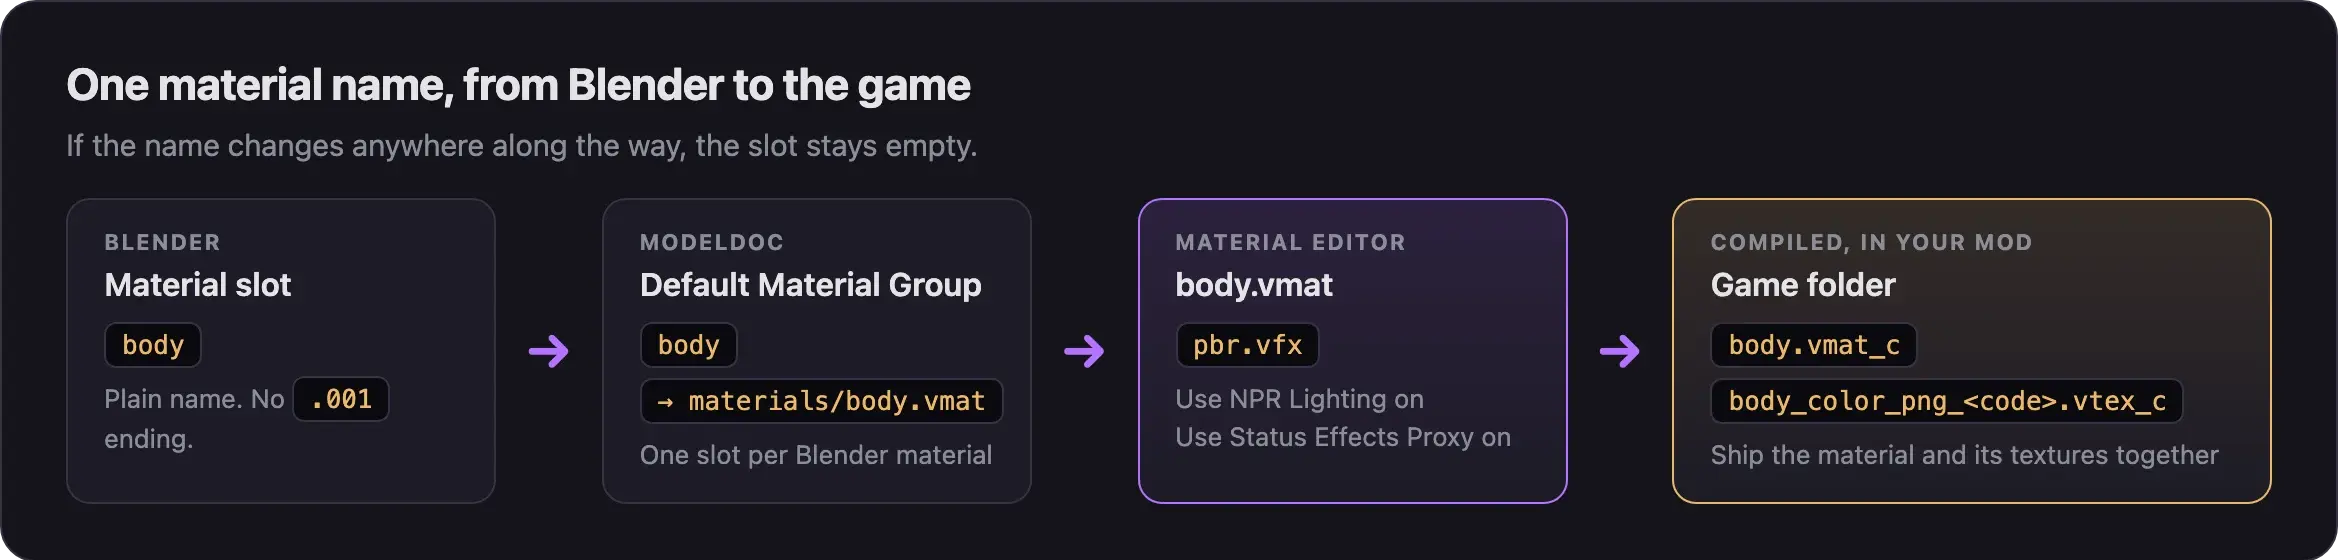
Each material in Blender becomes a slot in ModelDoc's Default Material Group. Each slot points to one .vmat file. Keep the same name the whole way through. Use short, plain names like body or hair. A name with .001 at the end leaves the slot blank.
Pugzilla shows the materials part of a hero swap from 23:17 in this video. It was recorded in March 2026, so menus may look a little different.
Build the material
Make a new material
- Launch the tools for your addon. In the Asset Browser, click Material Editor.
- Choose File, then New.
- Choose File, then Save As right away. Save into the
materialsfolder next to your model, with the Blender material name. For example:body.vmat. - Check the shader at the top. It must be
pbr.vfx, the shader every Deadlock hero uses. If it shows another one, switch it topbr.vfx.
The game's own config names a different default shader for new materials, so check this on every new file.
Add your textures
Copy your PNG files into the same materials folder. Give each one the ending its slot expects:
| Slot | File ending | What it controls |
|---|---|---|
| Color | _color | The base colors of your model |
| Normal | _normal | Small surface detail, like folds |
| Roughness | _rough | How matte or shiny each part is |
| Ambient occlusion | _ao | Soft shadows in creases |
| Metalness | _metal | Which parts look like metal |
The file picker filters by these endings. If a file does not show up, rename it, or switch the picker's filter to All images.
- Set Color to your
_colorimage. - Set Normal to your
_normalimage, if you have one. - No roughness map? Click Change to color next to Roughness and pick pure white. White is fully matte. The gray default looks like shiny plastic.
- Look at the shadow side of your model. Deadlock's lighting gives the shadow side its own color input. By default it uses your color image. If the shadows look wrong, Pugzilla sets that input to a flat color.
Turn on the required settings
Tick both of these on every material:
| Setting | What it does | If you skip it |
|---|---|---|
| Use NPR Lighting | Turns on Deadlock's stylized lighting: rim light and banded shading | Your model is lit unlike every other hero |
| Use Status Effects Proxy | Lets status effects draw over your model, like Veil Walker or ultimates | Those effects are missing on your skin |
Use Status Effects Proxy only works with Use NPR Lighting on.
Pick optional settings
Your skin shows on every player who picks that hero, enemies included. Never make a hero glow, go bright, turn near-transparent, or go very dark. Never turn off the outline. These make a hero easier or harder to spot. Read What's allowed and how to stay safe.
| Setting | Use it for | Notes |
|---|---|---|
| Solid Color Outline | A flat colored outline. Needs Use NPR Lighting. | Pugzilla and Axelliax tick it on every material |
| Alpha Test | Cut-out shapes, like hair cards or lace | Never cut away large parts of the body |
| Translucent | See-through parts, like a glass visor | Never on the whole body |
| Self Illumination | Small lit details, like eyes or a screen | Never make the hero glow |
Write Depth Before Alpha Blending is a special case. Guides tick it on every material to stop bald patches and see-through curves when a hero fades out. But the shader only allows it with Translucent on, so we do not know yet what it does on a normal material. Leave it off unless your material is translucent.
The hero material settings reference, under Next steps, lists every other setting.
Assign it in ModelDoc
- Save the material and close the Material Editor.
- Open your model in ModelDoc.
- If there is no DefaultMaterialGroup node, choose Add, then Default Material Group. You see one slot per Blender material.
- Click the browse button on a slot. Pugzilla calls it open local browser. Find your material and double-click it.
- Repeat for every slot.
- Click Compile. A red mesh means a slot still has no material.
Ship the right files
Ship the compiled .vmat_c and every new .vtex_c from your addon's game folder, at the same paths. Compiled textures get a code in their name, like body_color_png_63291cfb.vtex_c. The material points to that exact name, so a material without its textures shows the error checkerboard in game. Then follow Pack your mod into a VPK.
Reuse the hero's own materials
Your new model can use materials that already ship with the game. Pugzilla's method:
- Find the material in Source 2 Viewer.
- Right-click it and choose Copy name.
- Paste it into the slot in ModelDoc. Delete the
_cat the end. - Click Compile.
To edit a hero's materials instead, decompile the hero's whole materials folder into your addon at the same path. Then work on them like in Retexture a hero.
Common problems
Next steps
Swap in your meshes and rebuild material groups, the ragdoll, and LODs.
Every setting and texture slot in the hero shader, in plain English.
Credits
This guide is based on the work of these creators. Check out their original guides.
- Video: (Read Desc) Deadlock - General Model Swap Steps by Pugzilla.
- Video: Deadlock - Soul Container Model Swaps by Pugzilla.
- Guide: From Start to Finish (Fuji's Asset Replacement Guide) by Fuji.
- Guide: How to Model Replace for Dummies + Blender Steps by Axelliax.
- Data: GameTracking-Deadlock by SteamTracking, for the hero shader's settings and texture slots.