
Material Atlas (No Plugin)
This tutorial will explain how to do material atlases manually. No plugins needed.
Before getting started there’s another guide on this topic that achieves the same and faster via a plugin here. Just in case you missed it.
But if:
- The plugin broke or has issues
- You are too lazy to update blender to version 5.xxx (my case lol)
- You are a plugin racist.
Then let's continue.
First things first, what is a material atlas? Well, ideally we want to have the 3D model textures packed into a single image so we can import them into league and sometimes when you download a model, its material view looks like this:
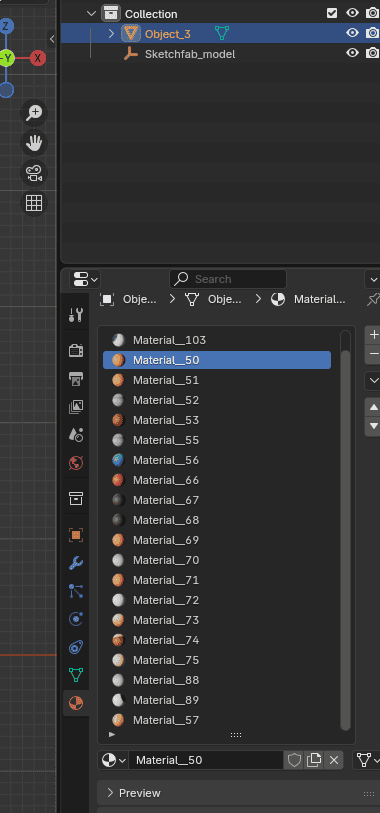
As you can see there’s a long list of materials and each one is tied to an image containing a portion of your model’s textures. We will narrow it down to just 1.
To do so we need to follow these steps:
- UV unwrap your model into a new blank image using a new uv map.
- Setup the baking
- Bake the textures into our blank image.
- Final touch and cleanup
Step 1
This is probably the hardest part of the process so once finished you will be 80% done.
For the sake of this tutorial we will skip the part of “good UVs” and we will let blender do it all automaticaly for us, but bear in mind that it will always be better if you manually create seams for your model and unwrap them properly.
First of all, create a new uv map to hold our new changes, to do so, go to the right side panel view in blender and click in the green triangle as shown here:
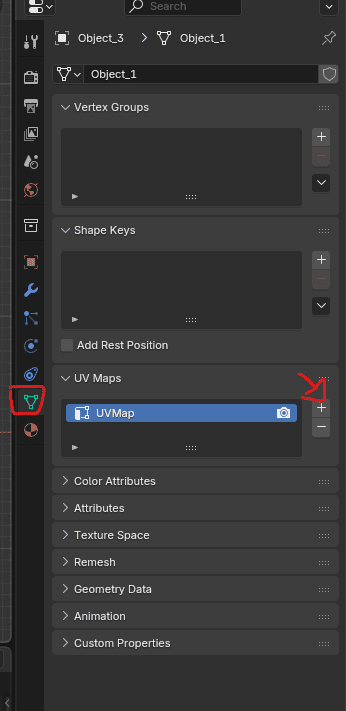
You can name the new uv map as you wish, you should now have something like
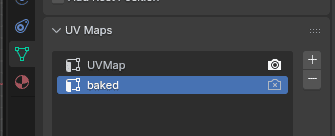
Notice how we have it highlighted in blue but the camera icon is disabled as opposed to the default UVMap that has it enabled, this is important. This tells blender “Show the UVs of UVMap in the render but any action or modification is saved onto the one in blue.
Next up is going to UV Editing tab
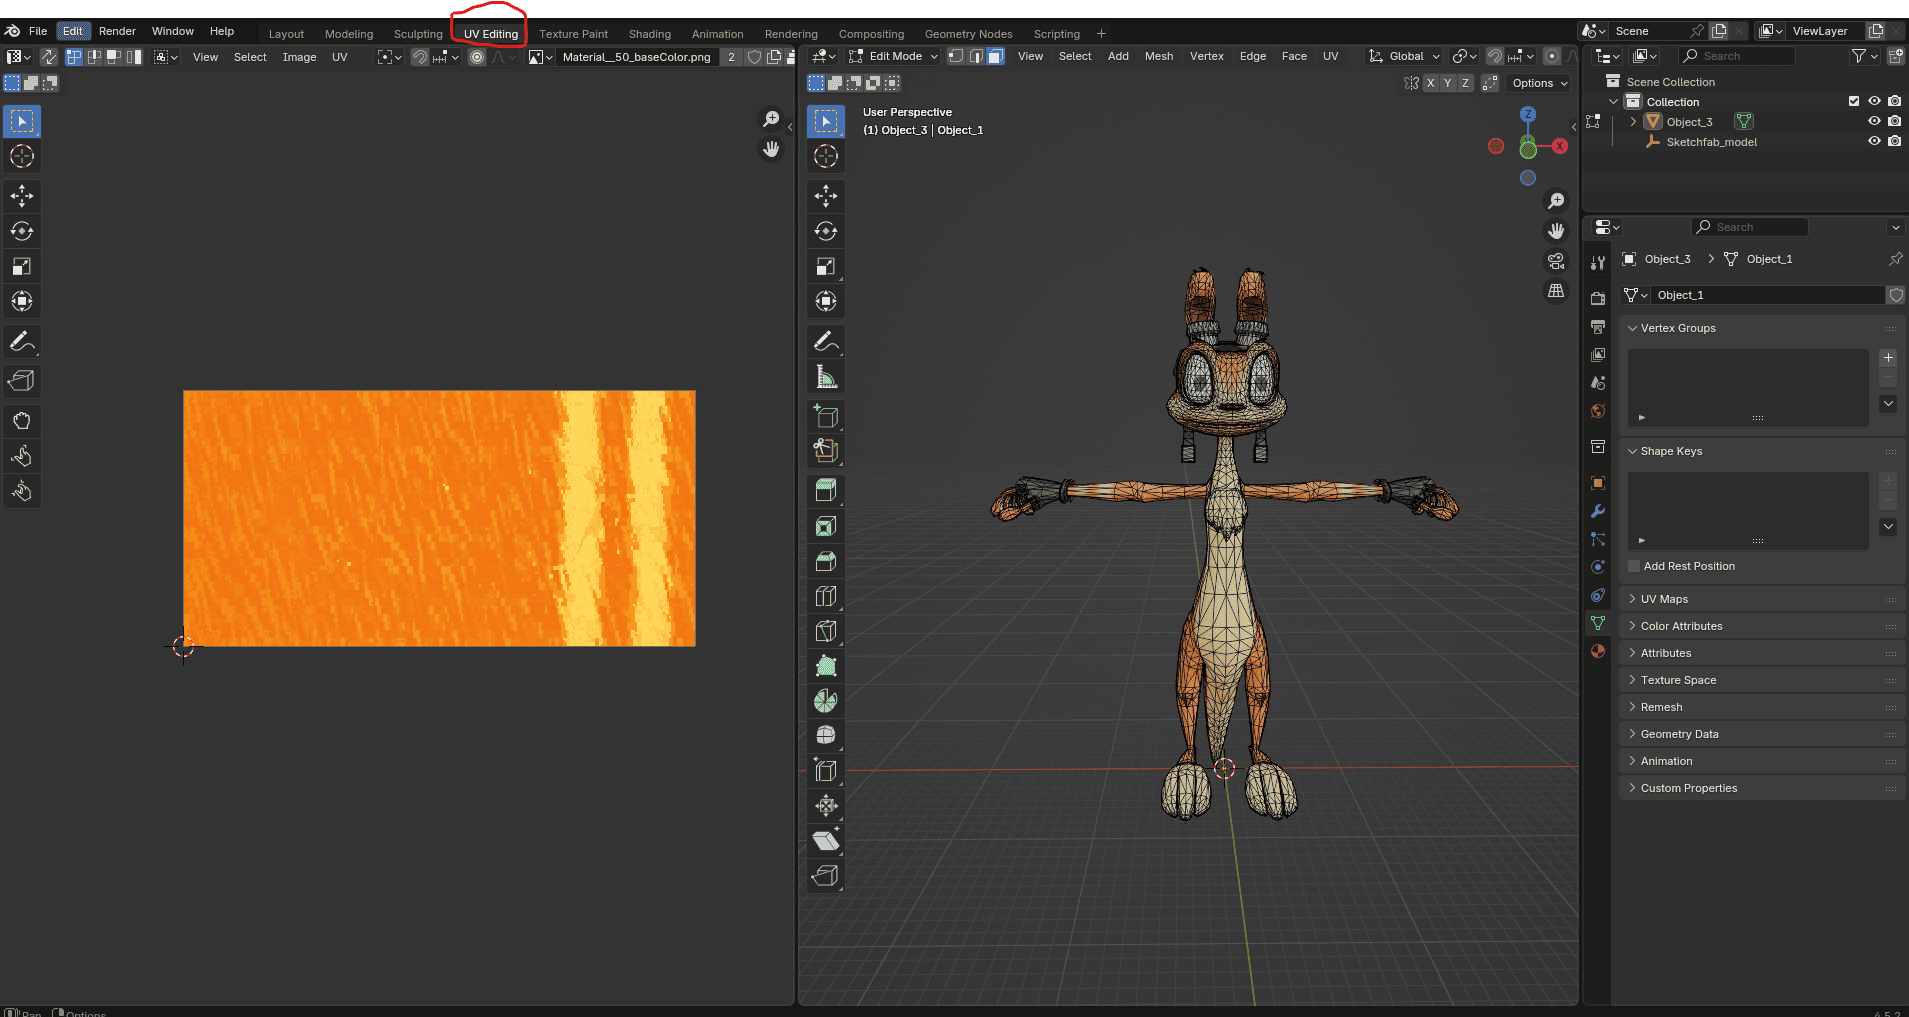
The left panel is where you edit your UVs, By default, a random image from one of the materials of the model will be selected but what we want is to create a new image from scratch. I usually set the images to be 2K → 2048 x 2048.
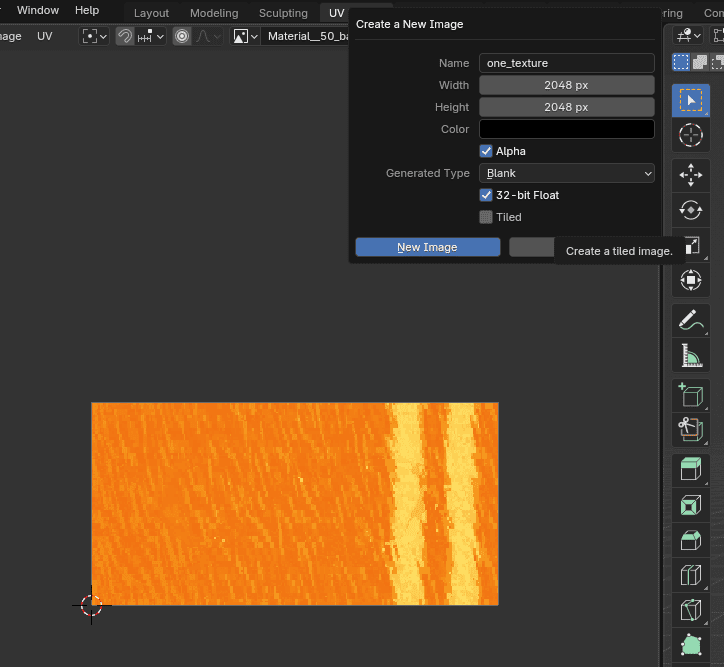
Make sure once the image is created that you are actually editing said image and also that you are using your newly created UV map:
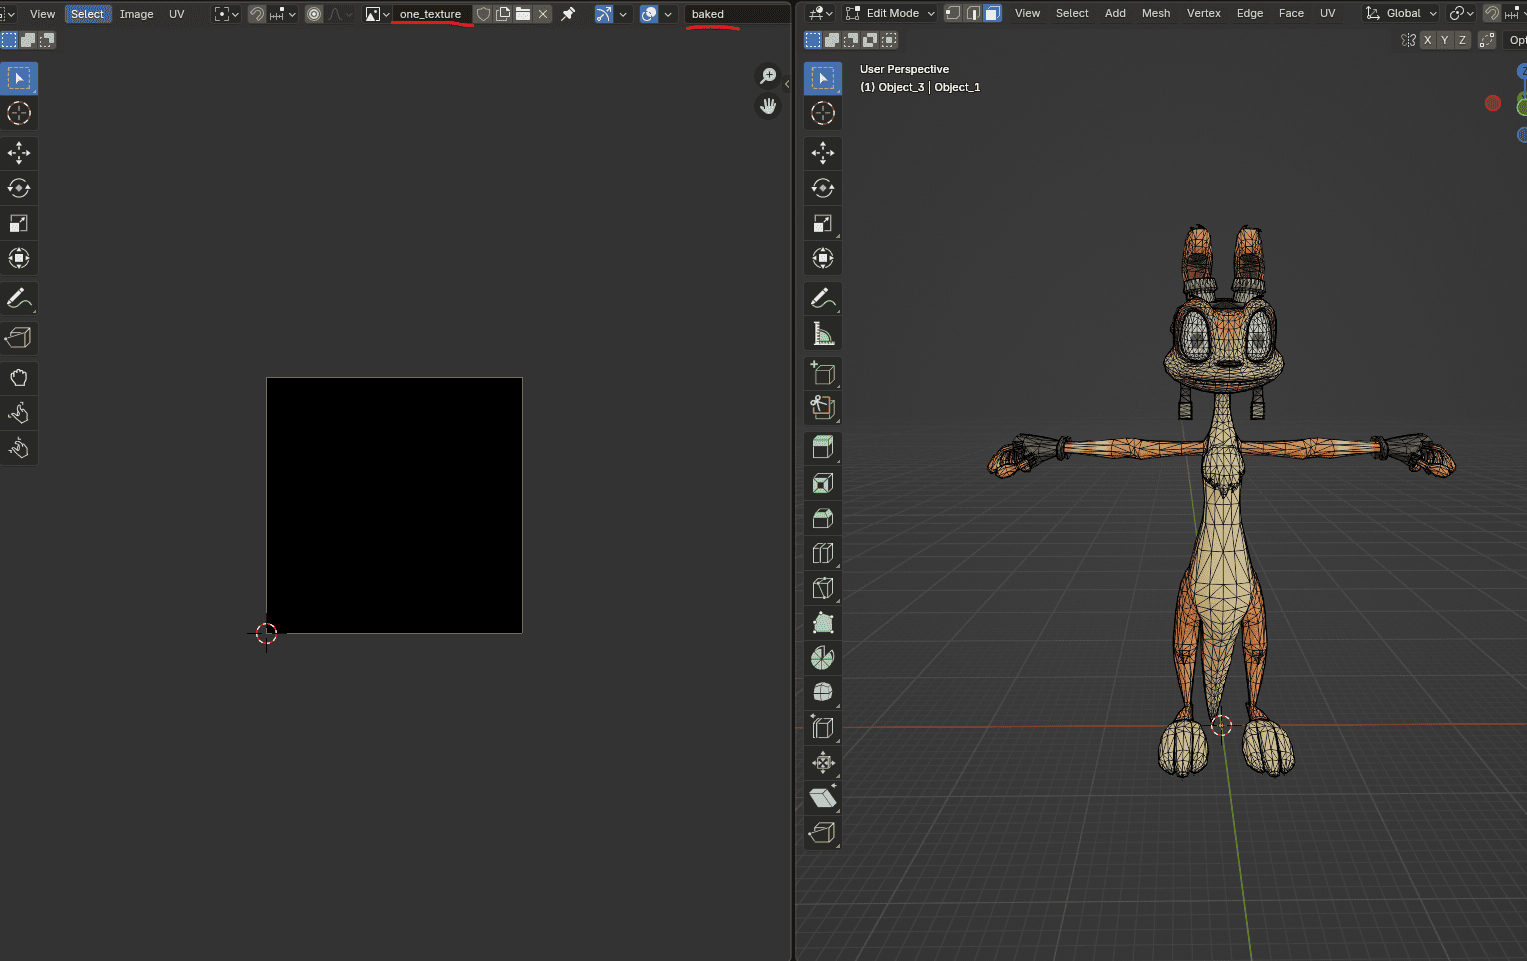
We have now to re-arrange the UVs so they are nice and tidy, right now if you select a part of the model you will see a mess:
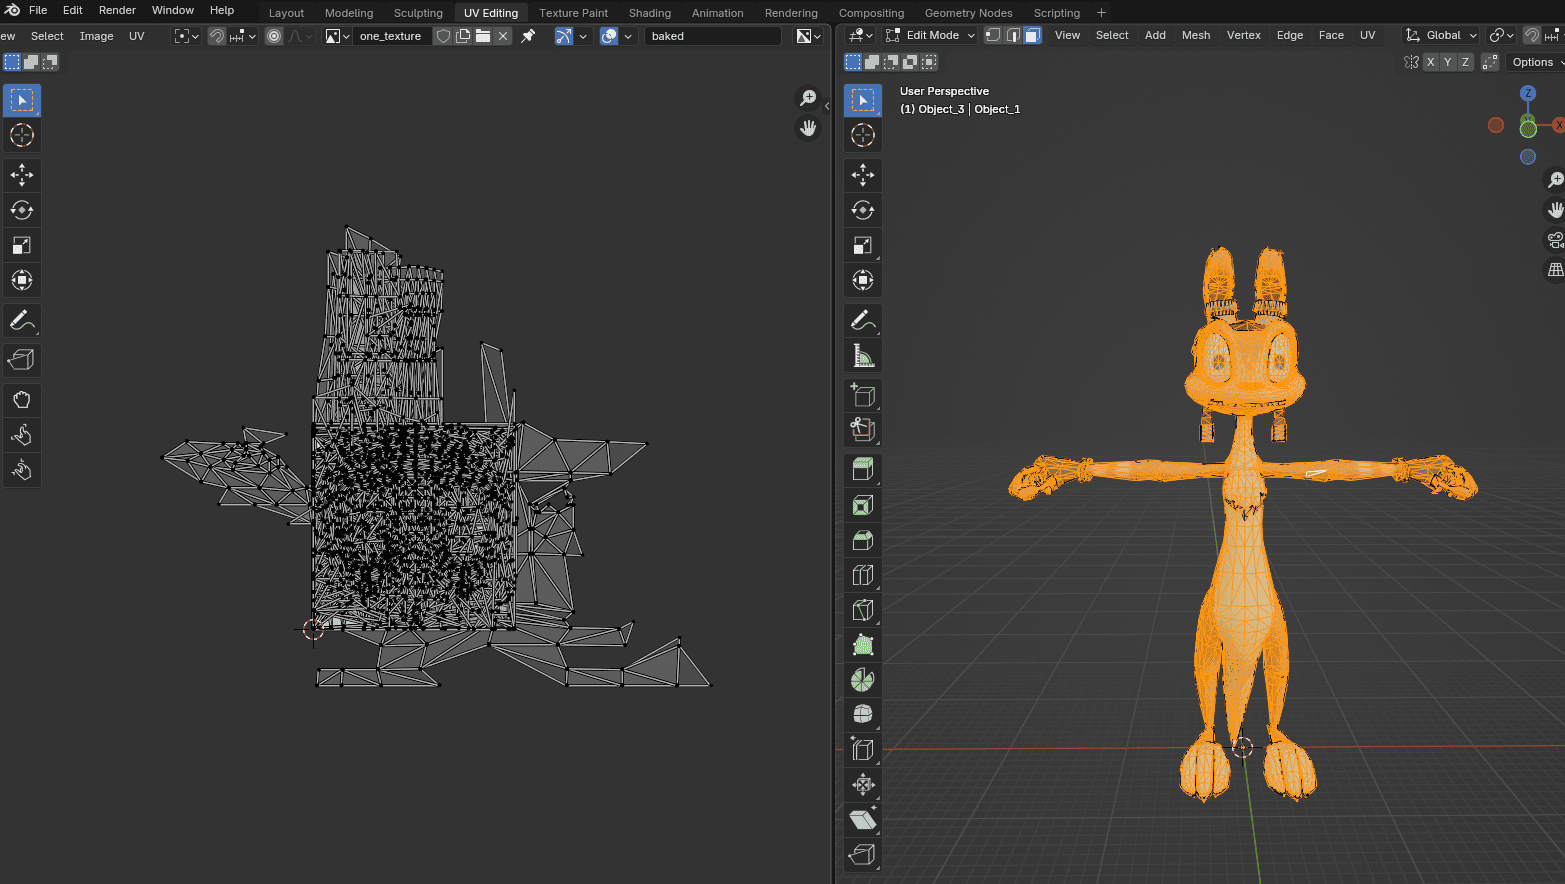
Fear not, the process is mostly automatic.
Select the whole 3D model pressing “a” then press “u” and select “Smart UV Project”, copy my settings or play with them as desired if needed.
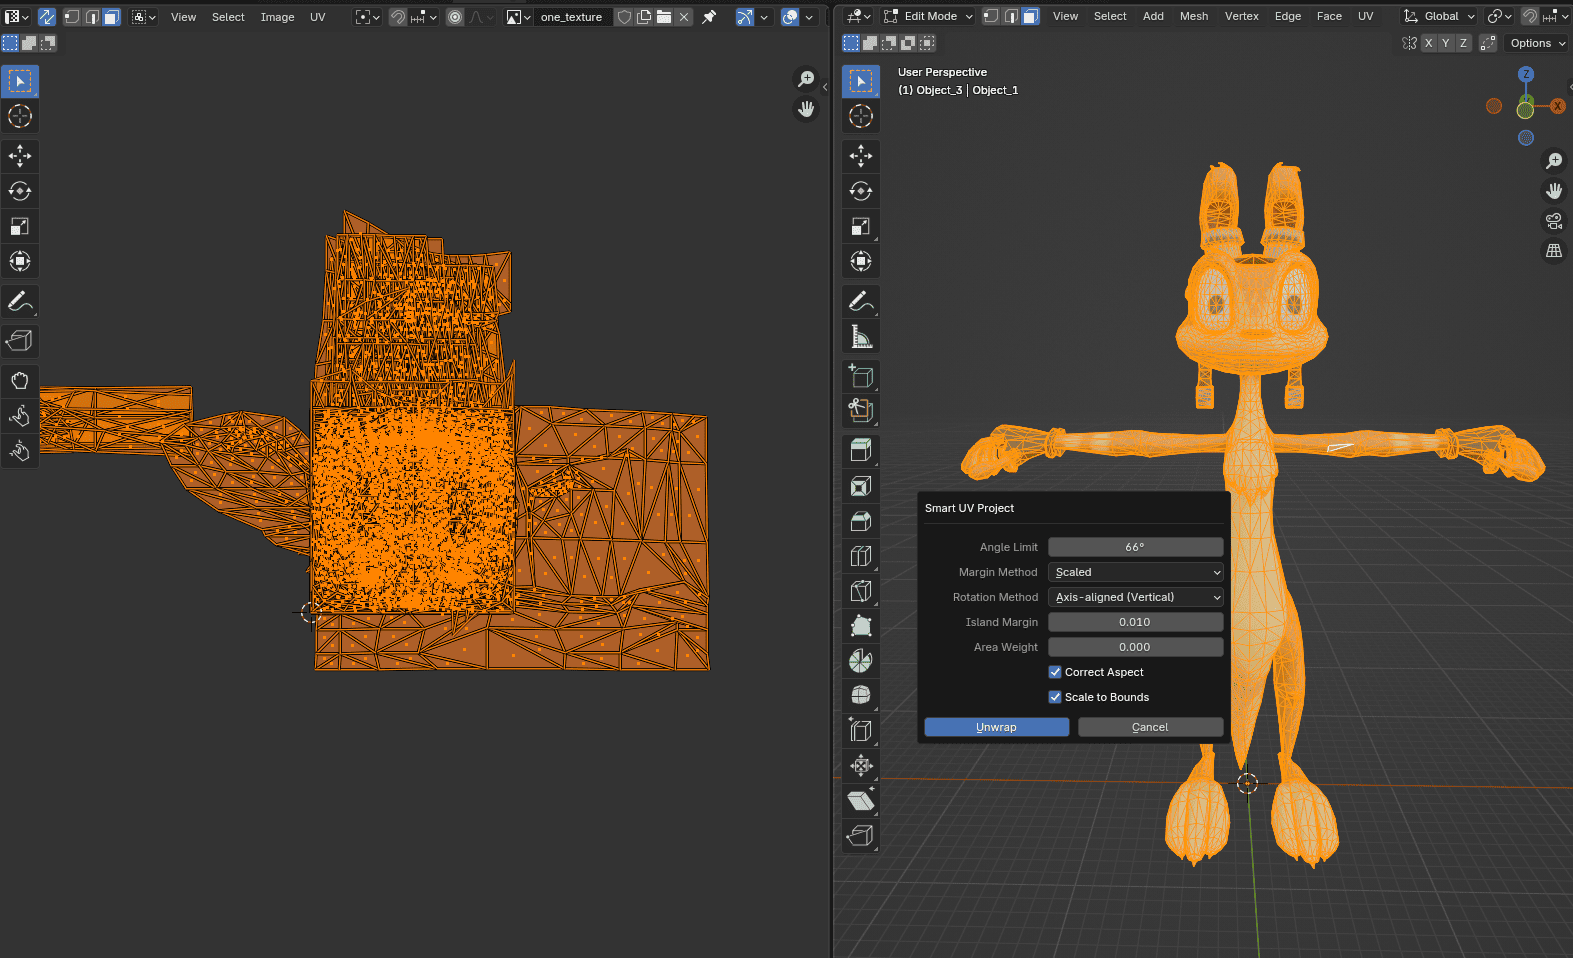
You should now have something like
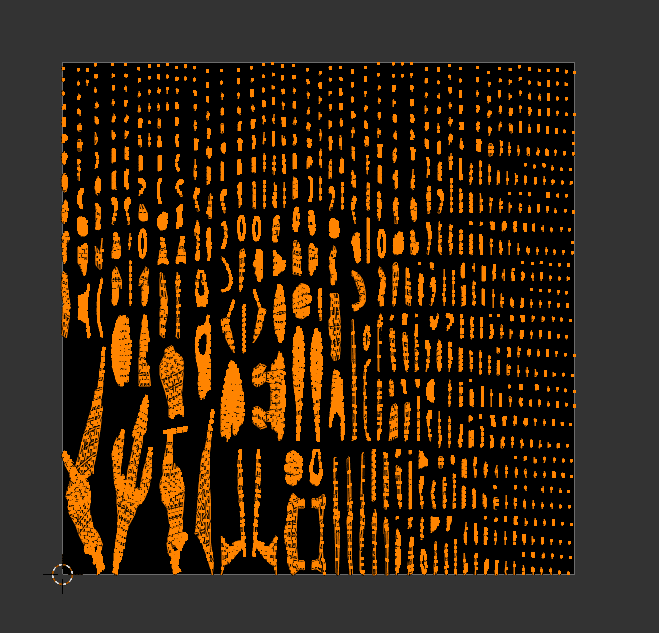
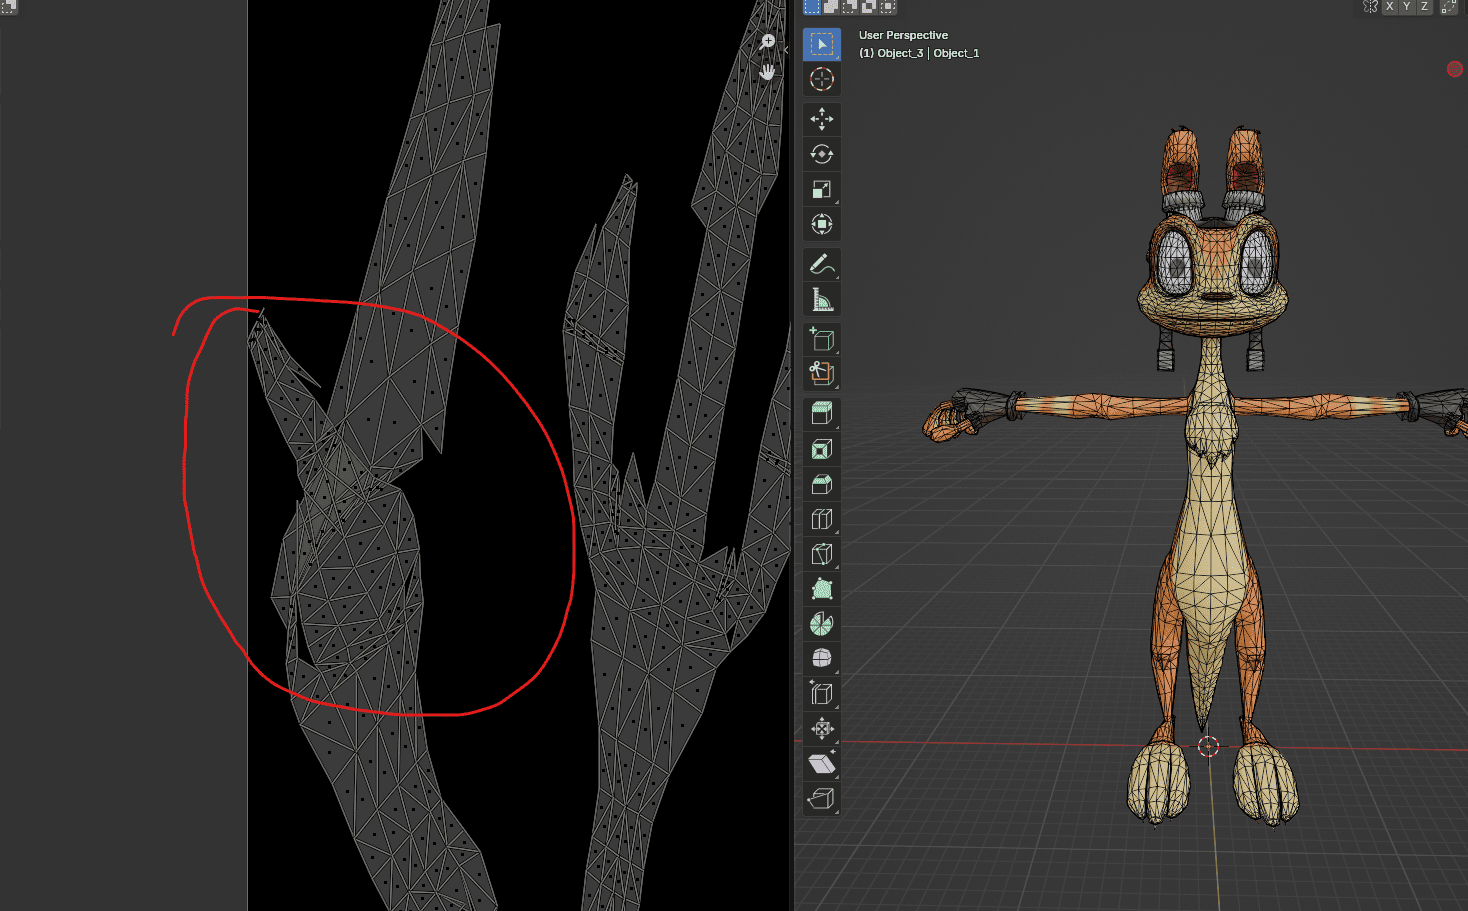
This might seem “good” but you need to be careful since automatic UV unwrapping is not perfect and it may be some overlappings.
For example, if we zoom in in the bottom-left corner we can see that hasn’t been unwrapped so nicely
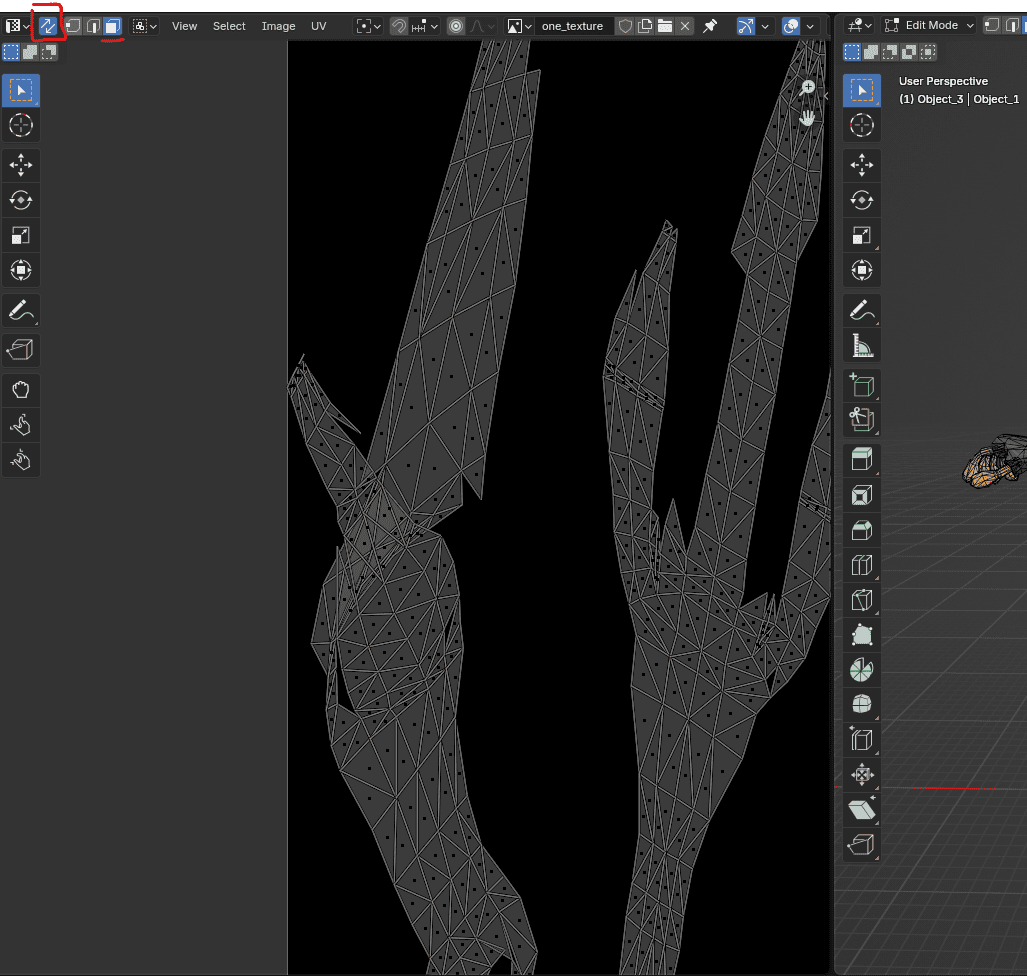
How do we fix it? Easy. First, select the affected part, to do so, you need to activate the little icon on the top-left corner of the below image. Also make sure to be on “face selection" (the underlined icon)
Now all UV island will be visible on the left side, you can now go to the problematic area, with the mouse hover a face from there and hit L to select only that island, you will see that it is highlighted also in the 3d model. Let’s unwrap this one alone, after selecting it, hit U but this time choose “Unwrap minimum stretch”.
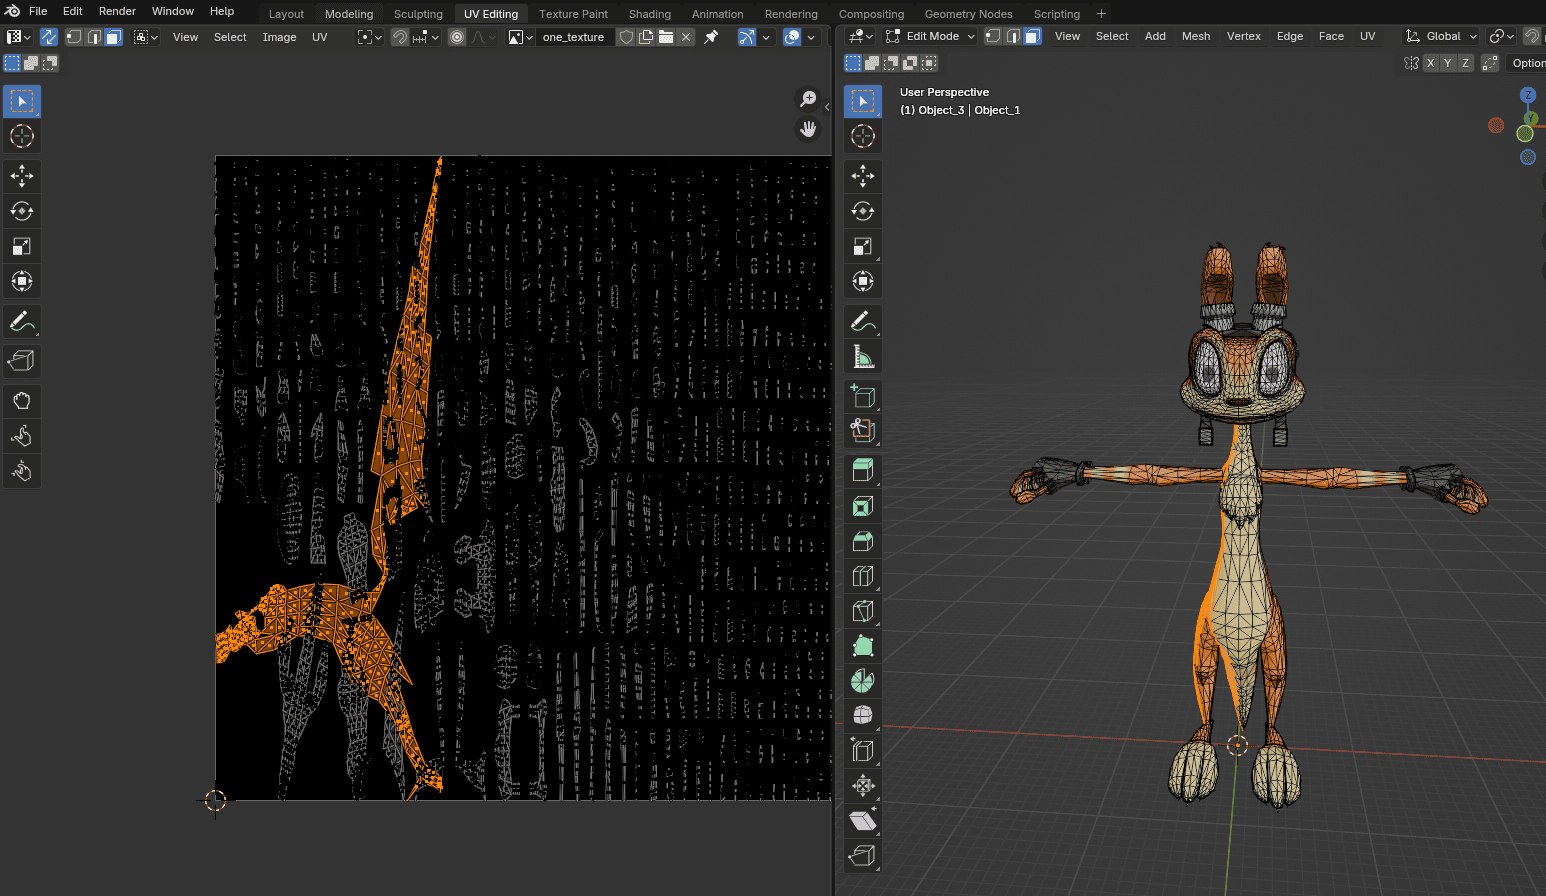
Image 12. Unwrap minimum stretch of selected area output
You could resize it by hand until it fits in the blank spaces of our image, or you could let blender do it for you! For the latter, press “A” again to select everything once more. Then go to UV menu and choose pack islands
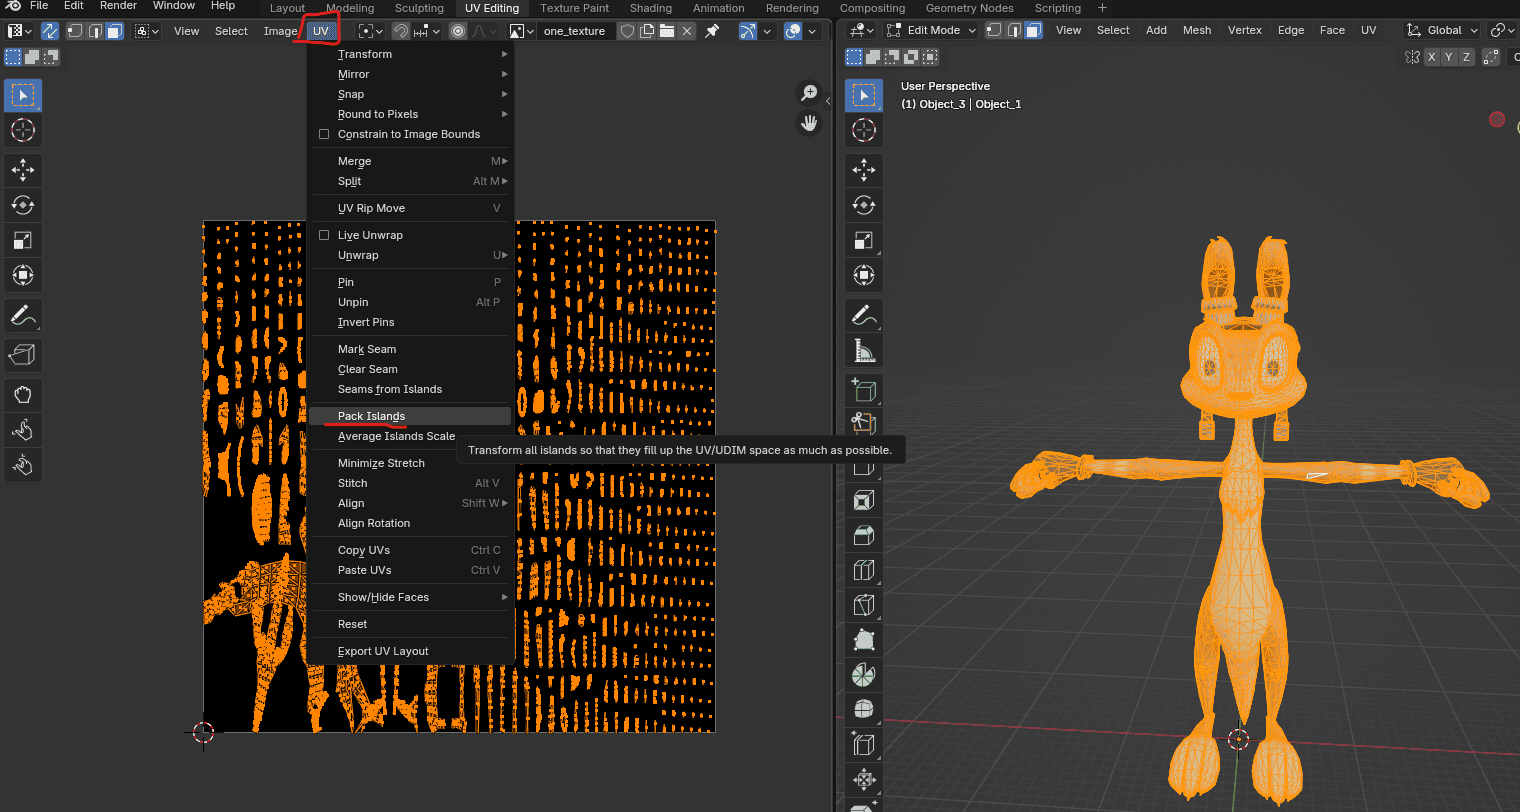
Try to use the same spacing value as in image 8
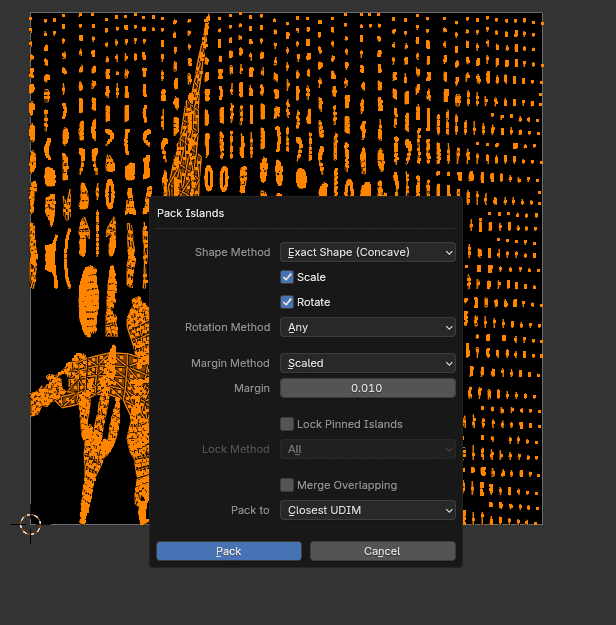
Your UVs are now ready. Let’s get the baking done now.
Step 2
The baking tells blender to transfer certain parts of how the 3D model is looking now into another place, usually a texture image.
For this step we’re going to use the shading tab from the tab menu at the top of the blender window.
In the left side, make sure to open our previously created “one_texture” image which should be black yet.
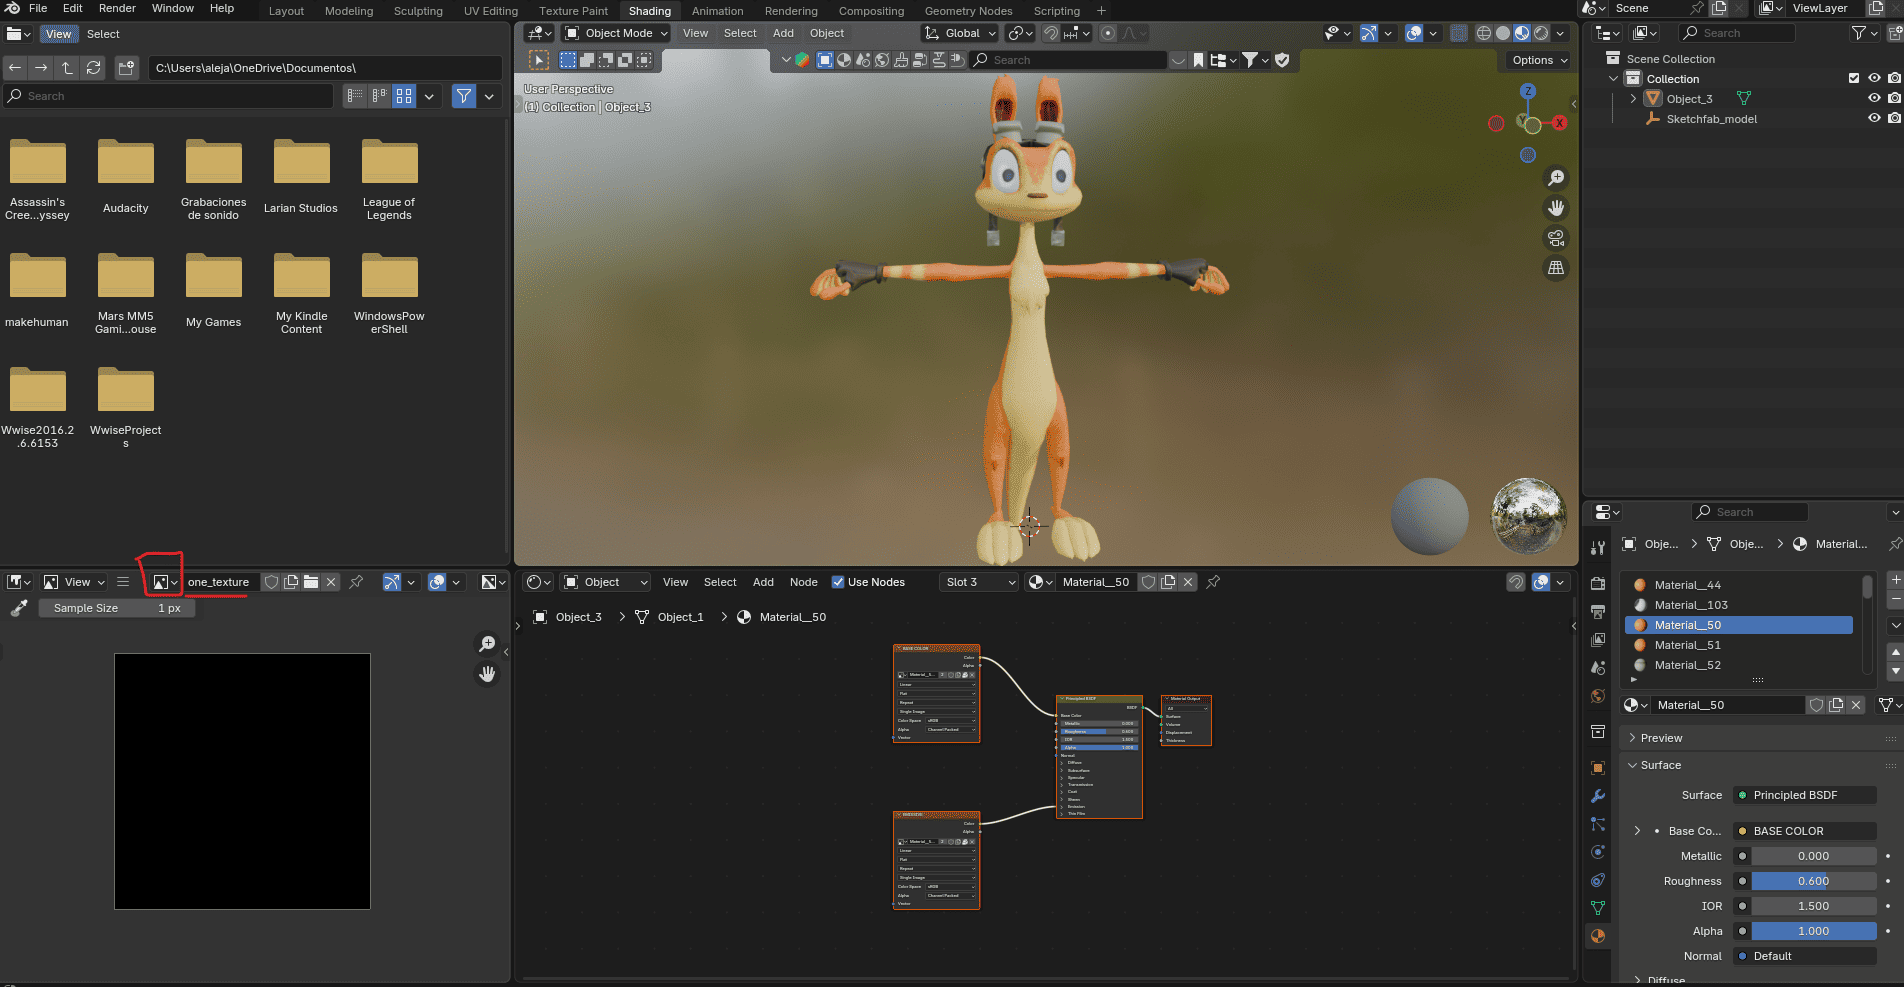
Now comes the boring part. go to the right side panel, the material view, and select the first one. Then, in the node panel (the boxes right below our 3D model) press F3 and type “Image texture”
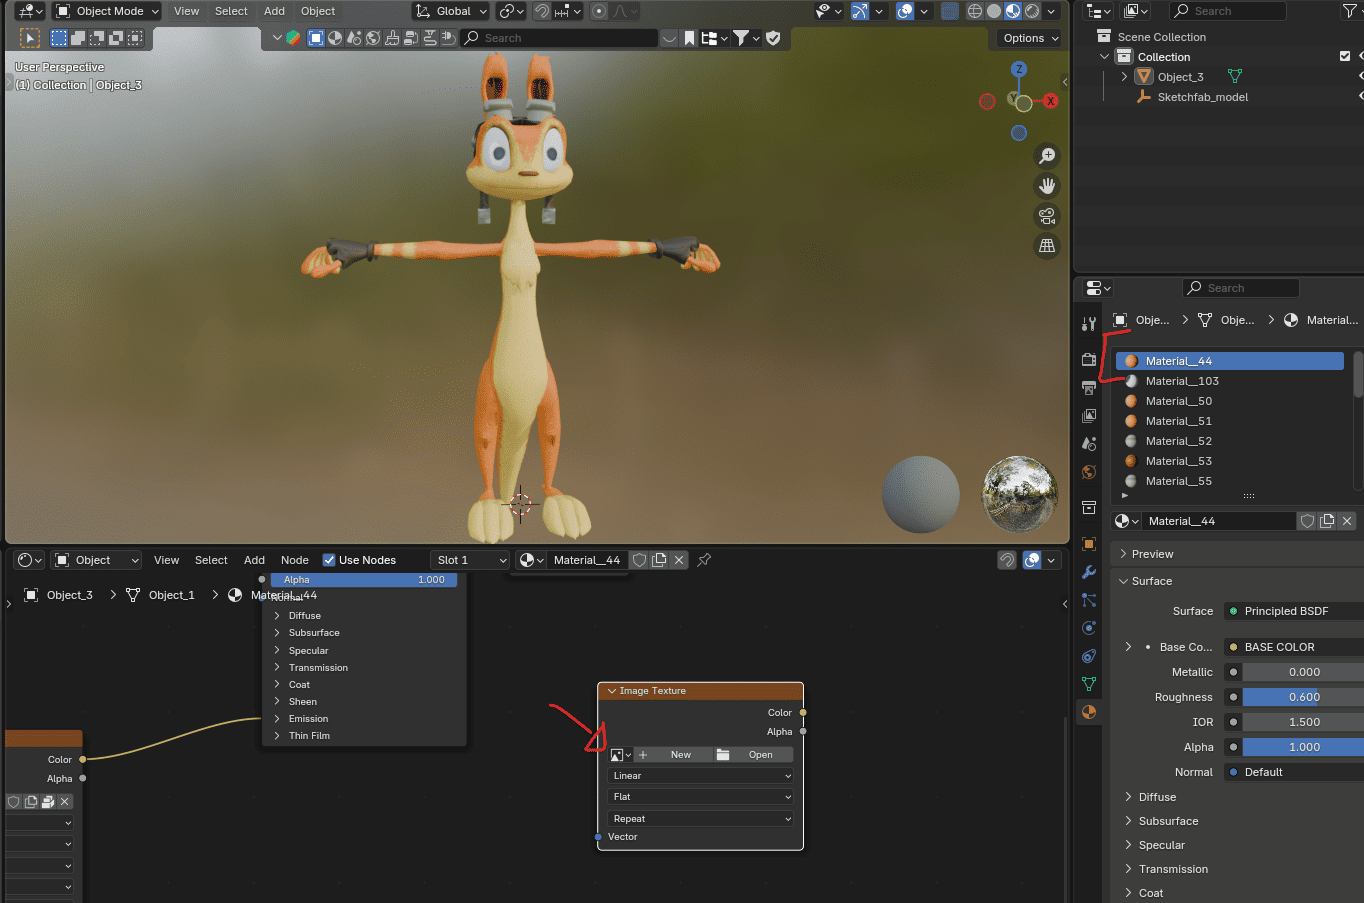
Now select our “one_texture” image from the “picture” icon. You should have something like this
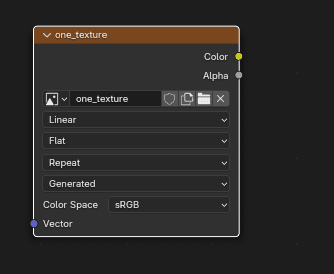
By the way, I like to change the color space to sRGB, the rest leave it as is.
Notice how you have a white highlight around the border of the box? That means it is selected, this is also important for the baking.
Once done, hit ctrl+c to copy the node, and go through each one of the remaining materials in the right side panel list and hit ctrl+v to paste it.
If you did it correctly, you will now have one box like the Image 17 per material, make sure they are all selected.
Step 3
Go to the render tab in the right side panel
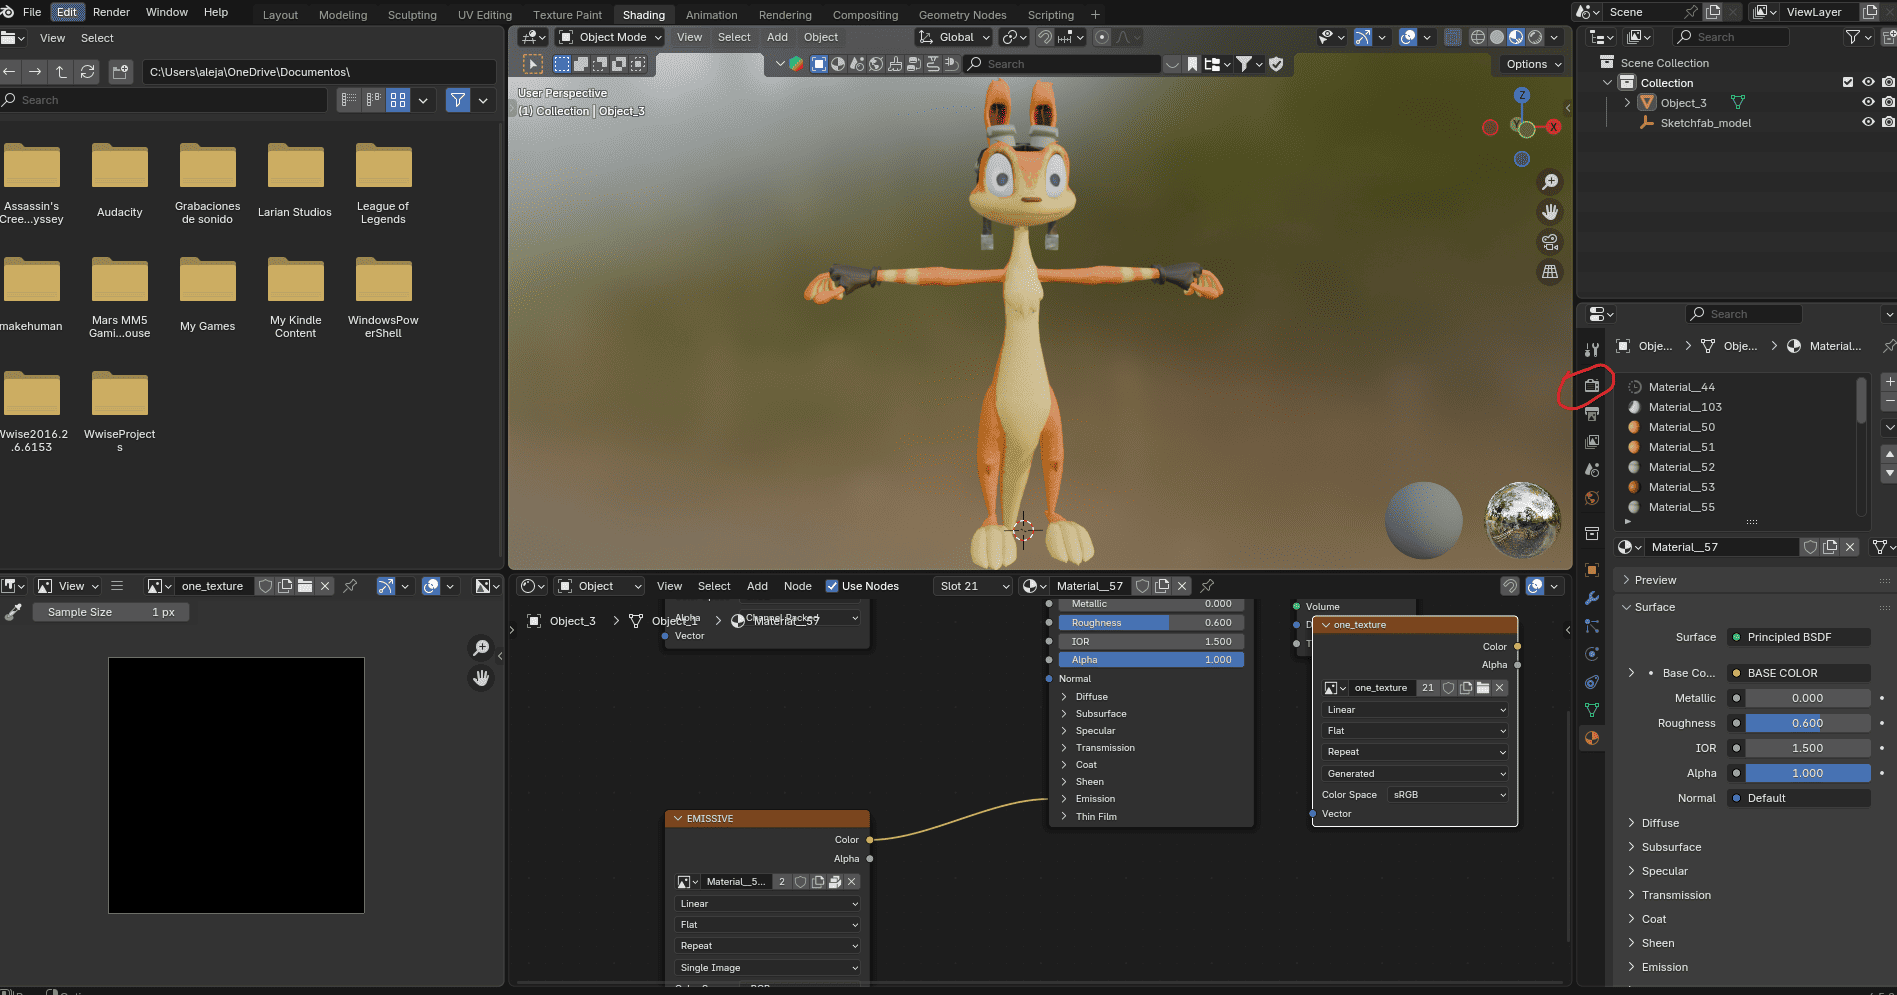
Change the render engine from EEVEE to Cycles since EEVEE doesn’t support baking.
Enter the “Bake” submenu there and select these settings:
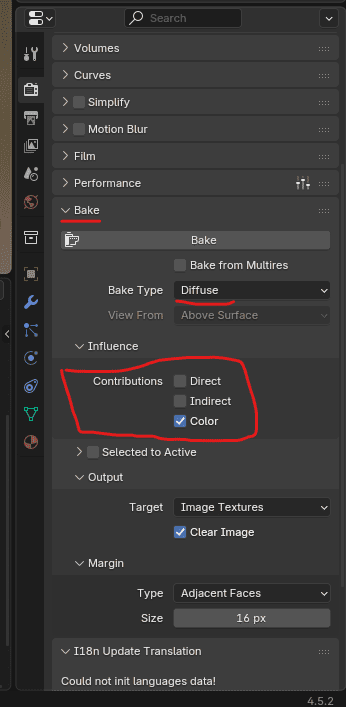
A diffuse map bakes the color of the texture, we disable direct and indirect since we dont want any lighting interfering.
Before hitting “Bake” button, make sure of this- The selected UV map is the one you created new.
- There’s a new selected image texture node for each material.
- Your 3D model is also selected
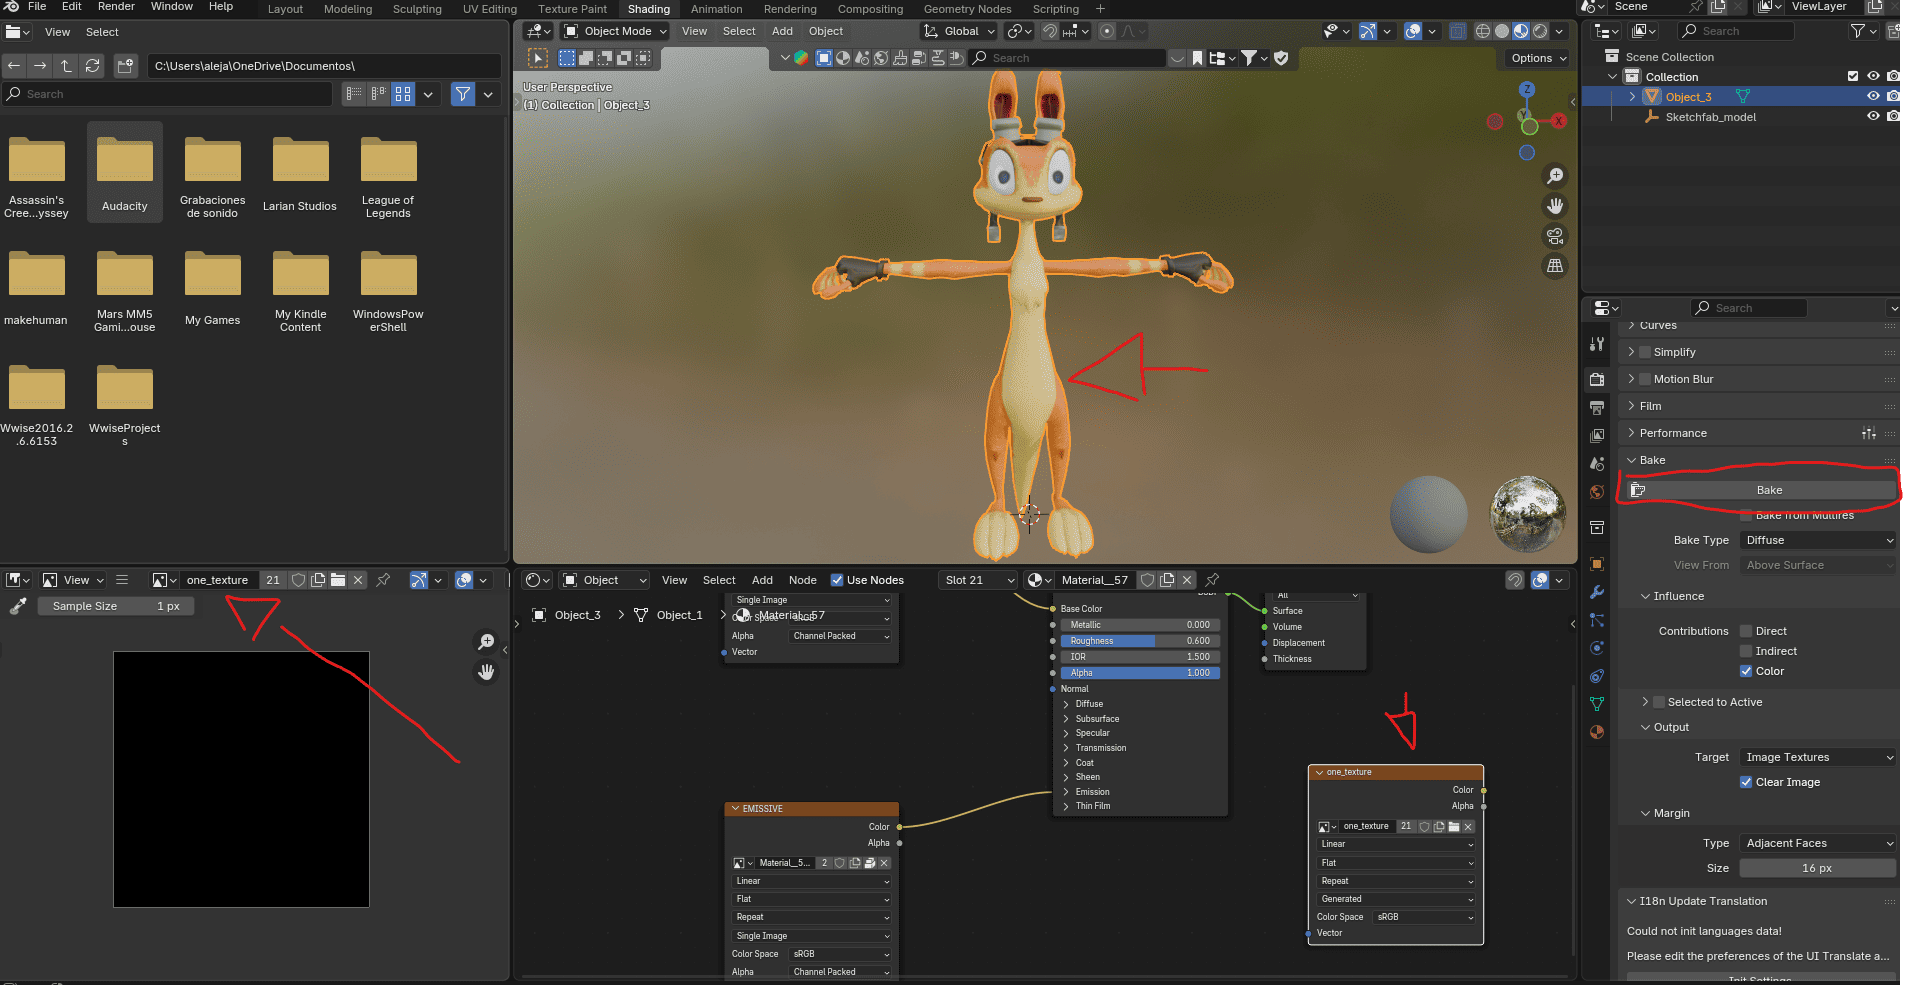
Once ready, hit bake.
If you followed the tutorial correctly, you will have now something like this
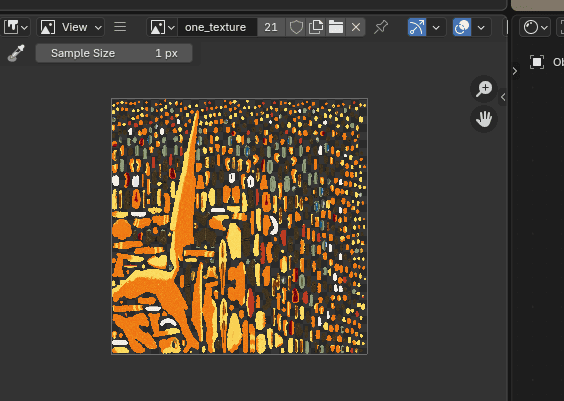
Save the image locally or you will lose it.
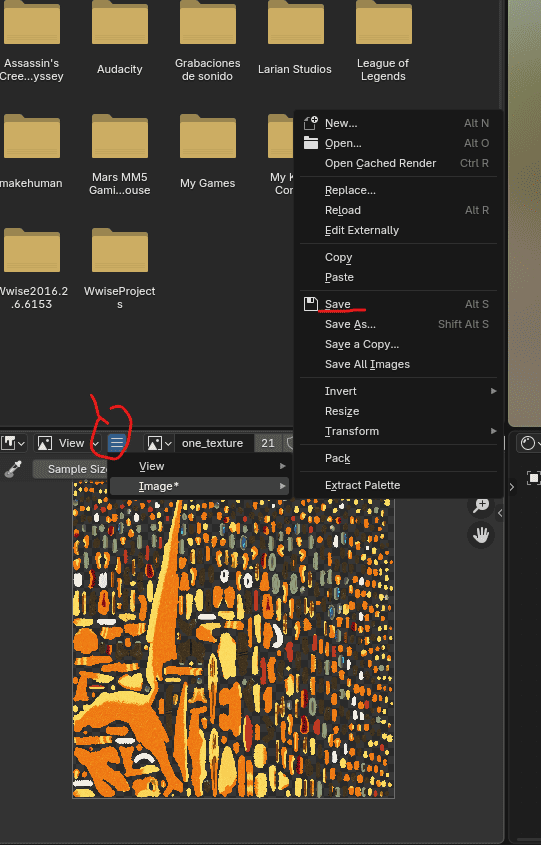
Step 4
Time to clean up and test the result.
Go back to layout view (at the top menu bar), your 3D model should look good by now, let’s mess it up a bit. First, let’s create a new material to hold our new texture.
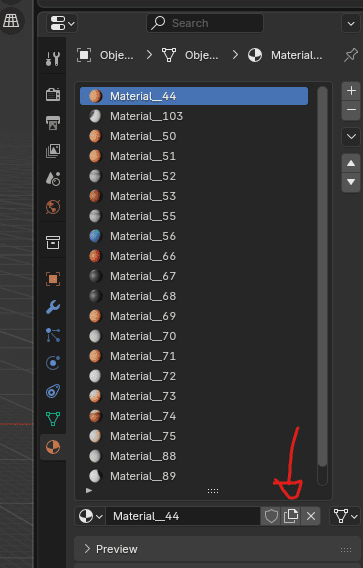
Give it a name, like “one_texture” and switch to the shading layout then put the nodes like in the following image.
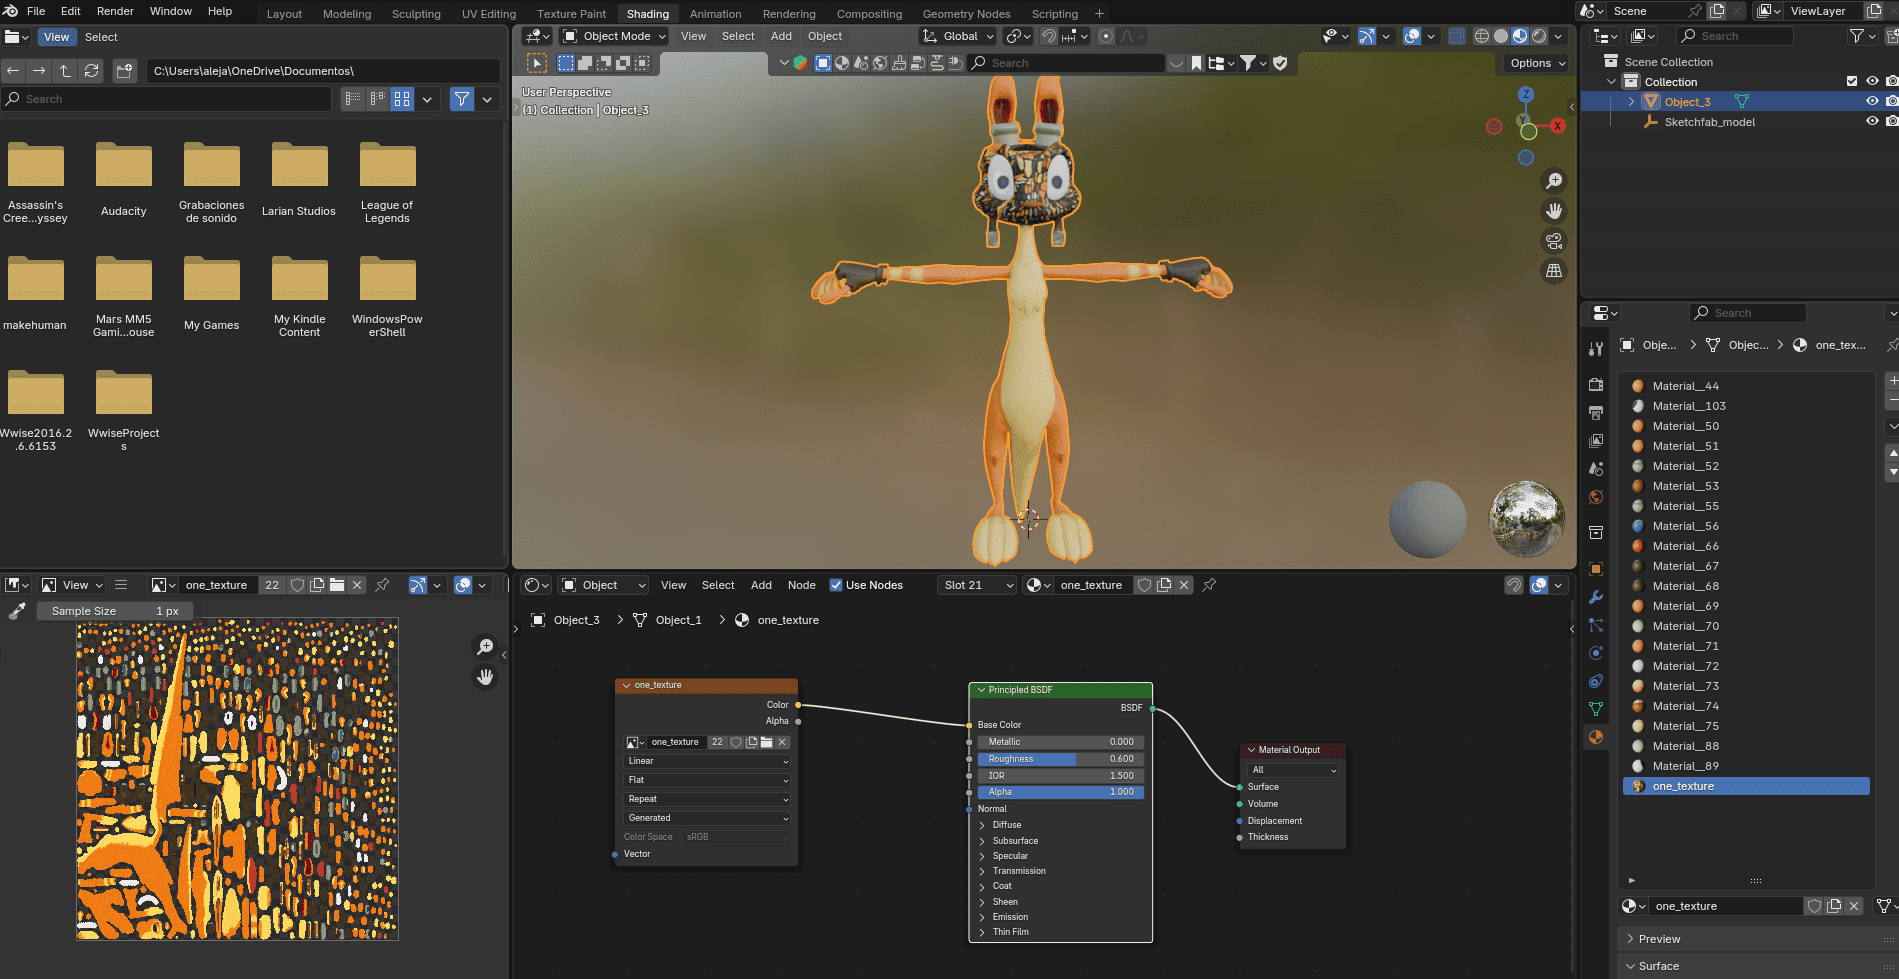
Go back to the layout tab and delete all materials except the one created by us. You will end up with a mess like this
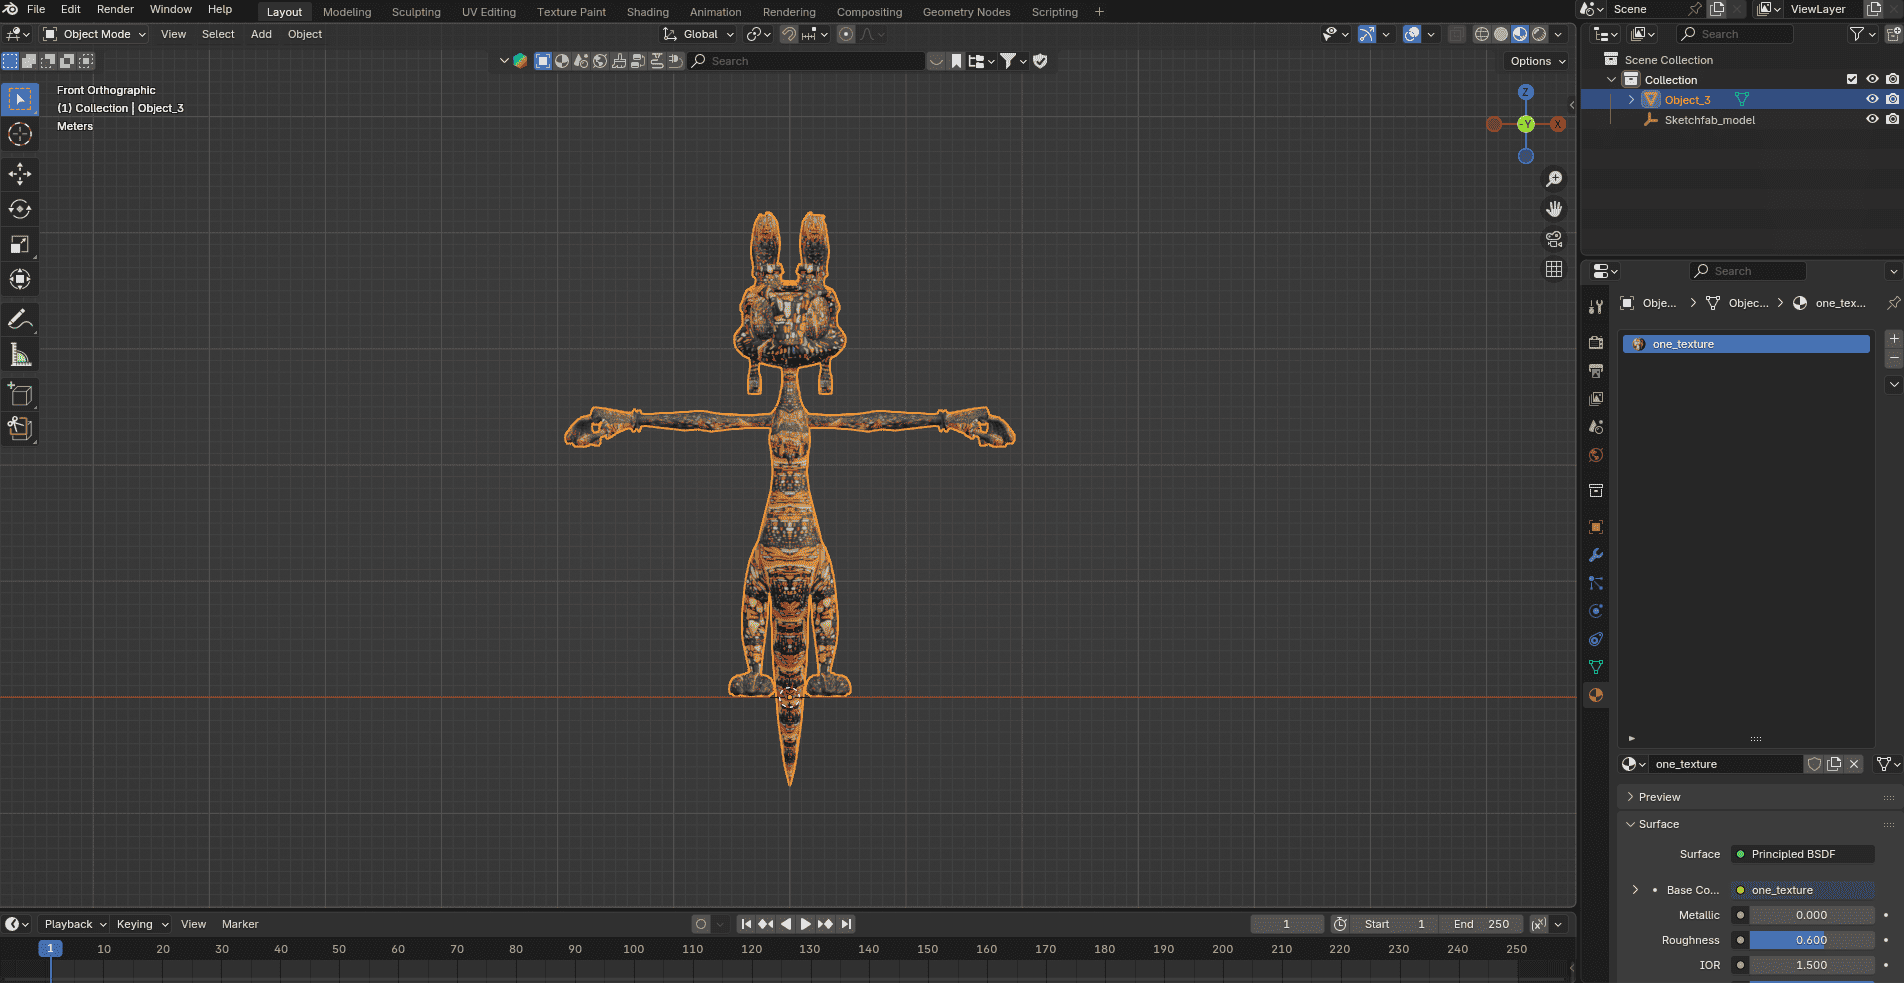
Do you recall the UV map menu back in image 2? swap the camera icon so that your new uv map is the one having it active and see the magic.
Now the final touch, remove the old “UVMap” and rename the new one to the same “UVMap” name. I’m not sure but I read somewhere that the UVMap name is important for the skins to work in league.