
Hero swap part 1: rig your model in Blender
Fit your character to a Deadlock hero's skeleton in Blender, transfer and fix the weights, and export DMX files for ModelDoc.
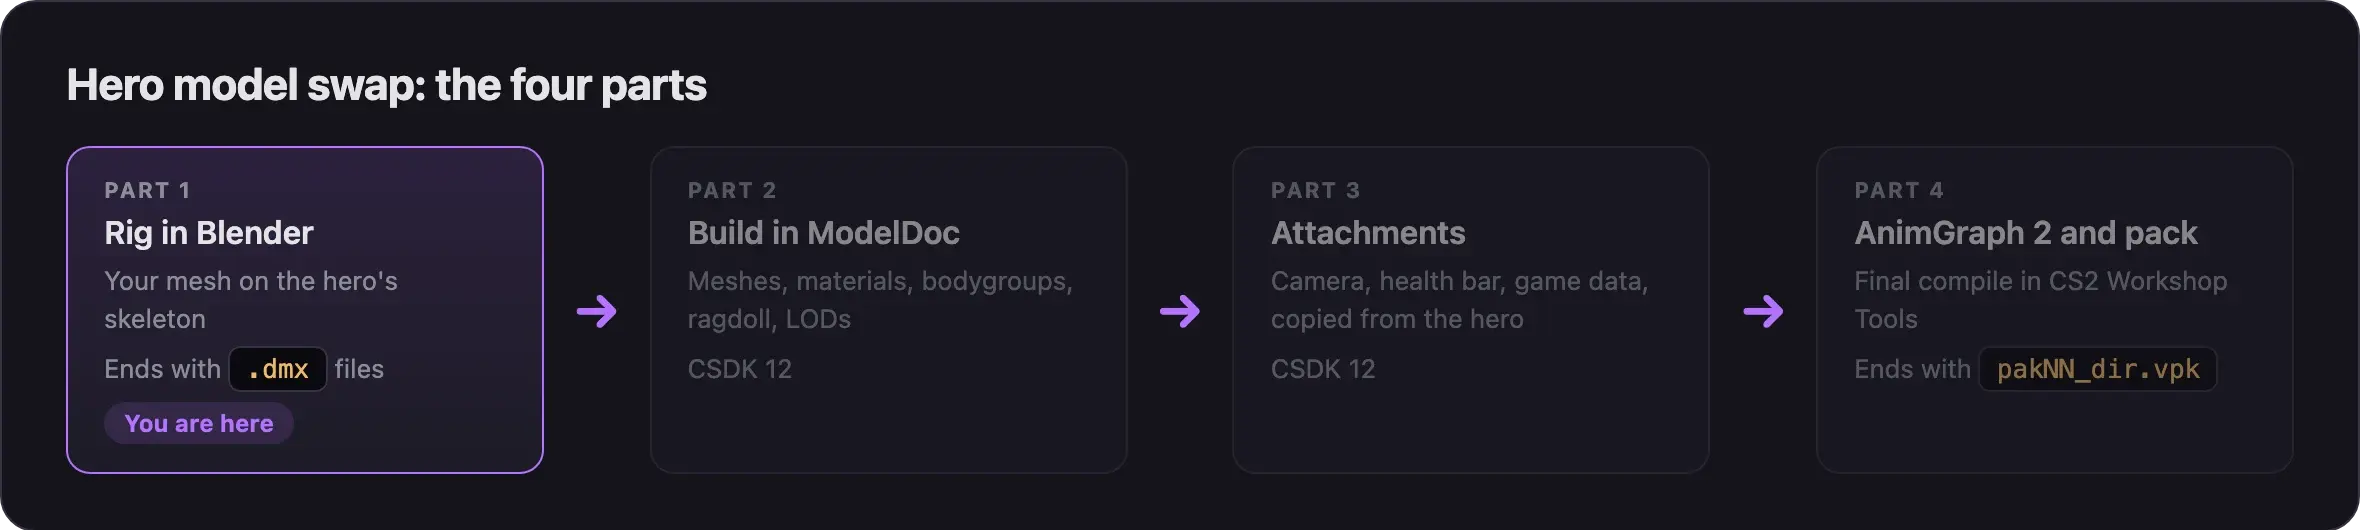
Part 1 of 4. You start with your own character model. You finish with DMX files in your CSDK 12 addon, rigged to the hero's own skeleton. Read Hero model swap: overview first.
What you need

Source 2 Viewer
20.0+CSDK 12
Blender
+ BlenderSource2ToolsMesh Data Transfer
optionalA finished soul container swap
Your own character meshSource 2 Viewer exports the hero. Make an addon for this skin in CSDK 12, named in lowercase with no spaces. The BlenderSource2Tools add-on (Fuji fork) exports DMX files for ModelDoc. Mesh Data Transfer is a free Blender add-on to copy weights. The soul container swap teaches the same tools on a much smaller model. Make the character mesh yourself, or get the artist's permission.
Want hair or a coat that moves? Read Add cloth to a model before you start. Cloth work may need an older Blender.
Watch the walkthrough
Pugzilla's video covers the Blender setup from 3:38 and the DMX export from 20:37.
It was recorded in March 2026, before Source 2 Viewer 20.0. Read the video description: it lists fixes found after recording. Where this page differs, follow this page.
Rig and export
Export the hero
Use the hero you picked in the overview. This guide uses Vyper, whose model sits at models/heroes_staging/viper/viper.vmdl_c. Other heroes are in Hero names and file paths.
You need the hero twice: as a model file for ModelDoc, and as a glTF for Blender.
- Open Source 2 Viewer and open
Deadlock/game/citadel/pak01_dir.vpk. - Go to
models/heroes_staging/viper/. - Right-click
viper.vmdl_cand choose Decompile & export. - Pick the model format (
.vmdl). Save it into your addon at the same path:content/citadel_addons/<addon>/models/heroes_staging/viper/. - Export the glTF as Import a Deadlock model into Blender shows. Save it in a work folder outside your addon.
The decompile writes a .vmdl file plus DMX files for the hero's meshes. Part 2 opens that .vmdl.
Load the hero in Blender
- Import and clean the glTF with the same Blender import guide. Follow route 1 up to and including Fix size and facing.
- Check the result. The hero faces +X, has no animations and no
$clothbones, and the armature is in rest pose. - Scale the hero to Source 2 size. Select the armature and every mesh, press S, type
39.37, and press Enter. - Press Ctrl+A and choose All Transforms.
- Save the
.blendfile.
The 39.37 scale turns meters into inches, the unit the Source 2 tools use. Do it once, here. Then you fit your character at the final size.
Doing the dry run? The overview suggests one full run with the unchanged hero first. Skip to Sort meshes into collections, export the hero's own meshes, and follow parts 2 to 4. Come back here once the plain hero works in game.
Fit your model to the hero
Do not make the hero smaller, thinner, or harder to see. You also see your skin on enemies who play this hero. Its size changes how easy they are to see and aim at. Players treat that as an unfair mod. See What's allowed and how to stay safe.
- Import your character into the same Blender file.
- Delete your character's own armature. Your mesh uses the hero's skeleton from now on.
- Move and scale your mesh until it lines up with the hero's body: head, shoulders, elbows, hips, and knees.
- Keep the overall height and width close to the hero's.
- Select your mesh, press Ctrl+A, and choose All Transforms.
Never edit the hero's bones. Do not move, rename, or delete them. The game plays the hero's animations on those exact bones. You may add new bones for cloth chains, such as a tail or long hair.
Rig your mesh to the skeleton
- Select your mesh, then Shift-click the hero's armature.
- Press Ctrl+P and choose Armature Deform.
- Copy the weights from the hero's body mesh to your mesh. Use Blender's Data Transfer modifier, or the Mesh Data Transfer add-on.
- Switch to Pose Mode and rotate a few bones. Your mesh should follow them.
- Fix the bad spots with weight painting. Strange bending in game almost always comes from weights.
- Move the hero's original meshes into a separate collection. You do not export them.
Rigid parts, such as a helmet or an armor plate, should follow one bone only. In Edit Mode, select the part's vertices, pick that bone's vertex group, and click Assign. Weight small accessories to the nearest bone.
Limit weights to 4 per vertex
Keep each vertex at four bone weights or fewer. The exporter warns you when a vertex has more.
- Select your mesh.
- Switch to Weight Paint mode.
- Choose Weights, then Limit Total. Check that the limit is 4.
Sort meshes into collections
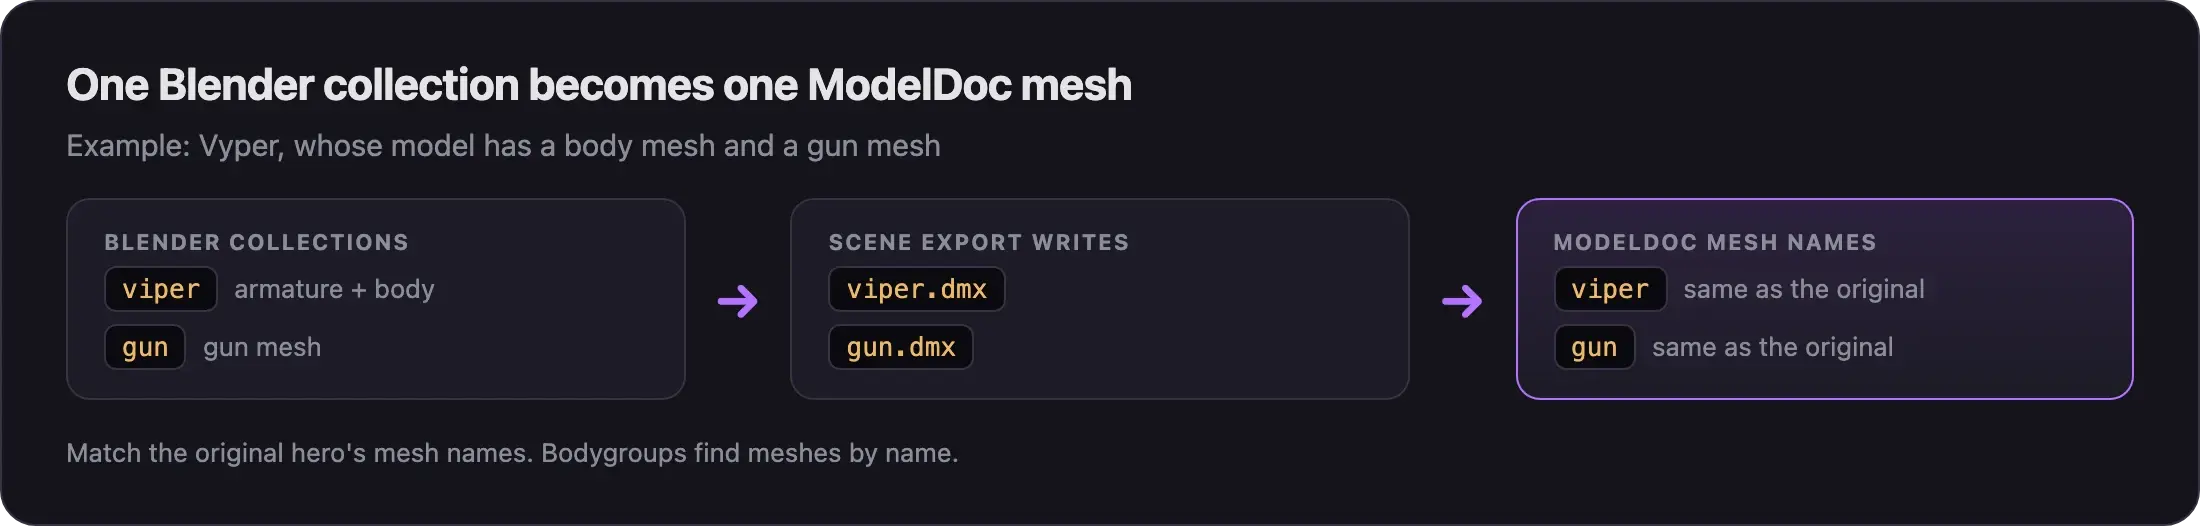
The exporter writes one DMX file per collection. In ModelDoc, each DMX file becomes one mesh.
- Make one collection for each mesh the original hero has. Vyper has a body and a gun, so make
viperandgun. - Put your meshes into the matching collection.
- Put the armature in the body collection.
- Move everything else out of these collections: the hero's old meshes, reference objects, and lights.
Keep these names the same on every export. ModelDoc finds each DMX file by its name.
Check before you export
- Every mesh is parented to the armature and weighted to at least one bone.
- No name ends in
.001. Check meshes, materials, and vertex groups. - Every face has a material. Use short, plain material names. Part 2 matches them by name.
- All transforms are applied.
- The armature is in rest pose.
- The file has exactly one armature.
- No
$clothbones are left.
Export DMX
- Open Scene Properties and find the Source Engine Export panel.
- Set Export Format to DMX.
- Set the DMX version to Binary 9 and the model format to Model 22, the ModelDoc format.
- Set Export Path to a
dmxfolder inside the hero folder of your addon:content/citadel_addons/<addon>/models/heroes_staging/viper/dmx/. - In Source Engine Exportables, untick the animations. Leave only your mesh collections ticked.
- Choose Export, then Scene Export.
- Read the warnings. Fix missing materials and too many weights. Most other warnings are harmless.
The separate dmx folder keeps your files apart from the decompiled ones. Heroes use DMX, not FBX: DMX keeps the scale and supports cloth.
Common problems
More fixes are in Model and skin problems.
Next steps
Swap in your DMX meshes and rebuild bodygroups, materials, the ragdoll, and LODs.
Credits
This guide is based on the work of these creators. Check out their original guides.
- Video: (Read Desc) Deadlock - General Model Swap Steps by Pugzilla.
- Video: Bat Drifter from Start to Finish: Part 1 - Make it exist first, make it pretty later by Basilisken.
- Guide: From Start to Finish (Fuji's Asset Replacement Guide) by Fuji.
- Guide: How to Model Replace for Dummies + Blender Steps by Axelliax.
- Guide: Neutral's General Guide for Modding Deadlock (Models, Textures, Sounds) by Neutraldrift.
- Tool: BlenderSource2Tools by FellOffFuji.