
Import a Deadlock model into Blender
Export a hero or prop from Source 2 Viewer and open it in Blender at the right size and facing, ready to edit or use as a reference.
Get a Deadlock hero or prop into Blender, cleaned up and ready to edit or use as a size reference. Every model swap starts here.
What you need

Use Source 2 Viewer 20.0 (August 2026) or newer. Older builds export models differently. Blender's glTF importer is built in. SourceIO is a Blender add-on that reads compiled models. Look up the hero's folder in the hero names list.
This guide uses Vyper as the example: models/heroes_staging/viper/viper.vmdl_c. Vyper's model has few special parts, so it is a good first import.
Pick a route
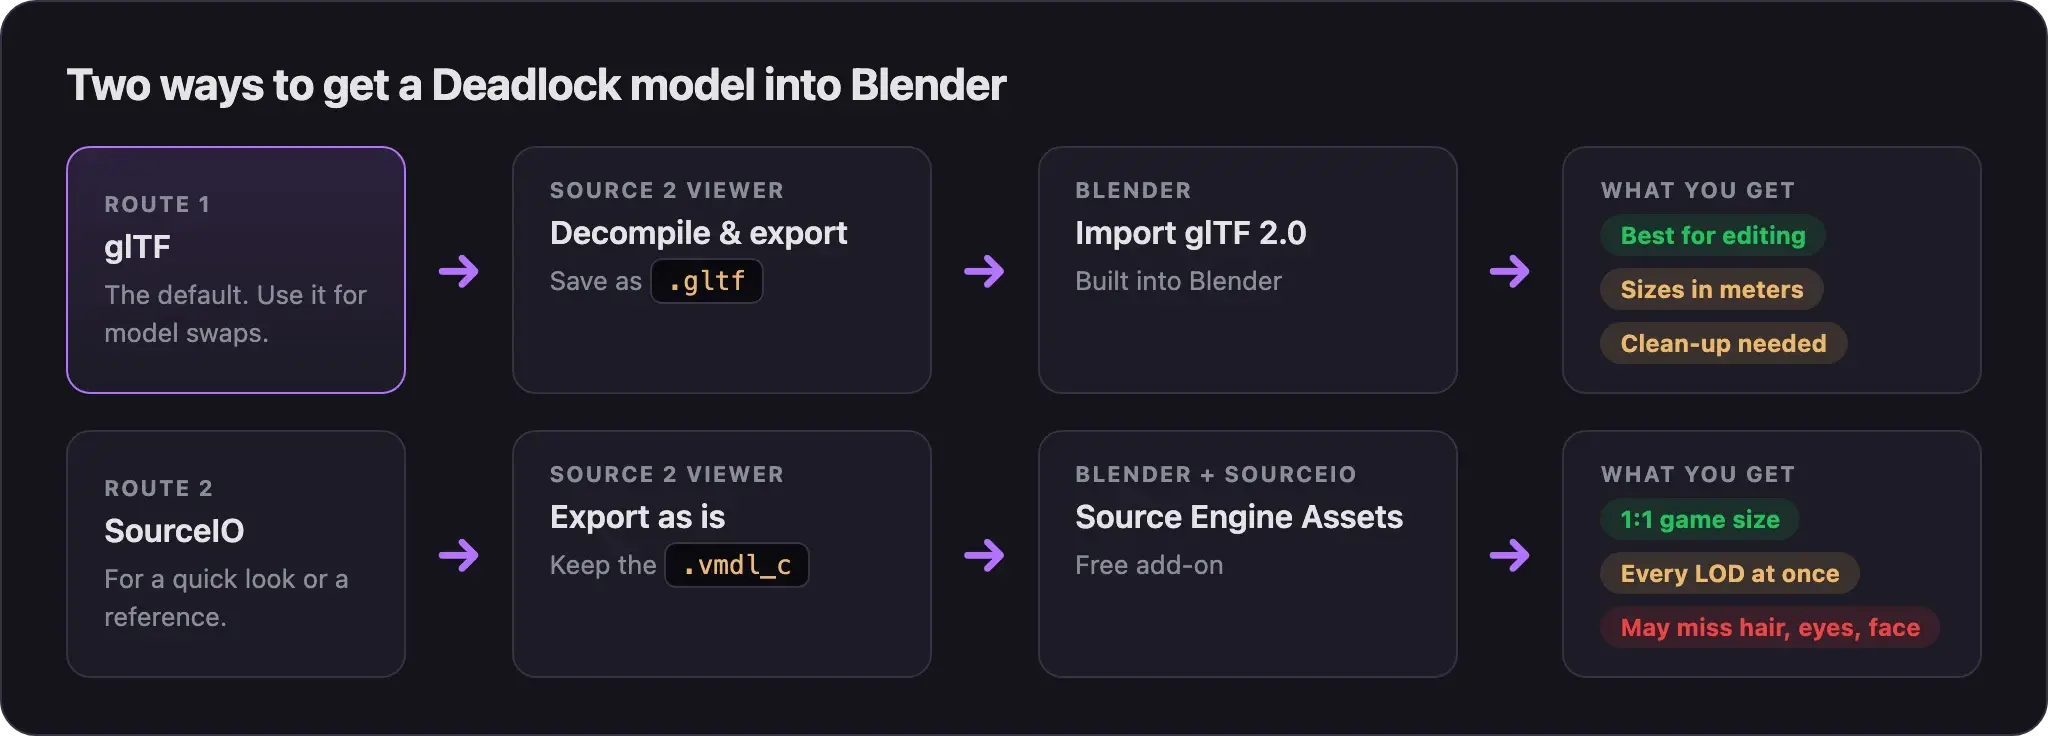
Use glTF for anything you will edit and send back to the game. Use SourceIO when you only want a quick look or a reference.
Pugzilla's model swap video shows this route from 3:38.
Pugzilla recorded it in March 2026, before Source 2 Viewer 20.0 changed how glTF exports store axes. The bone resize and rotate steps may not match what you see. Follow the steps below.
Export from Source 2 Viewer
- Make an empty work folder outside your CSDK 12 addon, for example
C:\modwork\vyper. - Open Source 2 Viewer and open
Deadlock/game/citadel/pak01_dir.vpk. - Go to
models/heroes_staging/viper/. - Right-click
viper.vmdl_cand choose Decompile & export. - Set Save as type to glTF. Pick
.gltf, not.glb. A.glbfile stops at 2 GB. - Save into your work folder. Large heroes take a while.
Import into Blender
- Open Blender. Select everything in the default scene and delete it.
- Choose File, then Import, then glTF 2.0 (.glb/.gltf) and pick your
.gltffile. - In the import options on the right, tick Disable Bone Shape. Without it, every bone gets a big sphere shape.
- Import the file.
Clean up
- In the Outliner, delete
glTF_not_exportedand anyIcosphereobject. - Delete the animations. Set the Outliner's display mode to Blender File and open Actions. Select every action, right-click, and choose Delete. Blender gets much faster.
- Delete the cloth helper bones. Select the armature and press Tab for Edit Mode. Click one bone whose name starts with
$cloth, press Shift+G, and choose Prefix. Press X to delete them all. - Delete their vertex groups too. Select each mesh, open the Object Data tab, and remove every group that starts with
$cloth. - Fix shading seams. Select each mesh, press Tab, and press A. Choose Mesh, then Normals, then Reset Vectors. Then press M, choose By Distance, and set the distance to 0.0001.
- Put the armature in rest pose. Select it, switch to Pose Mode, press A, and choose Pose, then Clear User Transforms.
Source 2 Viewer adds the $cloth bones to show cloth. They can crash ModelDoc later, so remove them now.
Fix size and facing
glTF stores sizes in meters. The Source 2 tools work in inches. One meter is 39.37 inches.
- Check the bones. If they look huge next to the mesh, shrink only the bones. Select the armature, press Tab, and press A. Set Transform Orientation to Local and Pivot Point to Individual Origins. Press S and scale down until the bones fit inside the body. Press Tab to leave Edit Mode.
- Check the facing. Press numpad 7 for Top view. The hero should face +X, the red axis. If not, rotate the armature around Z until it does. Older guides rotate it 90 degrees.
- Select the armature and meshes. Press Ctrl+A and choose All Transforms.
- Save the
.blendfile.
If you will export DMX for ModelDoc, there is one more step. Right before export, scale the armature by 39.37 and apply all transforms again. Hero swap part 1 walks through it. The soul container swap exports FBX and skips this step.
SourceIO is a free Blender add-on by REDxEYE. It reads compiled .vmdl_c files directly. Neutraldrift shows the whole route in this video from September 2026.
- Download the latest release zip from the SourceIO releases page.
- In Blender, open Edit, then Preferences, then Add-ons. Open the menu at the top right, choose Install from Disk, and pick the zip. Do not unzip it.
- In Source 2 Viewer, right-click
viper.vmdl_cand choose Export as is. Save it in your work folder. Export the hero'smaterialsfolder the same way. - In SourceIO's settings, mount Deadlock with Add new resource. This lets SourceIO find the textures.
- Choose File, then Import, then Source Engine Assets. In the Source 2 list, pick the
.vmdl_cimporter and select your file. - In the import options, keep materials on and turn on mount discovered content. Set World Scale to 1.
- Search the Outliner for
lod. Delete thelod1,lod2, andlod3meshes.
At World Scale 1, the model comes in at game size. Neutraldrift uses it so you can export later without the 39.37 step.
SourceIO can miss parts that only use vertex color, such as white hair, eyes, or a face. If that happens, use the glTF route for that hero.
What the export leaves out
| Left out | What to know |
|---|---|
| Lower LODs | glTF only has the most detailed version (LOD0). You build the lower LODs later in ModelDoc. |
| Hitboxes | glTF does not export them. They stay in the decompiled .vmdl that ModelDoc uses, and you never change them. |
| Cloth motion | Cloth bones come in stiff. You set up cloth again with Add cloth to a model. |
| Animations to work with | You deleted them in the clean-up. Hero animations live in the hero's clips folder. For animation work, see Replace an animation. |
| Exact shading | Materials come in as a close match, not the real thing. Always check your work in game. |
Common problems
Next steps
Start here. The easiest model swap: one bone, one material.
Fit your character to a hero's skeleton and export DMX.
Credits
This guide is based on the work of these creators. Check out their original guides.
- Video: (Read Desc) Deadlock - General Model Swap Steps by Pugzilla.
- Video: How To import Deadlock Models into Blender with Source IO and Souce2viewer by Neutraldrift.
- Guide: From Start to Finish (Fuji's Asset Replacement Guide) by Fuji.
- Guide: Neutral's General Guide for Modding Deadlock (Models, Textures, Sounds) by Neutraldrift.
- Guide: Importing GLTF format models to blender from Deadlock Modding Notes.
- Docs: Format Support and Export Fidelity by the ValveResourceFormat team.
- Tool: SourceIO by REDxEYE.