
Optimize Models That Exceed League's Limits
Reduce a model's joint and vertex count in Maya while preserving skin weights and League of Legends export compatibility.
This guide shows you how to reduce a model's joint and vertex count in Maya while preserving most of its skin weights.
If you only want to make a 3D model swap and do not plan to edit animations, skip to Reduce mesh geometry.
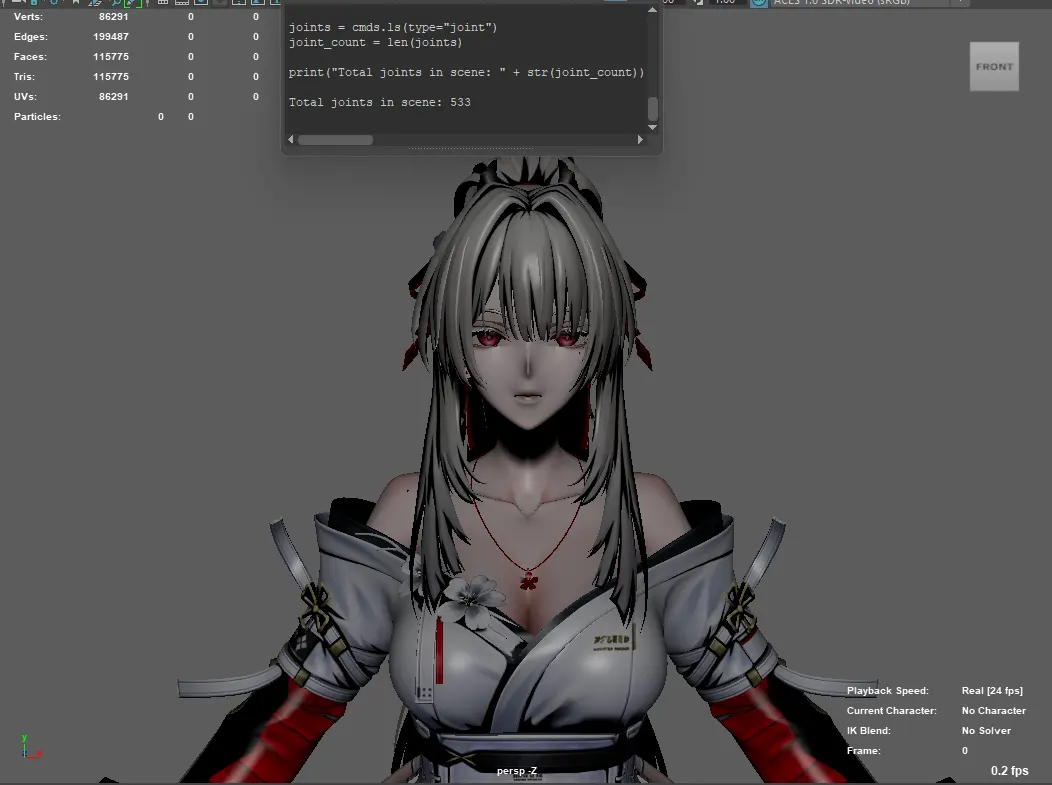
1. Reduce the joint count
Use this script to move skin weights from one or more source joints to matching target joints.
- Copy the block below into Maya's Script Editor.
- Replace the example names in
source_jointsandtarget_joints. Each source joint must line up with the target joint in the same list position. - Select the skinned mesh and run the script.
import maya.cmds as cmds

def transfer_weights_multi(source_joints, target_joints):
    if len(source_joints) != len(target_joints):
        cmds.error("Source and target joint lists must be the same length.")

    # Get selected mesh
    sel = cmds.ls(sl=True, type="transform")
    if not sel:
        cmds.error("Select the skinned mesh first.")
    mesh = sel[0]

    # Find skinCluster
    skin_cluster = None
    history = cmds.listHistory(mesh)
    for node in history:
        if cmds.nodeType(node) == "skinCluster":
            skin_cluster = node
            break

    if not skin_cluster:
        cmds.error("No skinCluster found on selected mesh.")

    # Get all vertices once
    verts = cmds.ls(mesh + ".vtx[*]", fl=True)

    for source_joint, target_joint in zip(source_joints, target_joints):
        # Ensure target joint is an influence
        influences = cmds.skinCluster(skin_cluster, q=True, inf=True)
        if target_joint not in influences:
            cmds.skinCluster(skin_cluster, e=True, ai=target_joint, lw=False, wt=0)

        for v in verts:
            src_w = cmds.skinPercent(skin_cluster, v, q=True, t=source_joint)
            if src_w > 0:
                tgt_w = cmds.skinPercent(skin_cluster, v, q=True, t=target_joint)
                cmds.skinPercent(
                    skin_cluster,
                    v,
                    tv=[
                        (target_joint, tgt_w + src_w),
                        (source_joint, 0)
                    ]
                )

        print("Transferred weights from {} to {}".format(source_joint, target_joint))

    print("All joint transfers complete.")


# ===== USAGE =====
# 1. Select the skinned mesh
# 2. Replace joint names below

source_joints = [
    "_Bone_Hair045_L",

]

target_joints = [
    "_Bone_Hair044_L",

]

transfer_weights_multi(source_joints, target_joints)
Move each source joint after the script finishes. It should no longer deform the mesh. Move the target joint as well to confirm that it now carries the transferred weight.
One joint can influence several meshes. Select each affected mesh and run the script again before removing that joint.
The script transfers weights but does not delete joints. Process every affected mesh first. Then check each source joint's descendants and delete only the joints you have confirmed are no longer needed.
Run this script to check the scene's total joint count:
import maya.cmds as cmds

# Find all joint nodes in the entire scene
joints = cmds.ls(type='joint') or []
print(f"Total Joints in Scene: {len(joints)}")
If the count is still above the export limit, repeat the transfer with another safe source and target pair.
2. Split meshes and copy skin weights
- Select your mesh and press
Ctrl+Dto duplicate it. - Select the duplicated group, then use Separate Mesh by Material on the Lemon 3D shelf.
- Select every separated mesh in the group and bind them to the original SKL. In the Bind Skin options, choose Closest Distance for the fastest result.
- Select the original mesh, then a separated mesh, and copy the skin weights. Repeat this for every material.
- Divide the mesh group into smaller groups. Drag the SKL into each group, then export it. You can remove any material you do not want to include at this point.
- Open a new Maya scene, then drag all the SKL and SKN files you exported back into it.
3. Reduce mesh geometry
Start with geometry inside the character's clothing. League's top-down camera usually will not show it in game.
- Select the mesh. Hide the other meshes to make the next steps easier.
- Press
F11, then double-click the faces you want to remove. - Hold the right mouse button, drag down to assign a new material, and choose any material in the menu.
- Open Hypershade and confirm the new material's name.
- Return to the skin group, export it, then import it again.
- Find the new geometry or material group in the Outliner. Unbind the unwanted geometry from the skin, then delete it.
Alternatively, use Maya's Reduce tool to lower the mesh quality, then bind the reduced mesh back to its original SKL.
If the scene exceeds the joint limit, finish reducing the joint count before you split or export the mesh. Otherwise, the model cannot export. For a simple 3D model swap that does not change animations, you can go directly to section 3.