
Replace portraits, icons, and item art
Make custom hero portraits, minimap icons, ability icons, and item art with CSDK 12's image template, then rename and pack the files.
Replace hero portraits, minimap icons, ability icons, or item art with your own: compile your images with CSDK 12's image template, rename them, and pack them as a mod. First set up your tools with Set up your creator tools.
What you need

Source 2 Viewer shows the original images, their names, and their sizes. CSDK 12 compiles your images with its image template. Your image editor must save PNG with transparency. Draw the art yourself or use art you have permission to share.
Keep it fair
Icon mods change art only. Other players see the normal game.
- Keep icons at their normal size and about as easy to read as the originals.
- Never make objective or enemy icons brighter, bigger, or glowing.
- Never add information the game hides, such as timers or health numbers. The full list is in What's allowed and how to stay safe.
Which image is which
Hero images live in panorama/images/heroes/. Each file name starts with the hero's image codename, which can differ from the hero's other codenames in Hero names and file paths. For Haze it is haze:
| File | Where it shows |
|---|---|
haze_card_psd.vtex_c | Hero portrait at the top of the HUD |
haze_card_critical_psd.vtex_c | Portrait when the hero is low on health |
haze_card_gloat_psd.vtex_c | Kill streak portrait |
haze_sm_psd.vtex_c | Small icon, used in the kill feed |
haze_mm_psd.vtex_c | Minimap icon |
haze_vertical_psd.vtex_c | Tall portrait on hero select |
backgrounds/haze_bg_psd.vtex_c | Hero background |
Other images:
| Images | Folder |
|---|---|
| Ability icons | panorama/images/hud/abilities/<codename>/ |
| Item art | panorama/images/upgrades/ and panorama/images/items/ |
Make the mod
Pick a route. The full workflow works for every image. The quick option builds the mod in your browser, with no CSDK 12.
This video by Pugzilla follows the same CSDK 12 steps as this guide.
The video was made before the September 2026 update. The CSDK 12 launcher looks different now, but the steps work the same way.
Check the original size
Your image must be the exact same size as the original.
- Open
Deadlock/game/citadel/pak01_dir.vpkin Source 2 Viewer. - Go to
panorama/images/heroes/. - Double-click the image you want to replace. Write down its width and height.
- Repeat this for every image you plan to replace. Each image type has its own size.
- Optional: right-click the image and choose Decompile & export to get a PNG to use as a guide.
Duplicate the image template
CSDK 12 comes with a ready-made image addon called hero_image_template.
- Open the CSDK 12 launcher. Keep Steam running.
- Right-click hero_image_template and choose Duplicate Addon.
- Name the copy in lowercase with no spaces, for example
hazeicons. - Right-click your new addon and choose Explore Content Folder.
- Open
panorama/images/heroes/. It holds the template's sample images for Grey Talon. - Delete the sample images. If you keep them, your mod also changes Grey Talon's icons.
Make your images
- Create a new image at the exact size you wrote down, with a transparent background.
- Draw your art.
- Export it as PNG into
content/citadel_addons/hazeicons/panorama/images/heroes/. - Name it like the original, without the ending. For example,
haze_card_psd.vtex_cbecomeshaze_card.png.
Your addon's content folder now looks like this:
List them in image_compiler.vdata
This file in the template's panorama folder tells CSDK 12 which images to compile. Every image in your mod needs one line in it.
- Open
panorama/image_compiler.vdatain a text editor, such as Notepad. - Find the lines with the template's sample file names.
- Replace each sample name with one of your file names. Include the
.pngending. - Add a line for each extra image. Copy the format of an existing line.
- Save the file.
Each line points at an image in your addon's panorama/images folder. The Haze card line looks like this:
panorama:"file://{images}/heroes/haze_card.png"For ability icons or item art, put the image in the matching folder and change the path in the line.
Compile
- In the CSDK 12 launcher, select your addon and click Launch Tools. The Asset Browser opens.
- Search for
image_compilerin the Asset Browser, not for your image names. - Right-click
image_compilerand choose Recompile, then Full. This compiles every image in the list. - Close the tools.
- Right-click your addon in the launcher and choose Explore Game Folder.
- Open
panorama/images/heroes/. Your compiled.vtex_cfiles are there.
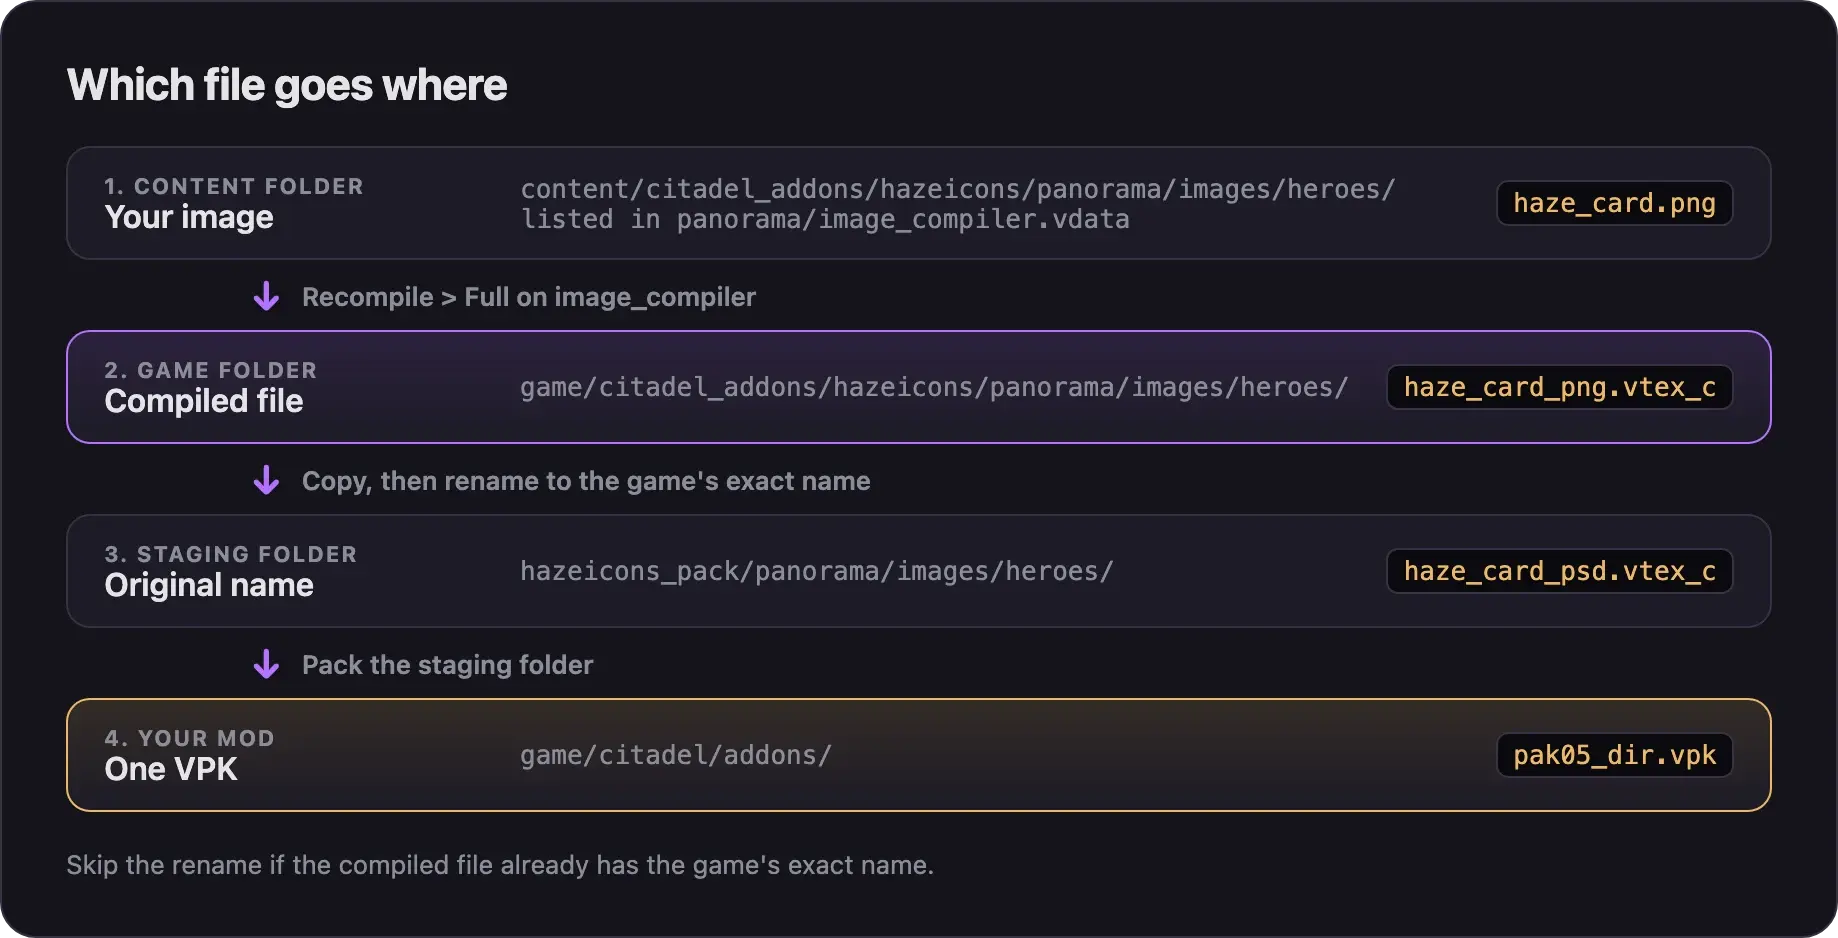
Rename to the original names
The game only loads a file with the exact original name, and the compiled files may not have it.
- Make a staging folder, such as
hazeicons_pack, with the pathpanorama/images/heroes/inside. - Copy only your compiled images into it. Leave out
image_compiler.vdata_c. - Rename each file to the exact original name from Source 2 Viewer. For example,
haze_card_png.vtex_cbecomeshaze_card_psd.vtex_c.
This rename step comes from guides made before the September 2026 update. If your files already have the original names, skip it.
Pack and test
- Pack your staging folder into a VPK with Pack your mod into a VPK.
- Load the mod and check every image in game with Test your mod in game.
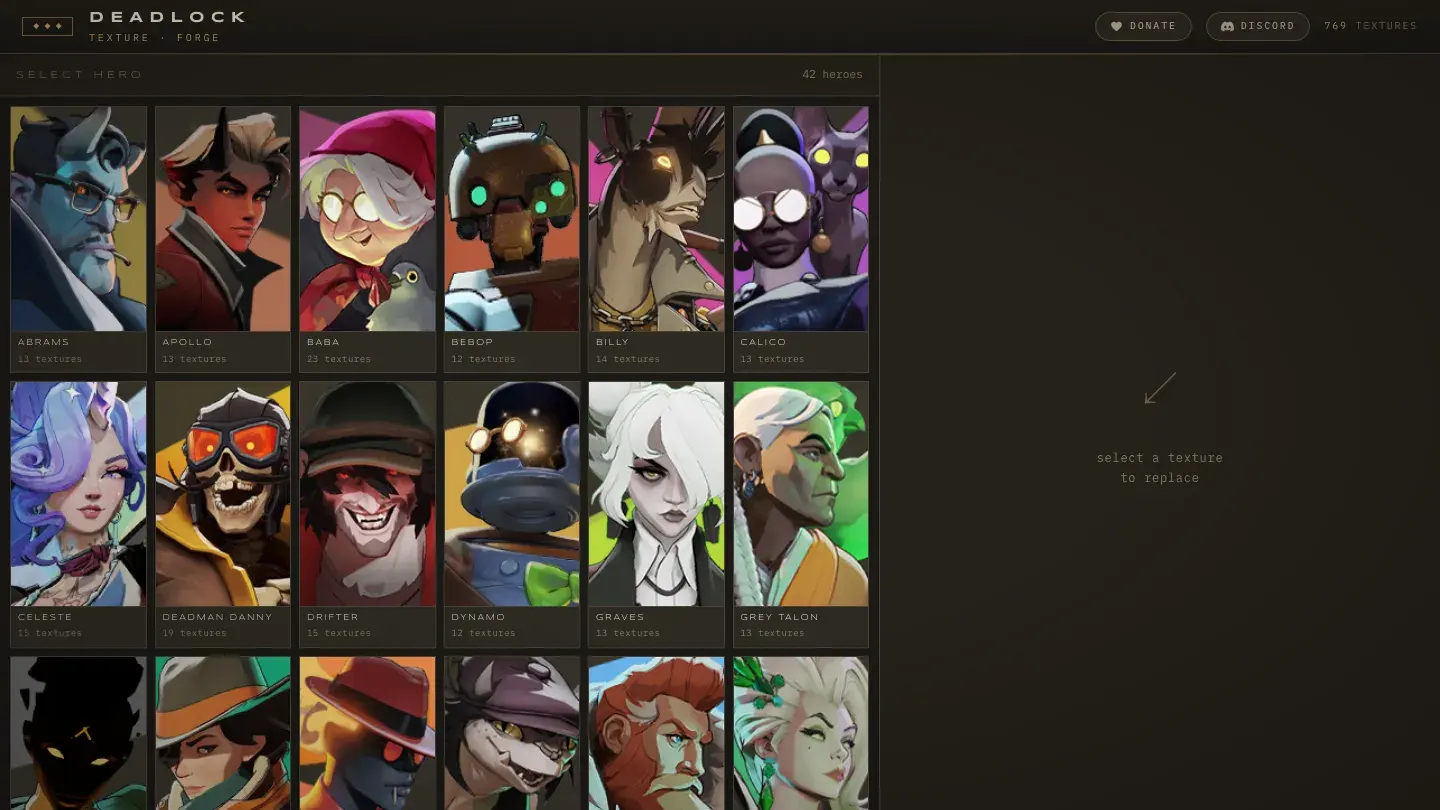
Deadlock Forge builds image mods in your browser, with no CSDK 12. Other browser tools are in Make mods without installing tools.
- Open Texture Forge for portraits, ability icons, and minimap icons. Open Item Forge for shop item art.
- In Texture Forge, pick the hero, then the image you want to replace. In Item Forge, pick the item from the Weapon, Vitality, or Spirit tab.
- Upload your image as PNG, JPG, or WebP.
- Download the VPK it builds.
- Rename it to a name like
pak05_dir.vpkif needed. The rules are in Pack your mod into a VPK. - Install it with Deadlock Mod Manager or by hand.
DeadMod is another browser tool that can replace portraits. RedMser's DeadMod video shows it from 1:39.
Common problems
More fixes are in Errors when making mods.
Next steps
Rename the items whose art you changed.
Move or restyle one part of the HUD with Panorama CSS.
Credits
This guide is based on the work of these creators. Check out their original guides.
- Video: (Read Desc) Deadlock - Custom Hero Icons Tutorial by Pugzilla.
- Guide: How to Image Replacement for Dummies by Axelliax.
- Guide: Compiling UI Textures from Deadlock Modding Notes.
- Data: GameTracking-Deadlock by SteamTracking, for the image names and folders.
- Tool: Deadlock Forge by Sirsyorrz.
- Video: DeadMod: Make new Deadlock texture mods in minutes by Red Mser.