
Add cloth to a model
Make hair, coats, and skirts move on your custom model with cloth chains or a proxy cloth mesh, set up in Blender and ModelDoc.
Make tails, hair, coats, and skirts move on your custom hero model. You set up cloth in Blender and ModelDoc while you build the model. Finish the hero swap up to part 2: build the model in ModelDoc first.
What you need
Use a DMX exporter such as BlenderSource2Tools (Fuji fork). For proxy cloth, you also need a way to copy vertex groups between meshes. Blender's own Data Transfer works. Hoxdolum's proxy cloth video uses the Mesh Data Transfer add-on, a free Blender extension.
Pick a Blender version
Sources disagree on the best Blender version for cloth:
| Source | What it says |
|---|---|
| Pugzilla's March 2026 model swap video | Use Blender 4.2 for cloth |
| Hoxdolum's 2024 cloth video | Newer Blender versions cap the collision radius map at 1 |
| The current Fuji fork | Supports Blender 4.4 and newer. For Blender 4.1 to 4.3.2, its notes point to the older release 3.3.1_2c |
Use Blender 4.2 with Fuji fork 3.3.1_2c for cloth until newer versions are tested.
Cloth chains or proxy cloth
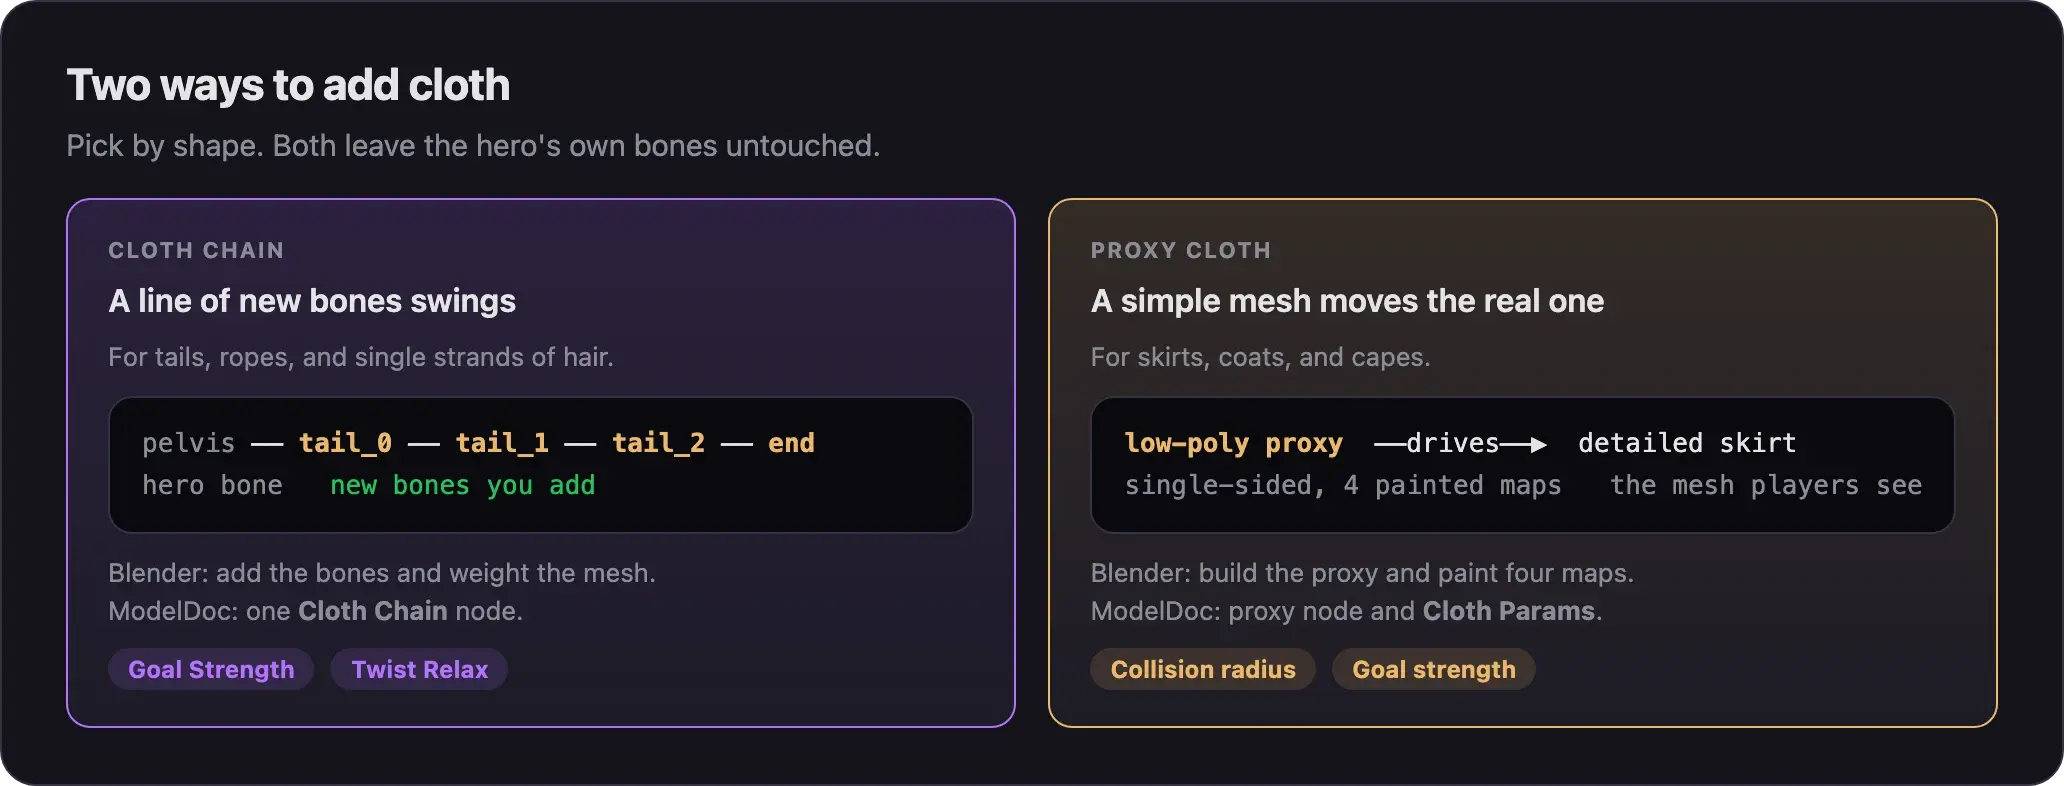
| Method | What it is | Use it for |
|---|---|---|
| Cloth chain | A line of new bones that swings | Tails, ropes, and single strands of hair |
| Proxy cloth | A simple, low-poly mesh that moves a detailed one | Skirts, coats, and capes |
Before you start
- Never move, rename, or delete the hero's own bones. Adding new bones for cloth is fine.
- Keep the cloth close to the hero's outline. A huge cape or a wide skirt changes the hero's size on screen, and size changes are off limits.
- Source 2 Viewer only roughly rebuilds cloth when it decompiles a model. Use the original model's cloth nodes as a reference, not as finished settings.
- Save a copy of your
.blendfile before each export.
Add a cloth chain
Basilisken adds a cloth chain to a tail in this video, from 51:49.
In Blender:
- Select the hero armature and go to Edit Mode.
- Add new bones in a line, starting from the hero bone the cloth hangs from. For a tail, the video starts at the pelvis.
- Connect each bone to the one before it. The video names the last bone
end. - Weight the cloth part of your mesh to the new bones. For a quick start, parent it with With Automatic Weights.
- Export the DMX the same way as in part 1 of the hero swap.
In ModelDoc:
- Load the new bones. In the video, the author deletes the Skeleton node and adds a new skeleton from the DMX, then compiles.
- Add a Cloth Chain node. Pick the first bone of the chain.
- Turn on the simulation preview. Then turn on wobble preview, so the chain keeps moving while you orbit the camera.
- Set Twist Relax to 1, so the bones do not twist.
- Raise Goal Strength to about 7 to make the chain less floppy. Then lower it bone by bone toward the tip.
- Compile.
Build a proxy cloth mesh
Hoxdolum builds a proxy for a hero's skirt in this video.
The ModelDoc cloth steps are likely unchanged. Its Blender version advice is out of date, so follow the version advice above.
Make the proxy
- Add a new mesh at the world origin. For a skirt, the video starts from a cylinder with 32 vertices.
- Switch to Wireframe view. Shape the mesh roughly over the cloth.
- Keep it low-poly and single-sided: no thickness and no double faces.
- Add a few edge loops where the cloth needs more control, such as the hem.
- Keep the proxy as its own object.
- Choose Object, then Apply, then All Transforms.
- Add an Armature modifier that points at the hero armature.
- Copy the vertex groups from the real cloth mesh onto the proxy. Use World space and Vertex Groups.
- Pose the armature in Pose Mode. Check that the proxy follows.
Paint the four maps
- In the Source Engine Export panel, set DMX to Binary 9 and Model 22. The float map options appear.
- Add the four maps in the table below.
- Paint each map in Weight Paint mode. The Gradient tool works well: Linear for a smooth fade, Radial for one spot.
| Map | What it controls | How to paint it |
|---|---|---|
| Cloth enable | Which parts move as cloth | Red parts simulate. Blue parts stay fixed. |
| Goal strength | How closely the cloth follows the motion | Works the other way: high values hold the cloth to the animation. |
| Collision radius | Size of the collision spheres | Most at the bottom, near the legs. Little at the top. |
| Ground collision | Contact with the ground | Leave it at one flat value. |
Copy the maps onto the real mesh
The maps must sit on the mesh players see. A donor copy moves them across.
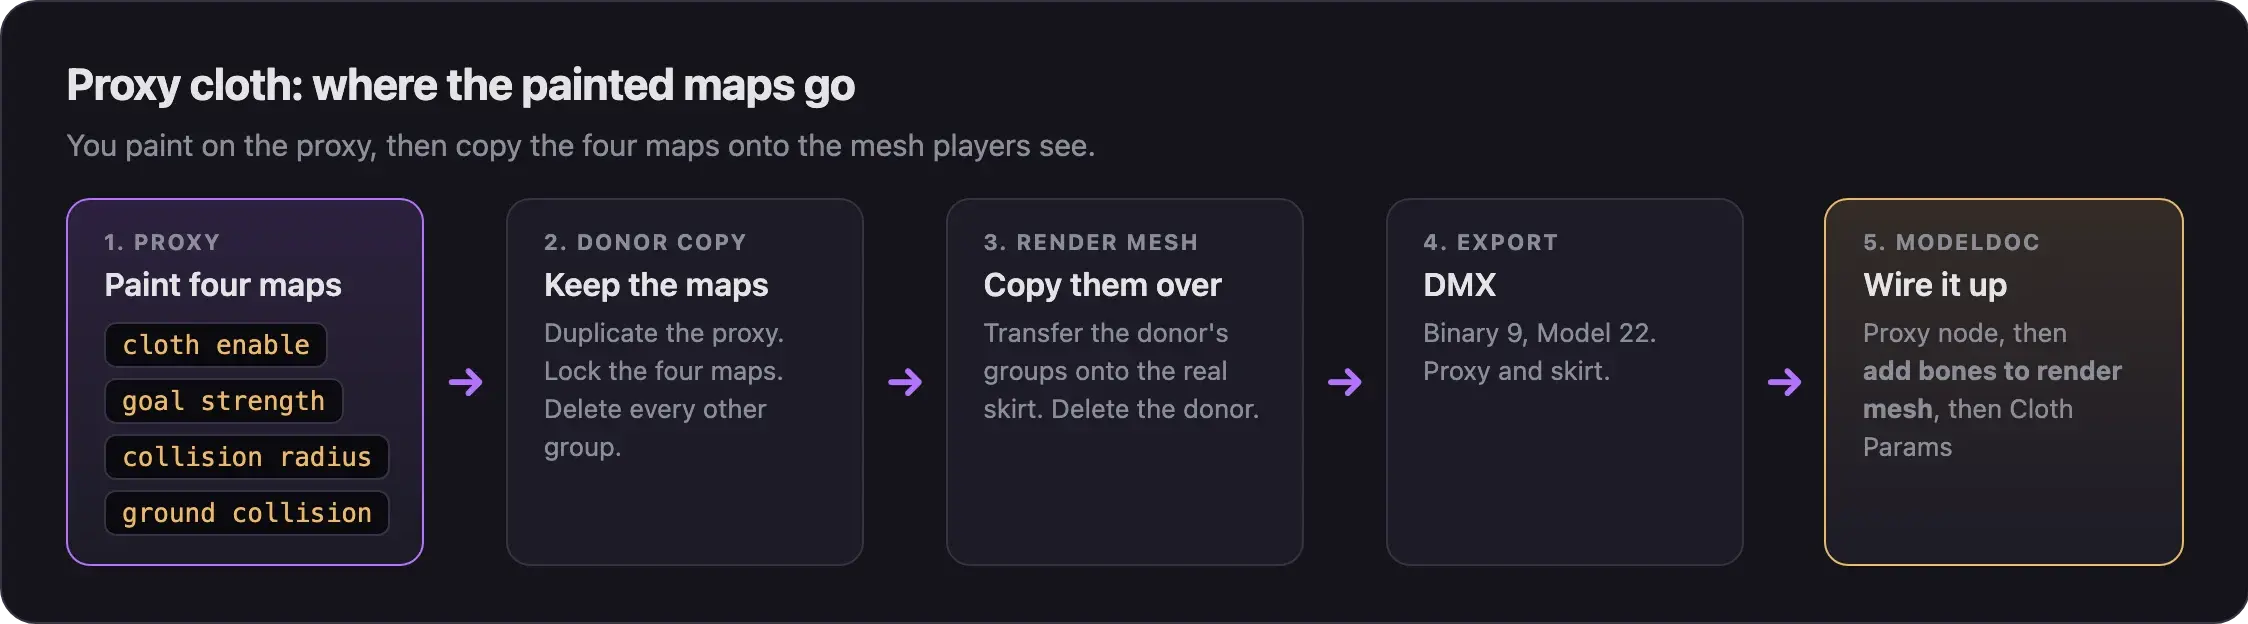
- Duplicate the proxy. If the copy moves, set its location back to zero. This copy is the donor.
- On the donor, open Data Properties, then Vertex Groups. Lock the four map groups.
- Delete every group that is not locked.
- Select the real cloth mesh. Copy the donor's vertex groups onto it, with World space and Vertex Groups.
- Check that the four maps are on the real mesh. Then delete the donor.
- If the exporter asks for a material, give the mesh one. If it asks for an action, create one in the Dope Sheet.
- Export. You can ignore warnings about vertices.
Set it up in ModelDoc
- Add a cloth proxy mesh node. Point it at the proxy's DMX file.
- On that node, run add bones to render mesh. Without this step, the proxy does not move the real mesh.
- Add a Cloth Params node. Leave it at its defaults for now. It affects every cloth part on the model, including hair and chains.
- Turn on the simulation preview and play a walk.
Fix clipping and stretching
- The cloth clips through the legs. The collision spheres are too small. Paint more collision radius near the bottom.
- The radius will not go above 1. This is the Blender version limit from the 2024 video. That author repainted the map in Blender 2.93, with values up to 5. Move the proxy between Blender versions as a DMX file, never by copy and paste.
- The cloth stretches. Fix the proxy's weights first. Change Cloth Params last, in small steps.
Test in ModelDoc and in game
- Preview a walk and a turn in ModelDoc. Check every cloth part, not only the new one.
- Compile.
- Finish the model with parts 3 and 4 of the hero swap.
- Pack and test in game. Walk, jump, and turn fast. Follow Test your mod in game.
Common problems
More fixes are in Model and skin problems.
Community knowledge on cloth is thin. One Deadlock video covers proxy cloth, and it is from 2024. Nobody has published cloth settings for each hero.
Next steps
Copy the original hero's attachments, camera previews, and game data, then finish with part 4.
Credits
This guide is based on the work of these creators. Check out their original guides.
- Video: Bat Drifter from Start to Finish: Part 1 - Make it exist first, make it pretty later by Basilisken.
- Video: Source 2 proxy cloth tutorial by Hoxdolum.
- Video: (Read Desc) Deadlock - General Model Swap Steps by Pugzilla.
- Tool: BlenderSource2Tools by FellOffFuji.