
Hero select, shop, and end screen poses
Turn your hero and change the lighting on the hero select, shop, and end of match screens by editing their small scene maps in Hammer.
Turn your hero and change the lighting on the hero select, shop, and end of match screens. Each screen is a small map for each hero. You edit it in Hammer, compile it, and pack it with your skin. Learn CSDK 12 first.
This page comes from one video made in March 2026, before the City Never Sleeps update. We have not tested it on the current build. Folder names and the compiler steps may differ.
What you can change
- Move the lights and change their color.
- Turn the hero to any angle.
That is the light edit the video teaches. A brand new pose needs a new model placed in the scene. We have no tested steps for that yet.
These screens are menus, not the match map, so these edits give no advantage.
What you need

Hammer may need the full game files. Source 2 Viewer decompiles the hero's scene map. Look up the hero's codename in the hero names list. The GUI Map Compiler ships in the reduced CSDK 12 folder as GUIMapCompiler/CS2MapCompiler.exe.
Optional: the hero's compiled models and materials in CSDK 12, so Hammer shows textures. Pugzilla's Compiled Models In CSDK video shows how.
How these screens work
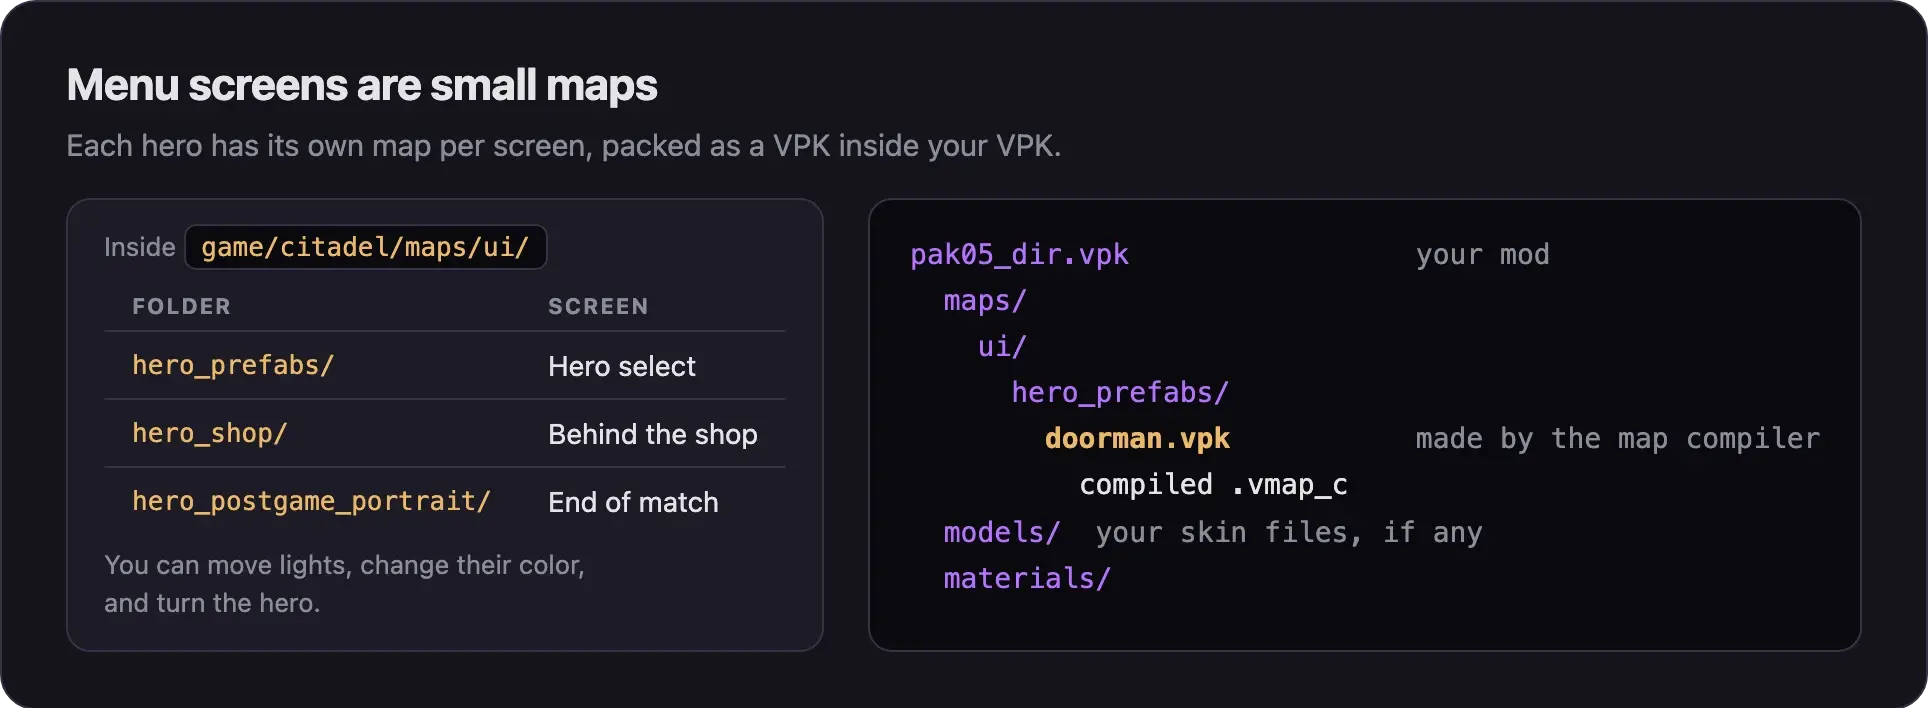
Each folder in game/citadel/maps/ui/ holds one small map VPK per hero:
| Folder | Screen |
|---|---|
hero_prefabs/ | Hero select |
hero_shop/ | The scene behind the shop |
hero_postgame_portrait/ | End of match, with the MVPs |
The game's hero data names these maps for each hero. For example, the Infernus shop scene is maps/ui/hero_shop/inferno_shop.vmap.
Watch the walkthrough
Pugzilla edits Doorman's hero select scene in this video.
Edit and pack the scene
Set up the addon
- Click Create New Addon in the CSDK 12 launcher. Name it in lowercase with no spaces, for example
doormanmenus. - Right-click the addon and choose Explore Content Folder.
- Create the folder
maps/ui/hero_prefabs/. Make one folder like this for each screen you edit. - Do not add a folder for the hero inside it.
Decompile the hero's scene
- Open Source 2 Viewer.
- Open
Deadlock/game/citadel/maps/ui/hero_prefabs/. - Double-click your hero's VPK, for example
doorman.vpk. - Right-click the
.vmapinside and choose Decompile & export. Leave every other file alone. - In the save dialog, remove
_dfrom the end of the name.doorman_dbecomesdoorman. - Save it into your addon's
maps/ui/hero_prefabs/folder. - Check the folder. You should see the
.vmapand a world nodes folder.
Edit the scene in Hammer
- In the CSDK 12 launcher, select your addon and click Launch Tools.
- In the Asset Browser, open Filter and click Mod twice. Your
.vmapshows at the top. - Double-click the
.vmapto open it in Hammer. - Find the camera entity. It sets what the screen shows.
- Find the barn lights. They light the hero.
- Select a light. In the direct light section, click the color bar and pick a color.
- Look for a light environment entity. If the map has one, it may light the hero too. Change it as well.
- Switch the viewport from Full Bright to 3D All Lighting to see your lighting.
- Drag the lights to move them.
- Select the hero. Rotate it to face the camera, or to any angle you like.
- Press Ctrl+S to save. Close Hammer.
Compile the map
- In the Asset Browser, right-click the map and open its folder. Copy the folder path.
- Open your reduced CSDK 12 folder. Go into
GUIMapCompilerand runCS2MapCompiler.exe. - Click open vmap. Paste the path and pick your
.vmap. - Click change output and pick your desktop.
- Set custom path to the Deadlock option.
- Leave the other settings alone and click compile.
- Open the output. It is a folder named after your addon, with
maps/ui/hero_prefabs/doorman.vpkinside. - Drag the inner
mapsfolder out. Delete the empty wrapper folder.
Pack it with your skin
The compiled map is a VPK. It goes inside your mod's VPK, at the same path.
- Make a staging folder. Put the
mapsfolder in it, so the path readsmaps/ui/hero_prefabs/doorman.vpk. - Shipping a skin too? Put the
mapsfolder in the skin's staging folder, next tomodelsandmaterials. - Pack the staging folder. Follow Pack your mod into a VPK.
- Open the finished VPK in Source 2 Viewer. Check that the inner VPK sits at
maps/ui/hero_prefabs/.
If another mod ships the same hero's scene, only one of them shows. The lower pak number wins.
Test each screen
- Close CSDK 12. Deadlock does not start while the tools are open.
- Start Deadlock.
- Open hero select and look at your hero.
- Check the shop and the end of match screen too, if you edited them.
Common problems
Only one video covers these screens. Nobody has published tested steps for custom poses or for the team reveal screen.
Next steps
Put your own character on a hero. The whole path, the tools, and the rules.
Credits
This guide is based on the work of these creators. Check out their original guides.
- Video: Deadlock - Lightweight Map Changes (Hero Select, Shop, Postgame) by Pugzilla.
- Video: Deadlock - Compiled Models In CSDK by Pugzilla.
- Data: GameTracking-Deadlock by SteamTracking, for the map folders and hero data.
- Guide: CSDK 12 from Deadlock Modding Notes.